• Welcome to H4O! For a reduced ad experience, please login or register with the forum.

theBroken's 2008 H3 build up

theBroken

Well-Known Member
Messages
143
Location
Michigan
Hummm, where to start...

Here it was the day I got it. I drove 4 hours to a tiny dealership in Ohio. I paid 17,500$.
It's a 2008 H3 adventure, 59,000 miles
Black on black with monsoon and that's it. No moonroof, no power seats, no leather, no onstar, no floor mats, no accessories.
kcn-2996_3.jpg

kcn-2996_13.jpg

.
First thing I did was mess with the grille. A long process but I finally got it the way I wanted.
I filled in the signal holes, removed the lamp and put some LED amber lights in it.
Took me forever to find the LED's, notice the board in them is black, very hard to find, most are green or tan.
051020091178.jpg

051020091177.jpg
051020091176.jpg

Wired it up to plug rite in a work with the OEM plug.
251220091868.jpg

I wired it so the little amber light stayed on 100% of the time and the big amer light flashed with the blinker.
The gold ballast was mounted to the inside face of the grille. That made it work properly on the 12v system.
251220091866.jpg

Pictures of it finished
DSC00404.jpg

DSC00403.jpg

Painted in some ghosted flames, always liked the look. They can only be seen what the light hits it just rite.
DSC00411.jpg


.
.
Then I started with the sound. I upgraded the front speakers with JL audio marine series components.
Best speakers I've ever owned. They still sound great. The JL 7.7's is what I installed. They don't quite fit the hole so I had to made the hole bigger.
Also installed dynomatt to suck up the vibration.
191020091381.jpg

191020091382.jpg


191020091366.jpg

191020091367.jpg

I installed the tweeters rite on in the door panel. Sounds great.
050120101943.jpg

.
.
Installed a 7" screen from soundstream. It has ever option in the world but the best was that all it's preouts made 5volts.
This unit is easily hacked to run the screen in all drive modes. Most only let the screen work with DVD's and AV inputs in park.
I also painted the center counsel black. Also painted the temp control buttons. I get lots of complements on this one.
170120102175.jpg

050120101941.jpg

You can see the ghosted strip on this too, matches the grille.
050120101945.jpg

050120101942.jpg

190120102214.jpg

.
.
Then I started getting ready for winter and I made up a extra washer fluid bottle wrapped with heat strips for warm spray in the winter months.
151220091674.jpg

It's fed at the bottom to keep the fluid level in both tanks even.
121220091671.jpg

121220091670.jpg

.
.
Then at the same time I installed some heated wiper blades
171220091687.jpg

Kept it clean running the wires under the arm.
171220091688.jpg

.
.
 

theBroken

Well-Known Member
Messages
143
Location
Michigan
Then I made a winch plate. Modeled after CB Photo's plate, great simple design.
I cut a hole and added a spring to keep my dune whip from smacking my H3 when it's pulled down.
Mine I figured out won't work with the OEM brush guard.
070120102005.jpg

On the back of the fairlead plate I added two angles, cut at a angle to fit the winch and give the fairlead plate strength.
070120102010.jpg

I drilled holes in the bottom of the angles so my bungee that holes the cover on my winch had something to hook to.
070120102011.jpg

Got the new winch on with a few winch accessories. Thats a MM SEC9500. The "C" in SEC is for compact.
28082010657.jpg

Moved the switch from the box that was on top of the winch to under the driver side knee plate.
19102010871.jpg

19102010873.jpg

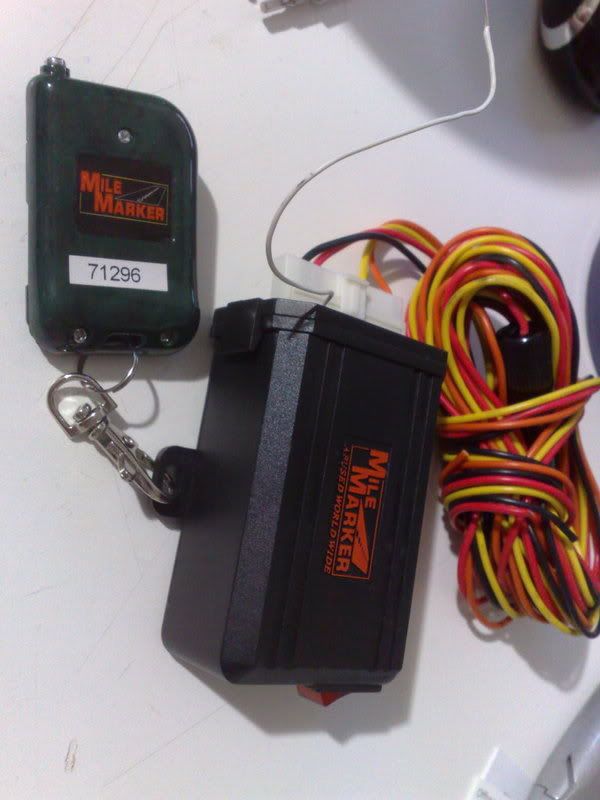
Then installed this neat little wireless controller from MM.
050220102536.jpg

.
.
Added Alpha Tbars
Copyof010320102826.jpg

.
.
Next I finally found some used MTR's. You can also see a prototype rock slider in the picture.
220520103340.jpg

.
.
Installed my smart tire digital monitor. Tells me the pressure and temp of each corner.
051220101057.jpg

.
.
Added some Hunner skids
130320102927-1.jpg

.
.
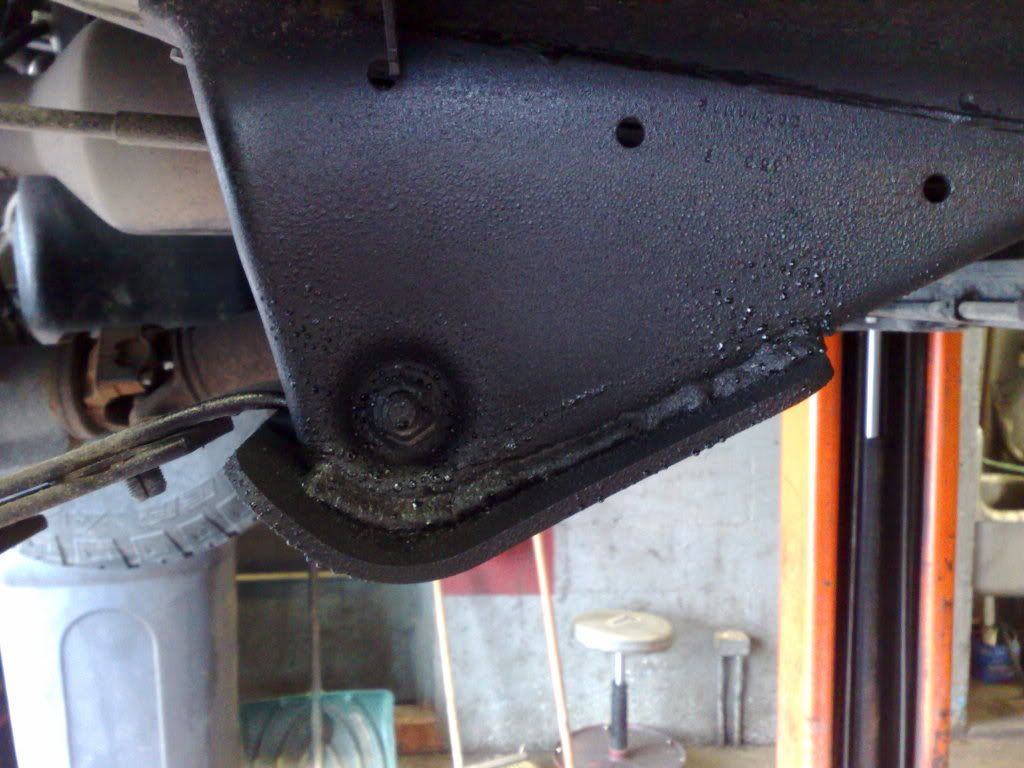
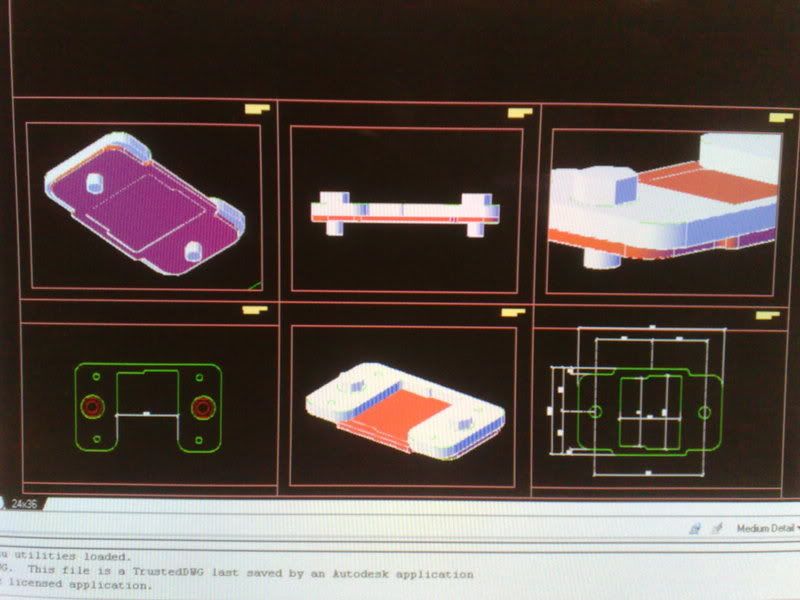
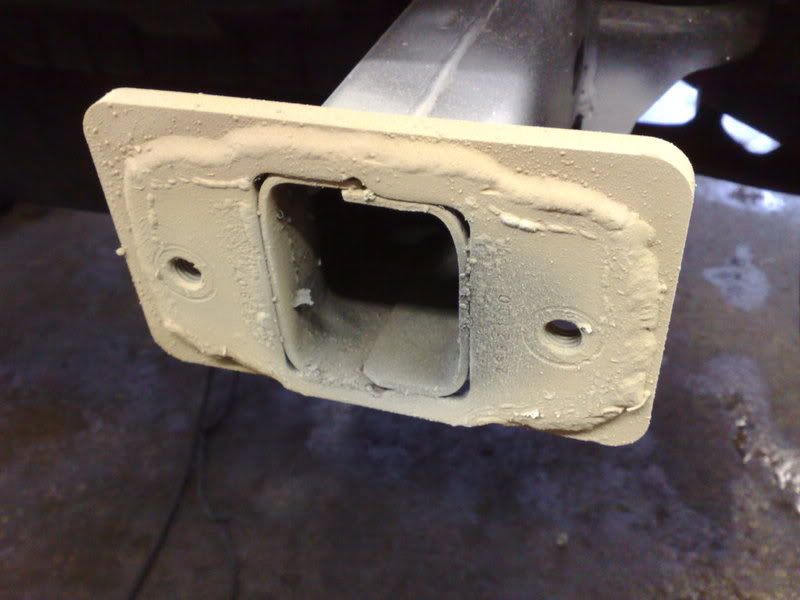
Then I added some ridge demon frame plate supports, I added a rare screen shot of the DWG file as I was designing it.
020320102832.jpg

130320102903.jpg

130320102904.jpg

.
.
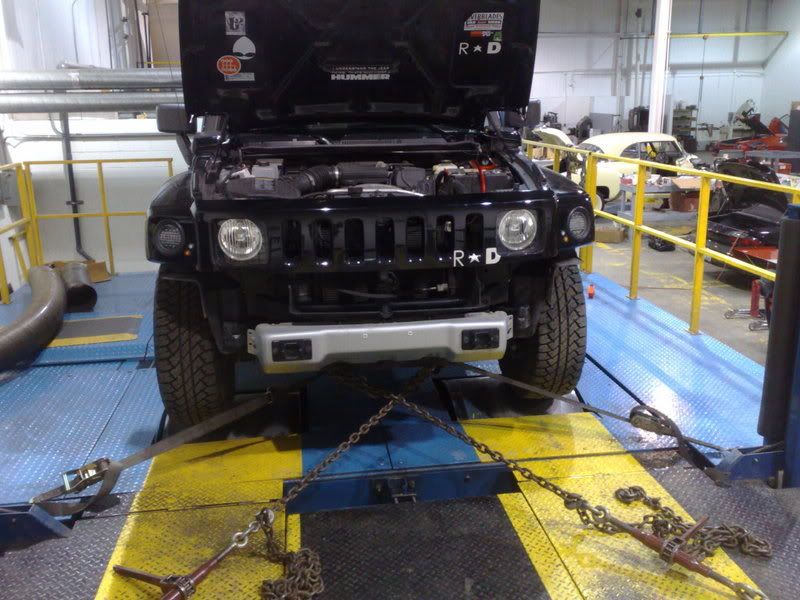
Got it on the dyno and shortly after started doing some major work to get it more power.
100320102875.jpg

This was the same time that I started learning that the BCM in the H3 is a pain in the ass.
I'm still working on this but I did start to find ways to turn certain systems on and off without cutting power to the engine.
I might never figure it all out but for now I can say I think I got further than most that have tried.
Click on picture for video!

.
.
Then some lady pulled out in front of me. I totaled her caddy SRX.
On mine I trashed the grille, fender and the hood needed fixed and the headlight was trashed.
Insurance would not pay for my custom grille because they didn't believe that it took me 60 hours to build.
170120111267.jpg

170120111270.jpg

.
.
I was pissed I needed a lift me up. Since they had to tape the whole H3 to paint it I got the body shop to change the color.
We made it with PPG paint and submitted it to PPG as a color called "demon iris". They never got back to me. It's a flat black with lots of silver and flaked dark blue.
It changes color in the sun, from a flat sliver to a deep dark flat black.
SANY0191.jpg

0126111006-00.jpg

270120111345.jpg

310120111420.jpg

.
.
Since I didn't have the strip on the front anymore I had to take it off the center counsel. I changed it to flat black.
07082010416.jpg

.
.
 
Last edited:

theBroken

Well-Known Member
Messages
143
Location
Michigan
Then I took it apart. Doors, fenders, wheel wells, seats, carpet, interior panels, etc.
Everything except the dash. I sanded everything down and blasted off any rust I could find.
On the interior I laid down dynomatt, including the roof. I also sprayed all the dynomatt with sound eliminator.
.
When I first stated taking it apart I found lots of mud and sand build up. Keep in mind, I avoid mud as much as I can.
SANY0138-1.jpg

SANY0072-1.jpg

SANY0086.jpg


Just look at how much crap came out of my rocker cover
SANY0070-1.jpg

.
.
Then using these products I started to soundproof and refinish the body and frame.
SANY0104-1.jpg

If you ever do this there are 2 different types of this sound eliminator.
One cost 7.99$ a can and one cost 12.99$ a can. get the 12.99$ stuff, it's thicker and actually deadens the sound.

.
Then I started sanding and coating all the exterior plastics.
SANY0234-1.jpg

Notice the top two are finished and the bottom two are not.
SANY0235-1.jpg


SANY0193.jpg

SANY0172.jpg

SANY0167.jpg


Started to grind and sand the rust away.
SANY0142.jpg

Before
SANY0215.jpg

After
SANY0226.jpg

.
.
Then I got to the interior. I put dynomatt on ever inch I could including both outer and inner shells of the doors.
17072010261.jpg

17072010271.jpg

17072010269.jpg

Made sure to mark where the wires are so in the future for myself or the next owner won't make a mistake.
17072010266.jpg
..
.
.
Finally got around to cutting in some 8" speakers into the rear doors.
21062010029.jpg


21062010032.jpg

.
.
Ran all new 12 gauge speaker wire to each door.
040420103050.jpg


.
.
Painted the center counsel to match the dash.
010620103431.jpg

.
.
Put some hurculiner on the rear cargo mat.
010620103427.jpg

.
.
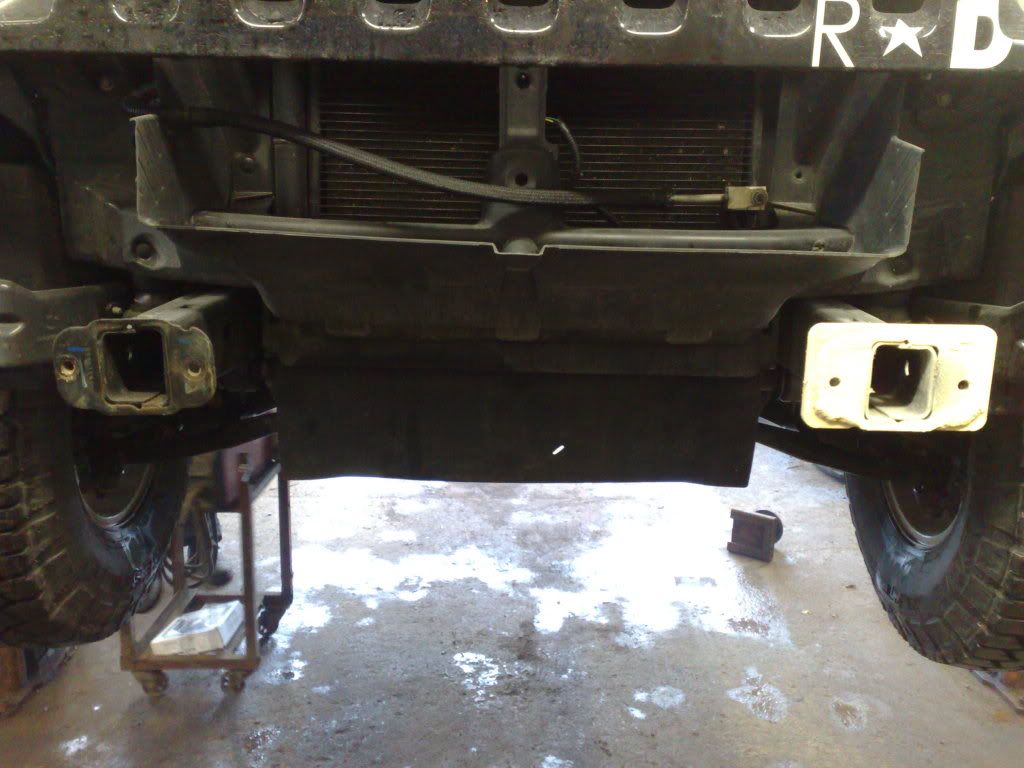
Modded my grille, removed the plastic structure behind the grille and replaced it with a tension rod and cable.
This increases airflow and allows the grille to flex a lot more before it breaks.
SANY0270.jpg

SANY0271.jpg

Lots of room now.
SANY0272.jpg
 
Last edited:

theBroken

Well-Known Member
Messages
143
Location
Michigan
Then it all got sprayed with sound eliminator.
260620111767.jpg

.
.
Then I refinished the outside of the interior panels. I covered the bottom half with bed armor.
For me I seem to not be able to keep from scuffing the bottom of the panel with my hoof so I'm hoping the bed armor will help keep it nice for longer.
260620111774.jpg

260620111775.jpg

Finished the door handles black.
SANY0107-2.jpg

.
.
Behind the monsoon panel in the rear I now keep my amps for the door speakers.
SANY0116-2.jpg

1 amp behind the other.
SANY0115-2.jpg

.
I got a super heavy ground block fixed to the body behind that rear panel.
SANY0117-1.jpg

.
.
Then I put the outlet into the rear interior panel. I use this for my woofer.
The woofer has a amp on the back of it that I made into a plug.
So when I need to remove my woofer I can just unplug it and take it out.
SANY0125-1.jpg

The plug that come from the amp
SANY0107-1.jpg

SANY0120-1.jpg

Backside of the outlet
SANY0124.jpg

Finish pictures.
SANY0173.jpg

SANY0174.jpg

.
.
Up front where I mounted the winch switch up in the dash along with a cut off switch.
I like having the switch where I can reach it in case the winch sticks or catches fire I can kill the power quickly.
Most guys mount it under the hood, I don't want to have to pop the hood to kill the power to the winch.
SANY0143.jpg

These switches are nice because they are also keys. You can remove the key and nobody can use the winch.
SANY0145.jpg

.
.
Under the hood I got the hood insulator
SANY0034-2.jpg

.
.
For juice I got a interstate megatron with tsunami terminals.
SANY0133.jpg

.
Then to clean up my work I cut up some lexan to fit the area above the battery.
Bolted my fuse block and power distro bolted to it and it's bolted to the fender.
SANY0135.jpg

SANY0136.jpg

.
.
Got a volant intake for a 2006 H3. Had to mod it a bit to work on my 2008.
I also put a screen in the bottom so I can fill it up with ice on hot trail days to keep it breathing cool air.
Had to make a gasket and use a air flow sensor from a 2006 H3.
SANY0118-1.jpg

Tapped in new studs so I could put bigger hardware on it.
SANY0122-1.jpg

SANY0115-1.jpg
 
Last edited:

theBroken

Well-Known Member
Messages
143
Location
Michigan
Now for the cargo area.

I'll start with the rear cargo door.
I made a base plate out of 3/4" MFD board, painted it to keep moisture from ruining it.

First it's hurclined on the bottom panel and cubby door and then the top part is bed armor. I cut in the remote plug for my power converter into the cubby door so I can use it without removing the door.
SANY0131-2.jpg

It can be turned on and off from this location.
SANY0133-1.jpg

.
.
On one side I got a very powerful small AGM Kentick 1600.
This is connected to my power inverter so when the power inverter is in use it draws from this battery and not my main battery.
SANY0210.jpg

On the other side I got my power inverter.
SANY0226-1.jpg

.
The remote power on the cubby door can be flipped around so my door then can act like a tray to work on.
It reaches up to the front doors and is a nice place to keeps nuts and bolts that you might have to remove on the trail.
With the webbing on the back of the cubby door nuts and bolts won't go rolling around so you have a nice clean spot to hold hardware and tools while you work.
SANY0224-1.jpg

SANY0221-1.jpg

SANY0223-1.jpg

.
Here's some pictures with the panel off. The green cable is a extension cord and is held on with a Velcro strap that is bolted to the wood panel.
The white and black extension cord for the remote power is also held onto the panel with some veelcro that is bolted to the wood panel.
SANY0225-1.jpg

.
The battery itself is held on with a nylon strap with a buckle.
The wood mounting plate has a recess in it that the battery fits into so the strap keeps it from falling out but it's really held in because it's recessed.
The reason I did this is because I wanted to be able to get the battery out if I needed to.
The battery can run a vehicle and if we are on a trip and someone's battery dies I can lend them this little battery to get home and it's not much work to get it out.
SANY0227.jpg

SANY0228.jpg

SANY0229.jpg

.
On the wood panel I also mounted a power connector.
It's so I can plug in my jumper cables and jump somebody from the rear cargo area. It can also give power to winches and generators.
SANY0211.jpg

Then I made a extension for it if needed.
SANY0212.jpg

.
.
If your wondering what happens when the Kinetik runs out of power here's your answer.
On the kinetik I installed some jumper wires. These hook up to some post I installed on the rear monsoon panel.
This allows me to not only charge the kinetik but I can also jump start myself if needed or just run the H3 if the main battery dies.
I can also hook it up to give my H3 more juice when winching or if I use the inverter too much.
I used large battery boots so the two wires can't touch.
SANY0213.jpg

Here's the two post I put in above the outlet for my amp.
SANY0130-2.jpg

SANY0214.jpg

They are long enough to reach when the cargo door is open and they are the proper length to allow it to shut.
SANY0215-1.jpg

The cubby door flexes just enough to still shut and let the 2 cables still come out from behind. The rear cargo door is shut in this picture.
SANY0216.jpg

.
My rear cargo area is hurclined. I move some real heavy parts in and out of my cargo area so the hurcliner is nice to have.
SANY0287.jpg

.
My woofer is a 12" JL Audio W12 V3.
SANY0279.jpg

It's powered by a Kicker 600.2 that's been modified by Diablo audio with their hellfire mod to run at .5 ohms.
It produces about double the power that it's rated. It's sounds great and is perfectly loud.
SANY0280.jpg

.
.
Moved my digital tire pressure readout up by the mirror, it is hung with a thin piece of metal.
You can also see my amplified FM antenna in this picture.
SANY0242.jpg

.
.
Under my armrest I mounted my CB. It's held in with Velcro.
It's up out of the way and since I only use it when I'm on the trail I never have to worry about forgetting it.
When needed I undo the velcro and either put it in my cup holder or just keep it on my lap.
SANY0247.jpg

.
It's powered by a cigarette style plug that I ran inside the center hold.
It's on ignition only power so if I forget to power off the CB when I put it away it won't kill the battery.
The CB antenna cord is ran up inside the hold also.
SANY0249.jpg

.
.
Mounted my flash light on the A pillar. The two brackets are just broom handle wall grips.
I just stretched them out to fit the flashlight and painted them black to match the interior. Comes in handy more than I thought it would.
SANY0239.jpg
 
Last edited:

Bigunit

Hammer Down!
Staff member
Messages
6,558
Location
Arizona
Great thread! Can't wait to see more, as I never knew much or have seen many pics of your rig. :corn:
 
M

MUTAINT

Guest
You have to see the paint in person to appreciate the kool Kustom color Brodie came up with!
 

justintaylor

Well-Known Member
Messages
63
Location
utah
This is why this section is so awesome, I never really new all the time and hardwork you have put into your rig. It looks awesome and I bet it is as quiet as can be in there. awesome build so far I am looking forward to the rest of it.
 

theBroken

Well-Known Member
Messages
143
Location
Michigan
I built the false floor in place of my rear seat.
I highly recommend this for anyone that don't need their rear seat.
Before I would keep my tools and gear in bags and tool boxes.
I still do but it's greatly minimized being able to organize it with the false floor.
.
I keep my tire strapped to the top of it. I keep the cargo rug under the tire because the tire squeaks on the false floors surface.
SANY0191.jpg

.
The surface is finished with bed armor that I mixed with some wood shavings for a aggregate.
The false floor itself is all 3/4" MDF board. The legs are then the same 3/4" MDF board with 1X3's to stiffen them up.
The legs are also wrapped with aluminum sheet metal in the high traffic areas to keep from damaging the wood.
I also added a door on one side and and 3 tie downs. The tie downs are the same tie downs that you find in the rear cargo area.
The underside is finished with sound deadening spray and some commercial HVAC insulation to kill the sound.
SANY0194.jpg

SANY0197.jpg

.
The rear lip that meets with the cargo floor mat is finished with a 2" wide piece of 3/16" thick steel.
It's held down by button head stainless hardware and finished with the same bed armor.
If you do anything like this make sure to grind the edge of the metal.
The edge is rather sharp and could cause damage to things that you slide over it. Hitting the edge with a grinder solves this.
SANY0196.jpg

.
I used outdoor gate hinges for the door.
Using a router I cut out the recess for the hinges to sit nice and flat, even with the board so I can slide things over it without getting hung up.
SANY0195.jpg

.
All the screws and bolts I installed before I painted it I was able to cover and hide. The one's I did after I painted it I had to just recess.
These are recessed because I first used wood to stop the door from falling below the plane with the main floor. That didn't work.
So the door stops I had to fab up out of steel to keep the door from falling below the level of the rest of the floor.
I think the wood stops I had didn't like the pressure of the spring that I used to keep the door shut. Replacing them with steel fixed that.
.
Door closed
SANY0198.jpg

Door open
SANY0203.jpg

.
The door is kept shut with a very heavy spring. The spring is anchored to a stud that comes through the floor that was for the rear seat.
SANY0199.jpg

.
.
And here is what I'm able to keep inside the false floor. These items are always in my H3. Just less I got to pack for the trail.
-3/4" Ingersol Rand electric impact, 50,000lb sling, ANL fuse assortment, MAXI fuse assortment, Mega fuse,
Glass Cylindrical fuse assortment, Skil mini multi cutting tool w/ razor/hack saw & jig attachment,
(2) 3/4" shackles, 1-1/2" shackle, 4 way, 16mm complete tierod, zip tie assortment, Velcro strips, gloves,
ratchet straps, homemade Tcase stuck in 4lo kit, vice grips, gorilla tape & a few raps.
I use the rags to wrap up the shackles so they don't clang when I hit bumps.
SANY0200.jpg

.
Under the passenger side of the false floor I got my 1 off HUMMER bag. This slides rite behind the edge of the door and the front legs of the false floor.
SANY0201.jpg

SANY0202.jpg

.
Inside the hummer bag
-Afgan war knife with extra blades, winter hat, food ration, small adjustable wrench,
medium adjustable wrench. BD socket dogbone, BD ratcheting dogbone, plyers,
(2) flathead drivers, philips driver, 6 gauge 12ft. jumper cables, 5' of nylon rope.
SANY0204.jpg

SANY0205.jpg

SANY0206.jpg

.
On the driver side of the false floor I built a small shelf under the floor.
It's made from 3/4" MDF a lined with aluminum sheet metal.
It's holds a Stanley 92-839 99 piece black chrome tool set.
It's got all metric and standard 1/4" drive and 3/8" drive shallow and deep socket along with a few wrenches and a driver set.
It's held in with a old style bungee cord. It fits nice and snug and don't move at all.
SANY0230-1.jpg

SANY0231-1.jpg

.
I left room under the shelf for my high lift jack. It fits fine but it's too long and I can't get it out. I'm trying to find a small tool box to fit here.
SANY0232-1.jpg

.
.
Next I got my cameras, this will become more elaborate in the future but this is what I got going rite now.
I got some super heavy duty water proof night vision cameras mounted in the rear for backing up and onto top of my carrier crossmember looking back at my tcase.
.
Heres the front crossmember camera. It looks back at the drive train so I can make sure to keep rocks away from the vitals.
The cam has a mic built into it too but I couldn't find a reason to hook it up.
SANY0263.jpg

SANY0272-1.jpg

.
Here's what the crossmember cam looks like on screen. Since I hacked my dash unit I can watch the cam while in drive mode.
Mounting a cam under the H3 with night vision is nice.
Since it's so dark it don't matter how close to the ground you are because if the light disappears it will still show a image.
SANY0236.jpg


Then here's my backup camera. It also has a mic and has night vision. I left the mic function off.
There's a screw on the back of this cam that lets you flip the screen so you can mount it forward if you want.
SANY0190.jpg

SANY0189.jpg

.
Here's what the rear cam looks like on the screen. Them foot lines are mindboggling accurate.
I don't understand how it's so accurate.
I thought it was just a image burned into the feed but if you put a tape on the floor it's super close to the foot markers.
SANY0237.jpg
 
Last edited:

theBroken

Well-Known Member
Messages
143
Location
Michigan
Installed some LED turn signal mirrors. I like them because people will speed up or slow down on the hwy when they are on.
Another plus is that they fill the entire mirror housing unlike the OEM's which have that black surround around the glass.
OFF
SANY0251.jpg

ON
SANY0252.jpg

.
.
Installed the mic for my headunits phone function. Tucked it into the door gasket.
SANY0240.jpg

.
.
I got sick of the roof rail plastic and the pillar plastic fading. I coated it with bed armor and it looks sharp again.
SANY0180.jpg

SANY0178.jpg

SANY0179.jpg

.
.
CB antenna mounted to the rear cargo door.
SANY0174-1.jpg

.
.
Took the OEM roof marker lights, tinted them black and mounted two on the front and two on the back.
SANY0258.jpg

SANY0254.jpg

SANY0256.jpg

.
.
Installed the thule crossbars and fairing. I like the crossbars a lot because with the push of the button they pop rite off.
SANY0276.jpg

SANY0277.jpg

.
.
My rocker moldings were fading like the pillar plastics so I coated them with hurculiner along with the rear corner plastics.
SANY0260.jpg

SANY0193-1.jpg

Also hit the filler bucket with hurculiner.
SANY0192-1.jpg

.
.
On the rear corners I mounted these backup lights. I did this before I got the nightvision camera.
They need to come off because at night the camera don't like the light and it just washes the screen with a dull green color.
SANY0293.jpg

.
.
When I had the headliner out to dynomatt the roof I decided to paint the headliner buttons and handles.
SANY0208.jpg

SANY0209-1.jpg
 

theBroken

Well-Known Member
Messages
143
Location
Michigan
For my new winch I got a Tuff stuff 12,500lb which. Came with a 3/8" cable.
I took the casing off and painted the entire outside black (it was hammer gray).
Then put my logo on it in drab green.
SANY0183.jpg

I dipped the clutch handle into some watered down black paint to make it look like black chrome.
SANY0184.jpg

Changed out the cable ends and fitted some heavy duty nickel plated eyelets.
SANY0188.jpg

Put a nice big 1/2" hook on it. Then I put a red Velcro strap on the pin so I don't loose it when I remove it.
SANY0182.jpg

.
If you go back to on the the previous post in this thread you will see that I put my switch under the dash.
This box is what the switch was in. I plugged all the holes in the box that the wire was coming out of.
I use this box now to hold my tree strap. I wanted to do this for a few reasons.
The main reason is if I can't get out and have to have someone else hook my winch up the tree strap is rite there for them.
The lid is held on with a velcro strap with a buckle.
SANY0187.jpg

With the lid off you can see the tree strap barely fits. It's a 20'.
SANY0185.jpg

To get it to stay rolled up tight I use a small velcro strap.
SANY0186.jpg

.
.
I coated my grille with sound deadener. I really like the ultra rugged look of it. In the pic you can also see my air horns in the grille.
SANY0181.jpg

.
.
On a lot of H3's, including mine I hate how the ends of the bumper cover sags at the corners.
I fabbed up some metal straps, bolted them to the bumper cover and made the bumper parallel with the grille.
You can also see the texture of the grille on this picture.
SANY0275-1.jpg
 

theBroken

Well-Known Member
Messages
143
Location
Michigan
For my suspension I installed some fox shox that I worked out the proper valving on.
070620103477.jpg

.
Made my own shackles that give me a 1.5" lift in the rear.
070620103485.jpg

.
Made my own extended links and just use some energy suspension bushings.
SANY0292.jpg

,
,
Got some used GT wheels and refurbished them. I put brass washers on the bolts and stainless button bolts.
Also added some extended black lug nuts and painted the hubs black to sharpen up the look.
SANY0129-2.jpg

.
.
Installed RD rock bashers.
SANY0132-1.jpg

SANY0130-1.jpg

.
.
 

theBroken

Well-Known Member
Messages
143
Location
Michigan
Tuned my PCM and TCM so I could change some parameters in my transmission.
I added a few raptor parts.
-Red eagle clutch pack
-Sonaxx oversize mega valve
-Fairbanks overdrive servo
2011-09-08_0156.png

.
I also did some minor engine performance upgrades but I can't find the pictures so I'll have to take them again or find them.
.
My amps were overheating when it got hot out this summer.
I installed a 200mm thermaltake PC fan where the sound came from the monsoon woofer. It's wired to the ignition so it only comes on when the H3 is on.
You can see it good in this picture
SANY0216.jpg

SANY0219.jpg

.
.
Installed a engine block heater. It's very simple on the I5, no tools needed.
On the V8 it's a bit of a pain because it goes were the freeze plugs are and the coolant has to be drained to install it.
260120111341.jpg

.
.
I got a gatorback belt. These things last forever.
28102010938.jpg


Window stickers.
SANY0177-1.jpg

SANY0176-1.jpg

.
.
There's more but I can't seem to find the pictures. So for now this is it.
I got a few other things I'll be doing sooner than later.
No point in talking about them, I'll post it up when I'm done.
 

ReconH3

Guardian Angel
Messages
2,288
Location
Raleigh, NC
I really like how you did your truck. All very useful but at the same time very discreet. If I hadn't gone so extreme with my truck, I would have done something similar. Many of the things you did I was planning on doing, but just haven't had the time. Like matching the center console to the body color. Amazing work!
 

theBroken

Well-Known Member
Messages
143
Location
Michigan
Just got my Donaldson powercore G2 6" air filter. I've always liked these style foam and paper filters so I was glad to find one that fit on my modded intake. Never needs cleaned and it last an extremely long time.

Here's some pictures.
SANY0012-1.jpg

SANY0009-1.jpg

.
.
.
Old volant oil filter
SANY0014-1.jpg

New donaldson powercore.
SANY0015-1.jpg

SANY0016-1.jpg
 
Top