• Welcome to H4O! For a reduced ad experience, please login or register with the forum.

HUNNER EXtreme Steering Rack Sleeves

Hunner

Well-Known Member
Messages
2,334
Location
Arkansas
Hi Hunner,

Would you mind finding out what shipping would cost to my valley of the world?

I really want to ensure I have a reliable H3 that keeps on kicking dust in the eyes of the haters :thumbs:

pm or email me 1secondwind@comcast.net with your complete address so I can get a quote on shipping. USPS will ship international on that size and weight but I need more info.
I have already checked on Hawaii, Crete, Australia and Dubai for skids but not the sleeve.
 

Hunner

Well-Known Member
Messages
2,334
Location
Arkansas
After seeing that video and seeing the play in my steering and also seeing that I am at around 80k miles now I bet there is no bushing there. :giggle:

Well look, you can see it without removing the skid. Your pushing it if it is gone because the other end has to be taking abuse.
You should have yours today or tomorrow. Gitterdun!! While your in there give the two mounting bolts at the other end a tug. You might also want to check the tiny bolt that connects the steering shaft to the rack. I think it is 11mm.
 

MidnightH3

Member
Messages
5
Location
Arizona
Paypal sent! Thanks again!

My bushing was just about completely gone after about 70k miles, so I really suggest that everyone gets one of these! That video is great, mine does the same thing.
 

Hunner

Well-Known Member
Messages
2,334
Location
Arkansas
Just caught me headed to the PO. Yours is on the way and I got a paypal from one more lost sheep.
Thanks
The pile of sleeves is going away.
If everything else falls thru I can always get a job folding pizza boxes!!
Off to the PO 10/11
DAH_2436.jpg
 
Last edited:

Big2dabank

Well-Known Member
Messages
1,220
Location
Central Florida
I was wondering if this mod would work on my wife's GMC Acadia, I'll have to check out how the rack is mounted. The rack and pinion looks very similar from what I recall. She obvisouly is not wheeling an Acadia, but she has a lot of play in the rack after 60,000 miles.
 

Hunner

Well-Known Member
Messages
2,334
Location
Arkansas
Check that out. I have looked at lots of racks, (drum roll) even some for vehicles other than Hummers. Surely something else uses these. They are made by the MONDO corporation in Korea so maybe they are KIA's I hope not.
Measure the diameter, accurately because it has to go around just short of reaching the straight cut side so it will compress.
Jaguar has one similar also.
 

06 H3

a.k.a. "The Jackal"
Messages
9,505
Location
Meridian, ID
Got it today! How long is the install? Depending on how long I may be able to do it today...just gotta paint it red first :)

2011-10-11_13-23-49_294.jpg
 
Last edited by a moderator:

Hunner

Well-Known Member
Messages
2,334
Location
Arkansas
How good are you? ha ha Don't be in a hurry and it goes better. The top bolt is the clincher. In my install I shortened a long socket. Check that out. A flex head ratchet works and one with a bent handle saves some knuckles. The first time I tried to use an air ratchet on that top bolt and before I could stop it, it was wedged against the diff. That took awhile to get loose. I don't recommend air tools on the top one.
There is a portion at the end of the bolt that is not threaded that will help you guide it into the hole. If you got small hands you might get it started by hand. Or if you have a spinner attachment that you can attach to the socket you can slowly get it started with your fingers on that. It will have thread locker on it that is dried. If you wire wheel that off and add fresh locktite it will go in easier. You may have to wiggle the bracket a bit to get it to line up. Once that one is started I put in the lower one but thought they were both really long. I was concerned about messing up the threads I did not cut it. It seems long. So if you look in my pictures I added some thick washers. There were still plenty of threads that went thru the welded in nut plate. Your call on that. When I got them run up all the way, I used a 3/8 ratchet handle I have that extends. You need more leverage than a shorty. I got it as tight as I could which was until it stopped turning and a grunt or two, depending on how big your biceps are.:)
First time could take about an hour to remove the skid, remove the bracket and rubber bushing, if there is one, ha ha and put it all back together.
One short cut you might try with this 2 inch sleeve/bushings is remove the lower bolt completly. Loosen the top one to get some slack and work out the rubber bushing and try to slide the steel sleeve/bushing under the bracket. There is a tab on the bottom of the bracket that if you have it loose enough you can jiggle it out from under the slot on the frame. If not, you got to remove both bolts. After several times testing the fit for the first one I just cut the damn thing off! Having too many tools can sometimes result in drastic measures!

Somebody let me know if the 2 inch sleeve fits without disturbing the tie rod boot and clamp.
I made these shorter than my prototype 3 inch so the stiffer replacement boots would also go on.
sorry I have been rushed to write some of this. I will try to get time to review it.

I know you had some experience with the diff mount. The dealer that did this said they have been replacing the rubber ones by dropping the diff while up on a rack to get room to reach that top one. I don't think I would try that at home.
Got questions or don't understand all that let me know. Just think it thru and take your time. Don't start making up new words and don't cuss the messenger.:shifty:
 
Last edited:

06 H3

a.k.a. "The Jackal"
Messages
9,505
Location
Meridian, ID
Alrighty It doesnt seem like a tough install just a Pain in the ass. I have delt with plenty of pain in the ass bolts before. I probably wont have enough time today but I will probably tackle this thursday. You guys can wait and I will help give input also or someone can give this a go first. Hunner, I am sure you can picture me trying to get that bolt in cursing like a sailor but dont worry the messenger did a good job in just getting this for us so dont worry too much. Thanks again. I do have enough time to paint it red though, so I will do that today. lol
 

Hunner

Well-Known Member
Messages
2,334
Location
Arkansas
I am a sailor, but I did it when no one was around!:shifty:Funny thing is I don't feel like cussing when I'm sailing???
nineknots.jpg
 
Last edited:

Hunner

Well-Known Member
Messages
2,334
Location
Arkansas
Maybe I should go back and edit the way I said that. It's supposed to be tight enough to stay on the end of the rack. If you take it off to put the sleeve/bushing on then with the clamp tightened to fit and crimped it might not slide back on. If you can get the sleeve/bushing on without removing it that would be best. I was just thinking of worse case scenario when I wrote that.
I made the sleeve short enough you may be able to get it on without moving the boot, if you completely remove the bracket.
Has it been that long since I saw a stock tie rod and boot? That is correct isn't it?? I slept since then.
In case you don't know I have BP tie rods and when I first did this I had to put the boot over the sleeve because I made mine 3 inches and it extended to the end of the rack. Then I tried the new PVC boots and realized those would not go over the sleeve so shortened them.
Never mind me I just popped in and wrote that before having to leave.
Maybe somebody will report on how they did theirs with the stock tie rods.
I hope it works out so you don't have to disturb the boot.
carry on
This is JUST on mine that the boot used to go over the sleeve. I run a shorter one now.
DAH_2274.jpg

9943.jpg
 
Last edited:

JoshuaL

NEVERENDING ADDICTION
Messages
254
Location
Mineral Bluff GA
Just got mine today:horns:. I got it painted to match the H3 I know it will get dirty but I couldn't help my self. I'm going to install it on saturday it's the first day I have off
007.jpg

Thanks Hunner

JoshuaL
 

Hunner

Well-Known Member
Messages
2,334
Location
Arkansas
There is no other way I can figure out how to tell you if it fits tight on each H3/H3T except to put it in there and tighten up the clamp. With both front wheels off the ground so there is no pressure on the rack see if you can push and pull on the wheel and if the rack moves. If it does you gots to try grinding on the bracket. I had to do mine, don't know why except the top and bottom of the bracket on the curved part right before they bend up a tab for the bolts to go thru are tighter than the entire curved part. I don't know any other way to say that. I had to grind a little on the inside of the bracket at each tab so it would go over the sleeve.
It will be interesting to hear how everybody finds this install to be on their vehicle. I feel better the guys did one at a dealership and had no problems. It is definitely a custom fit.
Post up if you have any questions. I have done it about 10 times while figuring it out.
 
Last edited:

Hunner

Well-Known Member
Messages
2,334
Location
Arkansas
Well after shipping 37 of these trying to keep the matched halves together I have screwed up. Someone got a mismatched pair. So that may mean so did someone else. Check them and let me know. I will replace them but need the others back as I don't know if I will order that many again. I will paypal you shipping if you are the other half of this. If I find out today I can send another.
I can see the one on the left is one I had to cut and the beveled edges are not both at the same end.
"stuff happens"
swanksleeve.jpg
 
Last edited:

5gn-h3t

Well-Known Member
Messages
616
Location
Northeast Pennsyltucky
My set is a little off but I really don't think it is enough to cause an issue.

477.jpg


REPLY from Hunner
No not really. That is about as accurate as they get. The point is to compress it so it locks in. When you clamp it the teeth align putting tension on the joint.
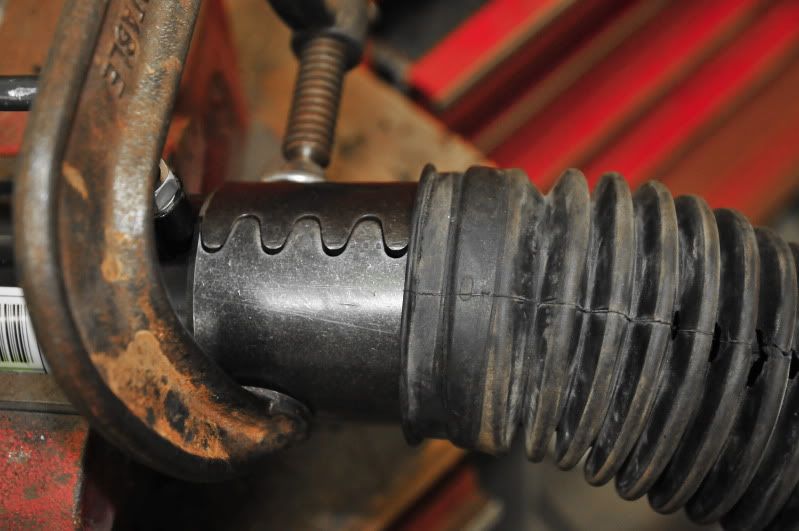
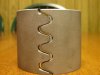
Here is a new 3 inch uncut like they come.
DAH_2504.jpg

This is the same one compressed. They are spring steel.
DAH_2503.jpg

It was my understanding that when the teeth are stamped it relieves tension of the piece so they offset slightly until compressed.
Even with the backside cut when the bracket compresses the two halves they come together. That is why I recommend putting the teeth downward so you can see them come together.
That other one is way off and is two different halves with them turned two different ends around which can be seem by the cut ends and beveled end being opposite.
Operator error:emb:
 
Last edited by a moderator:

5gn-h3t

Well-Known Member
Messages
616
Location
Northeast Pennsyltucky
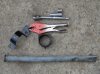
Here's the tools I used for the install:
Vice Grips - To bend that evil little tang out of the way on the bottom of the bracket
Short 15mm socket
Long 15mm socket
3/8" Ratchet
Cheater bar
Long flat head screwdriver (not pictured)
479.jpg

Upper bolt comes out slow, but isn't as bad as some make it sound.

Finished product:
480.jpg

The sleeve fits tight in the bracket. Rather than grinding anything, I slightly opened up the bracket by gently bending the ears out it in a vise.

Total install time with paint and 2 posts on H4O was about an hour. I already had the skids down from an oil change, so add some time for that.

Thanks Hunner.
 
Last edited:

Hunner

Well-Known Member
Messages
2,334
Location
Arkansas
See I was using reverse psychology so you would think it was not that bad. The first time I did it I must not have been in the mood. I can only start it with the tips of my longest two fingers a flat at a time.
I know how you fell about that tab.
Glad you handled it ok.
 
Top