• Welcome to H4O! For a reduced ad experience, please login or register with the forum.

Nugget's 110 Defender

nugget

Well-Known Member
Messages
245
Location
Where Gunner_45 can not find me
Well the weather in Brissie might be perfect if you are a duck, but it did have an upside for me ....... a day in the shed knocking over a pretty stock Defender project but one I have been wanting to get to for some time, installing my Mulgo Ex Box. The idea of raising the electrics appealed, having given a few trucks internal baths over the years and a higher centre console would be a better height for an arm rest on long trips.
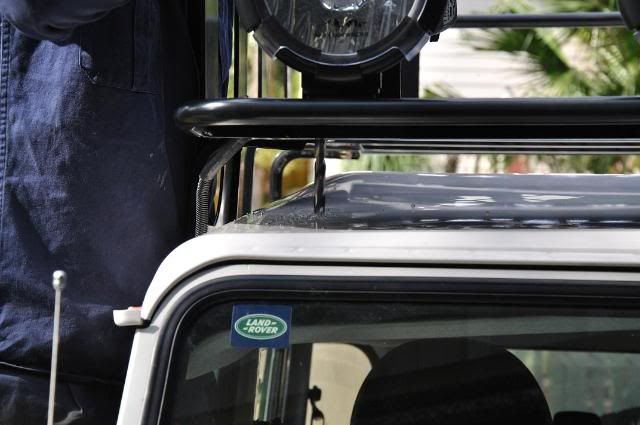
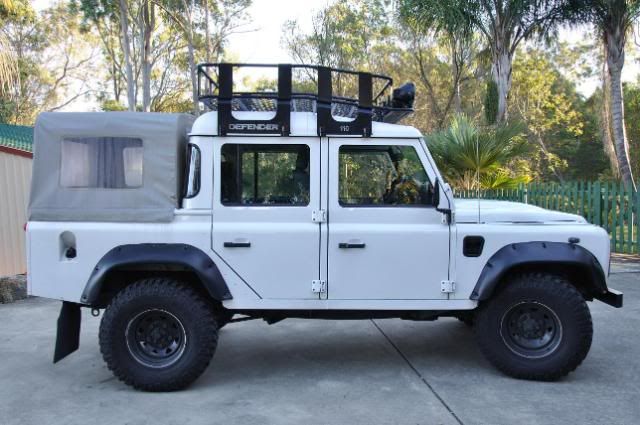
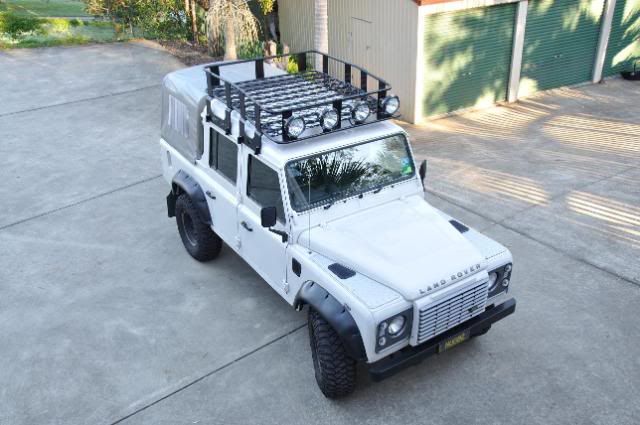
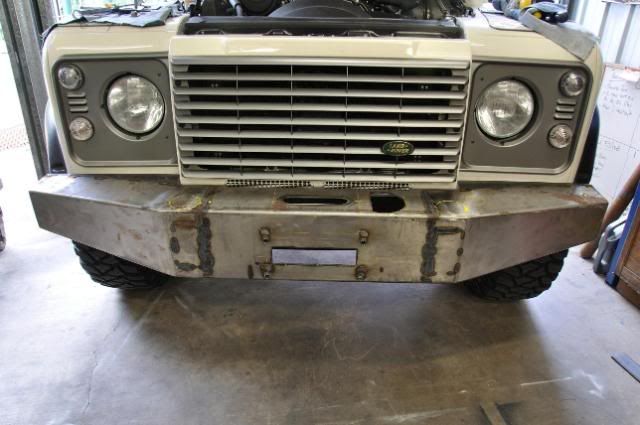
For anyone not familiar with Defenders, this is how it all looks out of the show room.

defebox10-12-28002_243.jpg


The electrics are currently under the drivers seat and the idea is to free up, this room for another yet to be determined use.

defebox10-12-28005_244.jpg


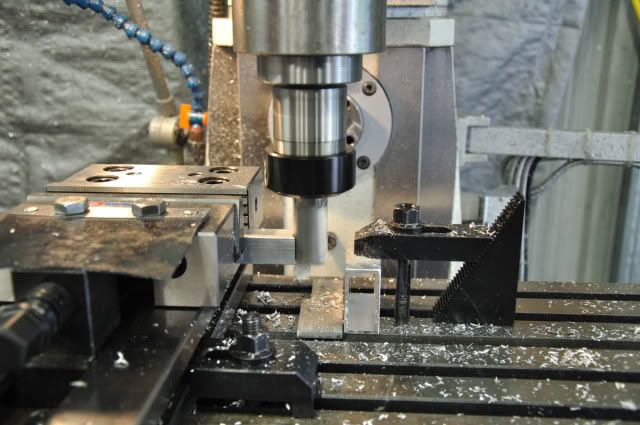
First up the centre console has to come out. 4 bolts...easy as long as you have a set of star head drivers..think thats what they are called..

defebox10-12-28009_245.jpg


Under the centre console is a plate which also has to come off and which then gives you complete access...even to the ground below!


defebox10-12-28011_246.jpg


I had spoken to Daniel at Mulgo and he gave me a great tip...rivet the fuel line retaining bracket in place before undoing the nut as the bolt is used later to secure the Ex Box. If it moves at all it would be extremely difficult to get it all back to get together, especially if you are on your own.

defebox10-12-28016_247.jpg


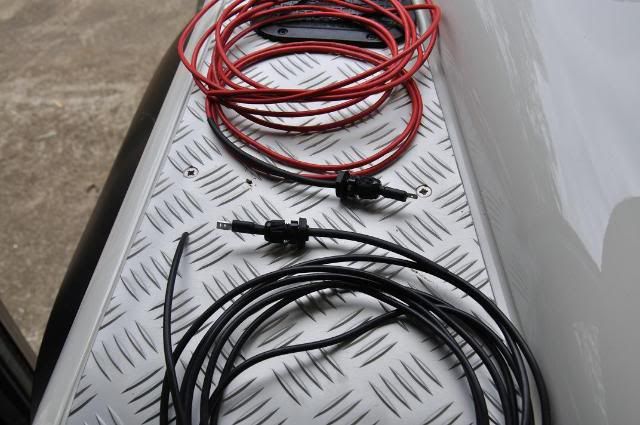
Now it is time to start getting into the nitty gritty...removing the electrics. I numbered each joiner so I would know where it had to go back.

defebox10-12-28023_248.jpg


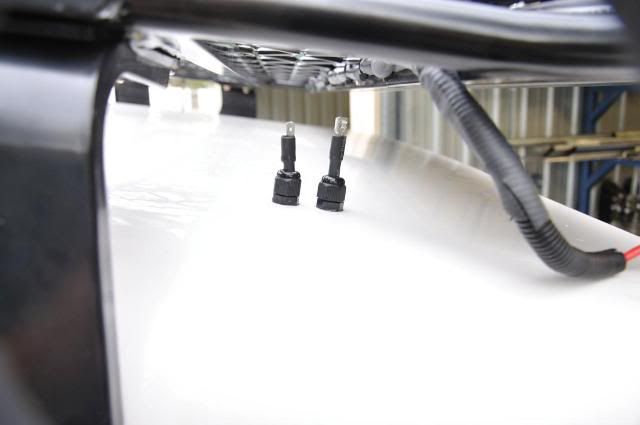
Next you pull the harness out of the side hole

defebox10-12-28024_249.jpg


The central locking wires have to be stripped out and fed back into the original compartment. As they would now be exposed under the car, I protected them and also applied heat shrink.

defebox10-12-28029_250.jpg
 

nugget

Well-Known Member
Messages
245
Location
Where Gunner_45 can not find me
The Mulgo people had also told me that heat could be a problem with the Ex Box so I protected the under side with Heat shield to minimise the effect.

defebox10-12-28030_251.jpg


The wiring harness is then fed through the bottom of the E Box and the box bolted in place. The ABS box and Fuse box bolt straight in. The relay strip are drilled off and then relocated in the box.

defebox10-12-28038_253.jpg


Centre console bolted onto the lid so the E Box

defebox10-12-28039_254.jpg


Job done..

defebox10-12-28040_255.jpg


Well job almost done....have to block off the holes in the original cavity under the drivers seat...

defebox10-12-29045_258.jpg


Now just bit of wiring to tidy up and check under the truck .
 

nugget

Well-Known Member
Messages
245
Location
Where Gunner_45 can not find me
Next cab off the rank was a roof rack. I had a very specific requirement as listed earlier. Plan was to do design exactly what i wanted then get the pro's to do the bit I couldn't , wouldn't or had no idea of how to, and do the bits I reckon I could stumble through.

Basically I got the hoops bent and the legs laser cut. I machined my own mounting system and di my own welding. The basket is ally and the legs steel plate.


defenderroofrack02post-1.jpg


defenderroofrack03post-1.jpg
defenderroofr11-03-130106_531.jpg
 

nugget

Well-Known Member
Messages
245
Location
Where Gunner_45 can not find me
The project took much longer than I expected..partly me being new to milling and it taking a lot longer than I thought plus some messing around with getting the front mounting plates right..bit complex for a simple guy like me with the angle of the roof and the radius of the bend.

These are all of the bits and pieces..probably doesn't make much sense until I start assembly!


defender roof r 11-04-09 0204_534 post.jpg

defender roof r 11-05-02 0217.jpgdefender roof r 11-04-09 0209.jpgdefender roof r 11-04-09 0212.jpg


Attachments

  • defender roof r 11-05-02 0216.jpg
    defender roof r 11-05-02 0216.jpg
    91 KB · Views: 561

nugget

Well-Known Member
Messages
245
Location
Where Gunner_45 can not find me
Just realised I missed the middle section of the build..

The cross rails I milled off centre so they would sit flush on 1 side of the tube , but low on the other side to allow room for the security screen floor

defenderroofr11-03-130104.jpg


Helps if things are square before you start melting metal

defenderroofr11-03-130111.jpg


All good to go

defenderroofr11-03-130106_531-1.jpg


Brackets I welded a gusset in for extra strength and then linished them back flussh

defenderroofr11-04-090212.jpg


positioning the mounting blocks and then welding

defenderroofr11-05-020217.jpg


the other half of the mounting bracket I milled in blocks of 4...needed 8

defenderroofr11-04-090199.jpg


great when a plan works!

defenderroofr11-04-050192.jpg
 

nugget

Well-Known Member
Messages
245
Location
Where Gunner_45 can not find me
With the roof rack done and dusted it was time to move onto a bullbar. Had a look at what was available commercially and nothing was what I wanted so I decided to build my own.

My concept was for a steel bar with a centre loop which would follow the radiator/grille lines, take a winch, provision for a ladder rack and a couple of other things I still have up my sleeve.

To make the job a bit easier, I managed to get my digits on a raw channel with brackets not welded in.

Copyofdefenderbullbar01.jpg


Unfortunately it had indicator slots which i didn't want, and the winch slot was not where I needed it so the first job was to fill in the holes.

defenderbullbar02-2.jpg


The brackets sit on the inside of the chassis rails so positioning was important

defenderbullbar03-2.jpg


I also added a bit of extra strengthening. A plate to sit against the end of the chassis rail and also a plate to bolt a recovery point through. This plate was alos braced back to the bracket later for even more strength.

defenderbullbar04-2.jpg


Unfortunately the winch, whilst fitting between the brackets, would not centre properly so I modified the bracket.

defenderbullbar05-2.jpg


A spacer and new plate section was added later to maintain the strength of the bracket.

I decided to machine my own Hawes fairlead which would have a front plate and rear plate so there is a fairlead on both sides and the 2 halves would be bolted together, sandwiching the bar between them...pic later of that one...and would also incorporate the number plate. First up it was time to cut the new slot.

defenderbullbar06-2.jpg


A bracket to hold the winch control box and the access hole for the engage lever

defenderbullbar07a-2.jpg


Time to slip it on and check everything was going to work. Position of the centre tube and also the ladder rack hole finalised.

defenderbullbar08-2.jpg
 

nugget

Well-Known Member
Messages
245
Location
Where Gunner_45 can not find me
Centre tube welded in with a bit of extra bracing for the really big roos!

defenderbullbar09-1.jpg


Starting to all come together

defenderbullbar10-2.jpg


The tedious but important part...preparing for powder coating and trying to make my welds look half decent.

You can also see the thickness of the steel where the recovery hook bolts on. 4mm channel with a 10mm plate behind sound enable a decent recovery.

defenderbullbar11-1.jpg


Time to start machining the fairlead parts

defenderbullbar12-1.jpg


Whilst I was in protection mode, decided to make my own bashplate as well.

Copyofdefenderbullbar13.jpg


And of course bash plates need barackets....

Copyofdefenderbullbar14.jpg


While everything was off being powder coated, I fitted the headlight guards which finish of the frontal protection.

defenderbullbar15-1.jpg
 

nugget

Well-Known Member
Messages
245
Location
Where Gunner_45 can not find me
Everything is back from powder coating so time to bring it all together...

First up is to fit the fairlead

defenderbullbar406.jpg


I made the fairlead to go either side of the bars front channel so that there would be a lead in for the rope on both sides, would add strength as the channel is sandwiched giving a larger foot print and the winch bolts through the whole lot, again adding strength.

defenderbullbar408.jpg


Fit the sleeve for the single post ladder rack....removable so I will only put it in when needed but will come in really handy when picking up lengths of steel etc

defenderbullbar412.jpg


Some front recovery eyelets. You can see in later photos that there is a l;ot of strengthening behind these points as well as bracing back to the brackets.

defenderbullbar419.jpg


fitting the winch and control box. I will be having dash mounted controls as well as the remote, which I have re-positioned into the top of the bar for ease of use.

defenderbullbar424.jpg


Here you can see some of the extra steel and bracing for the recovery eyelet

defenderbullbar428.jpg


defenderbullbar429.jpg
 

cgalpha08

"Like Nothing Else"
Messages
3,710
Location
Indianapolis, IN
Wayne, your mods inspire the masses! Makes me want to just go nuts and do all kinds of things to my 3!!!

Sent from my DROID BIONIC using Tapatalk
 

nugget

Well-Known Member
Messages
245
Location
Where Gunner_45 can not find me
Finally finished the final bits and pieces on the bullbar build.

I found that I couldn't reach the top of the single pole ladder rack to tie stuff down with out stepping up on the bullbar which was going to scratch it up over a time. Solution was some tread plate steps which I had anodised to match the ones on top of the mudguards. Made one for each side to even it out.

defender bullbar 470 .JPG
A major feature of this build was to be in cab winch control. The Defender has a host of spare switch positions on the dash for option they have in the UK which are not bought into Oz so I decided to utilise those. three controls..an On/Off isolator switch in the central flanked by an "In" and an "Out" which only work when the isolator switch is in the "On" position.

Started out by sourcing the switched from a wrecker and then working out the wiring..

defender bullbar 493 .JPG
The blank faces were white injection moulding sprayed grey so I had them Laser engraved which I reckon has given a more factory than factory finish. A future build will be a rear winch so there may well be a matching set in the future!


defender bullbar 551.JPG


I wanted the uhf aerial to be the same height as the roof rack, there by doubling up as a feeler guage/height indicator. The first attempt proved too whippy as the spring base was not strong enough. Found an excellent GME spring base but they don't make an aerial the right length so I turned up an extension to fit between the base and the aerial.

defender bullbar 531.JPG
The front end dropped 25mm..1"...with the weight of the bar and winch so I fitted some HD Land rover front spings and a set of OME shocks for good measure which has bought the front back up nicley.

defender bullbar 515.JPG
All finished and ready to hit the road


defender bullbar 538.JPG
 

H3slate

Brush raked
Messages
983
Location
Tualatin, Oregon
Great job Nugget!! I am very impressed with your work on that front bumper. It is clean and simple, but very stout and looks good on your truck. :cheers:
 

nugget

Well-Known Member
Messages
245
Location
Where Gunner_45 can not find me

Defenders house the battery under the passenger seat and all the other relays TC controller etc under the passenger seat. I wasn’t too comfortable with important electrics being so low and importantly not in a water tight compartment. Obviously I wasn’t the first Defender owner to have such concerns as there is a fix already on the market.

The E Box allows the electrics to be moved into a new box which goes under the centre console, significantly raising it.

When I got stuck in water which quickly filled the footwells and which flowed into the compartment which had housed the electrics, I was glad I went to the trouble.

As standard


def e box 10-12-28 002_243 post.jpg


def e box 10-12-28 005_244 post.jpg


As I disconnected, I tagged..not that I don’t trust manufacturers to ensure fittings are not interchangeable


def e box 10-12-28 023_248 post.jpg

All the wiring retracts through the hole in the side wall of the compartment


def e box 10-12-28 024_249 post.jpg
 

nugget

Well-Known Member
Messages
245
Location
Where Gunner_45 can not find me
First up poke all of the wire through


def e box 10-12-28 029_250 post.jpg


Some heat shield to the underside of the metal E Box to stop the knees blistering from the heat transfer...

def e box 10-12-28 030_251 post.jpg


Reconnect all the wires...


def e box 10-12-28 038_253 post.jpgdef e box 10-12-28 035_252 post.jpg

Bob's your Uncle, all done....

def e box 10-12-28 040_255 post.jpg
def e box 10-12-28 039_254 post.jpg

Except a plug in the original compartment which will be a compressor

def e box 10-12-29 045_258 post.JPG
 
Last edited:

LagunaH1

Well-Known Member
Messages
3,730
Location
Idaho
Very very nicely done. Wouldn't it be nice if we could get the Defenders here in the US......

Tell me more about the truck: Does it have locking diffs front center and rear? traction control? Can you articulate fully with those wider tires and fender flares?
 

nugget

Well-Known Member
Messages
245
Location
Where Gunner_45 can not find me
Has centre locking diff and Traction control. Wheel articulation no problem and I am standard height.

Jury still out on TC for me. Sometimes it is OK but others you would like to just plant it and let lockers do their work but it is difficult to build up that extra bit of speed sometimes like in mud with TC. I have found the fuse:)
 

nugget

Well-Known Member
Messages
245
Location
Where Gunner_45 can not find me
Given my history of internally washing most of my trucks in bog holes, I figured a snorkel was an early investment.

Wasn't real happy with the the air intake ducting so decided to upgrade the lot while I was at it. All a bit tricky with the original ducting being a slot shape at the air intake morphing to a round fitting at the air cleaner box. All of this was just push together plastic which didn't get my juices flowing at all so it seemed the best idea was to start from scratch.

The easy end was the the air cleaner box where I turned up a joiner...

defender snorkel 001 post.JPG

At the other end I needed to be able to bolt a box in place which connect the snorkel to a 90mm pipe so with a bit of tricky dicky fabrication we ended up with...

defender snorkel 002 post.jpg

and even something to fix the pipe with some big ass man clamps clamp....now there's an idea!

defender snorkel 003 post.jpg


Join it all with some decent re-enforced duct pipe


defender snorkel 086 post.JPG


and we are ready for a dunking....


Attachments

  • defender snorkel 084 post.jpg
    defender snorkel 084 post.jpg
    92 KB · Views: 701
Last edited:
Top