• Welcome to H4O! For a reduced ad experience, please login or register with the forum.

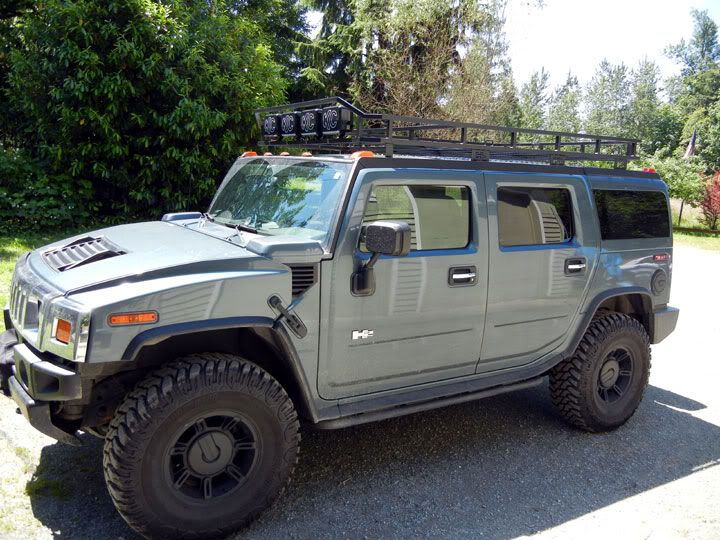
My custom home built roof rack

Scarsman

Sponsor
Messages
1,561
Location
Monroe, WA
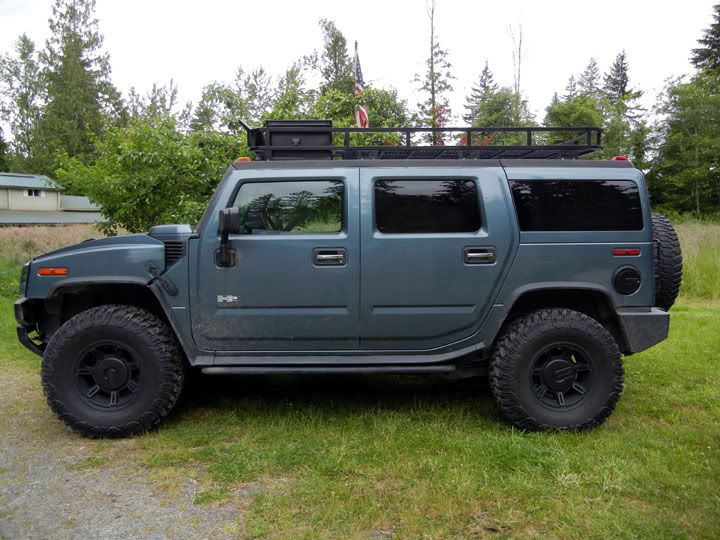
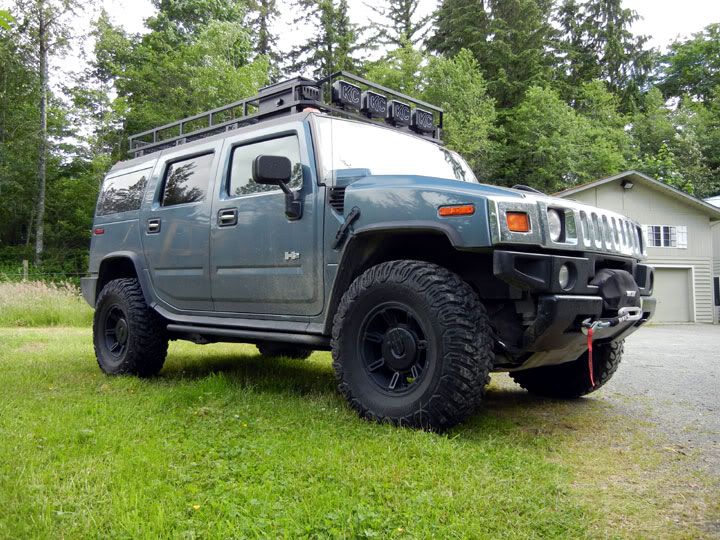
After looking at Gobi racks, and seeing how much they cost, :eek:, I decided to try and make my own. I thought about many different options, and chose to go with square tubing instead of round. I think it suits the Hummer better, since the Hummer is a very square, angular design. It took about 6 months of working mornings before work and weekends.


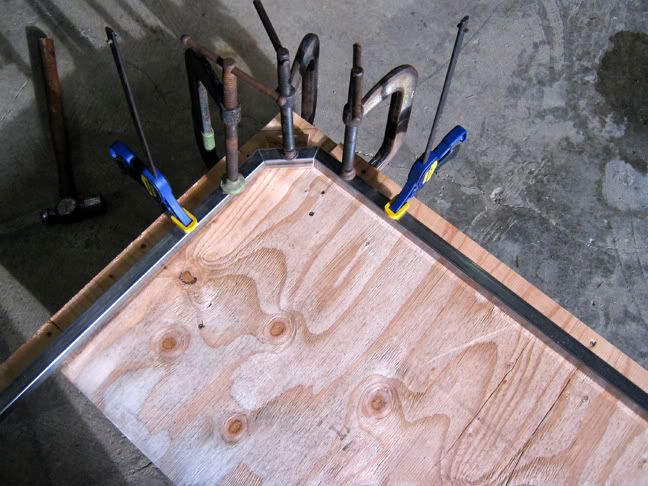
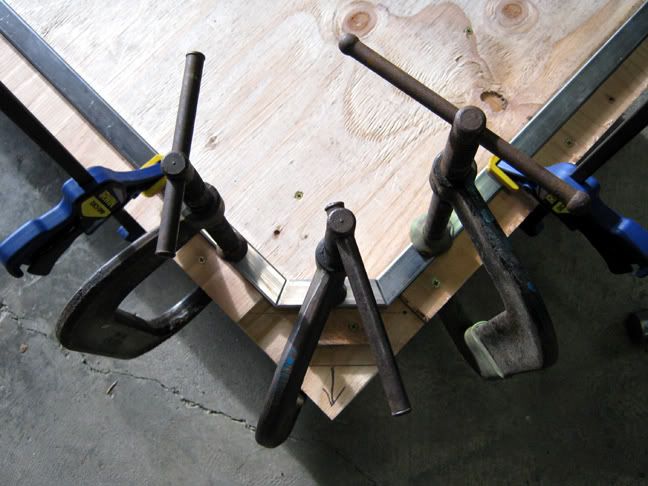
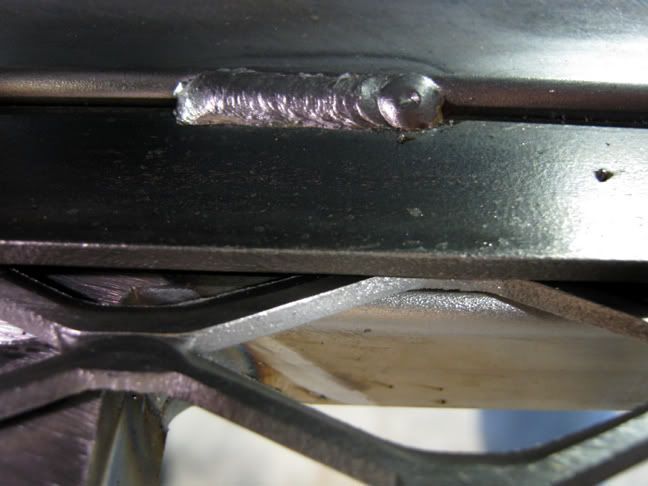
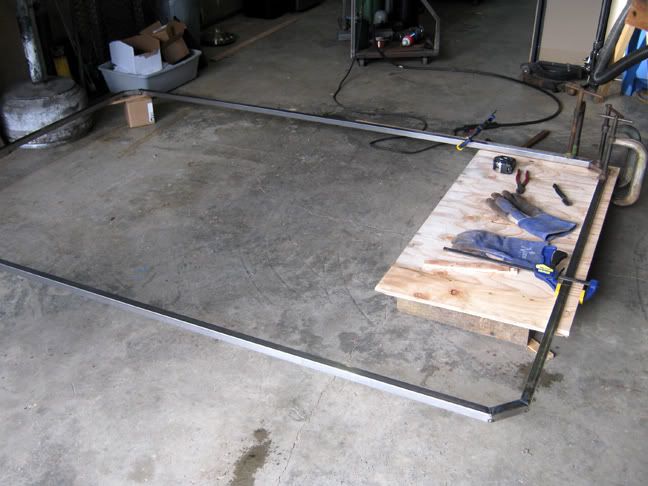
I built a quick jig for assembling the corners. It worked well, as the frame came out dead on square. :eek:
Here is the corner jig in action:
IMG_0001.jpg

IMG_0002.jpg

Here is the last corner going together:
IMG_0003.jpg

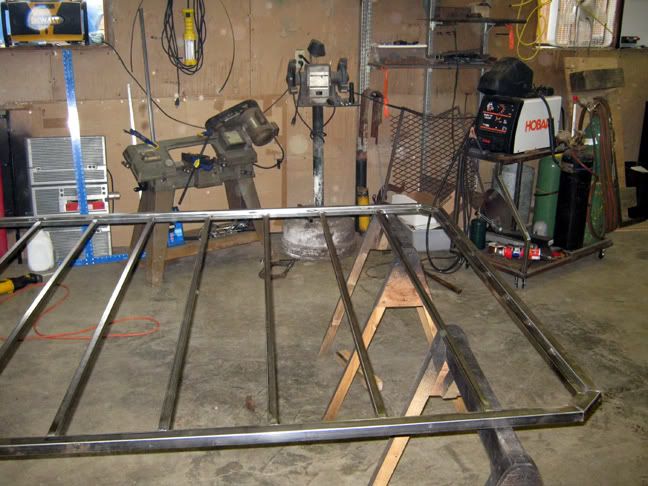
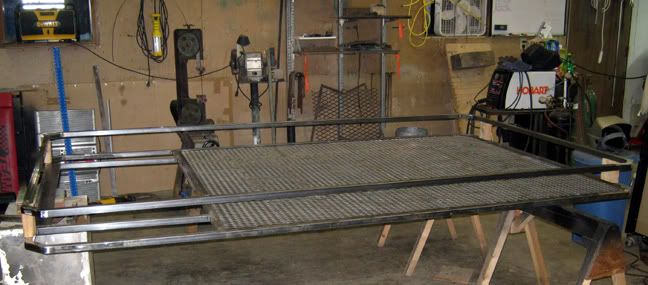
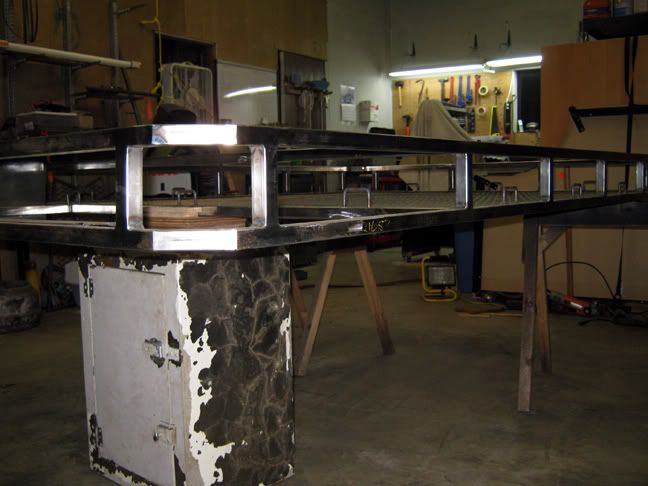
I used 3/4" tubing to go all around the cargo area. This will add more strength to the frame, and also makes a shelf for the gratting to sit on. Then I put in the cross pieces and added bracing in between them. Here it is with the 3/4" in around the cargo area and the cross bars:
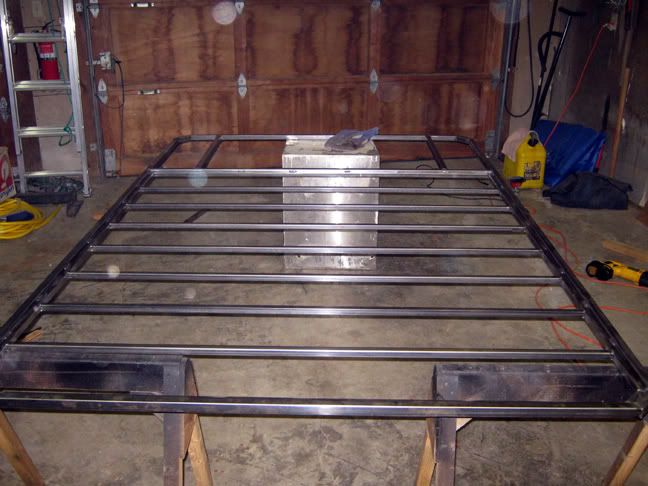
IMG_0008.jpg

IMG_0009.jpg


Here it is with the other bracing added:
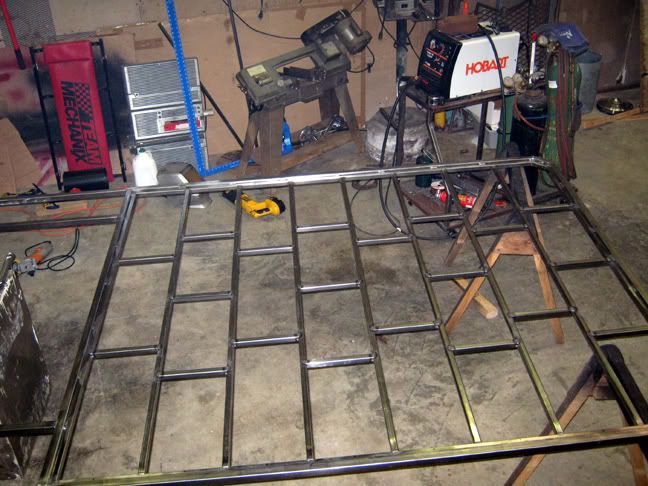
IMG_0011.jpg

IMG_0012.jpg


Everything to this point is fully welded. Just need to flip it over and clean up the bottom side, and then lay the grating. I am not sure yet if I want to put grating in the two spots beside the moon roof opening.

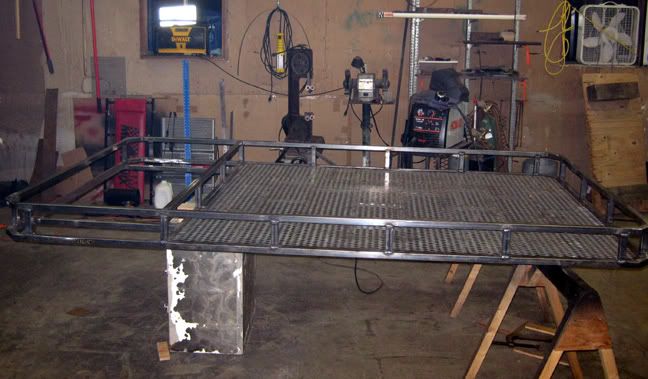
Ok, here is a pic with the grating welded in.
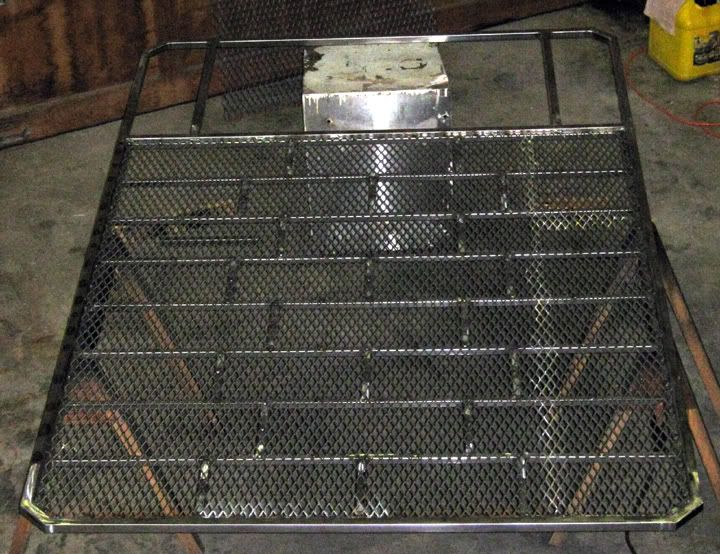
floor.jpg
 

Scarsman

Sponsor
Messages
1,561
Location
Monroe, WA
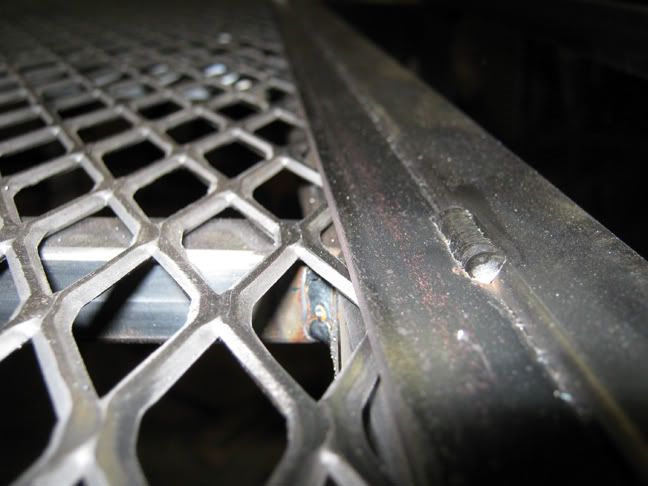
I finished the grating, ( had to weld the bottom side of the seam ) built the side rail frame, put on the tab for mounting lights on the front, and welded the strapping around the edge of the cargo area to cover the edge of the grating. Here are some more pics:
Here are a couple shots of the strapping around the edge to show how it went together:
998.jpg

999.jpg

Here it is with the rail frame built and mocked in place. I mocked it up with a few blocks of wood to decide on the height. It will be 6" overall height. If you look close you will see the light mounting tab at the front of the moon roof opening.
almost.jpg


Now I just need to cut all the uprights for the rail and assemble it. I am going to change the front of the rail, but not till after it is mounted. I also need to make the mount brackets. I have a special plan for those, but that's going to be a suprise. :p
I got the rail on it, and it is almost completely welded. I have a few more joints to weld up and then another round of grinding.
Next I'll have to get it up on the truck and figure out how high to make the brackets and where to place them. Need a break in the rain for that!

3.jpg

2.jpg

1.jpg

The front of the rail is going to change. I'm going to cut it and angle it it up for more space for lights. I'm also going to add two bars around the moon roof to match the lower part. Then I'll start working on some boxes for the front corners
 
Last edited:

Scarsman

Sponsor
Messages
1,561
Location
Monroe, WA
I mocked it up on the roof to figure out positioning and height for some brackets. I took some pictures of it sitting on the roof. I had it mocked up with some wood blocks. You'll just have to pretend it has a nice textured black powder coat finish.
test4.jpg

test.jpg

test1.jpg

test2.jpg
 
Last edited:

Scarsman

Sponsor
Messages
1,561
Location
Monroe, WA
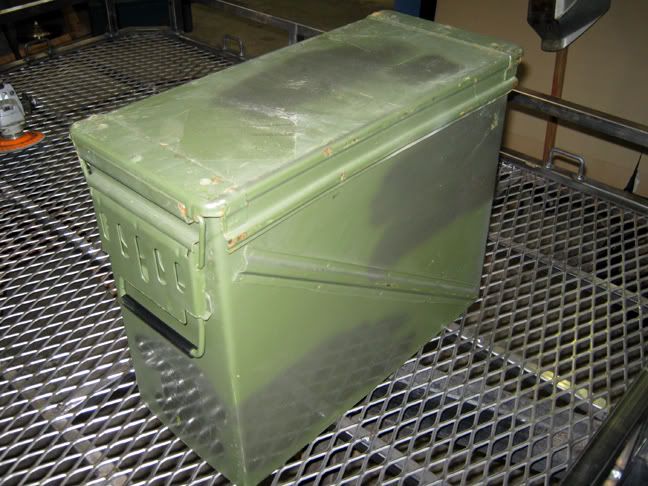
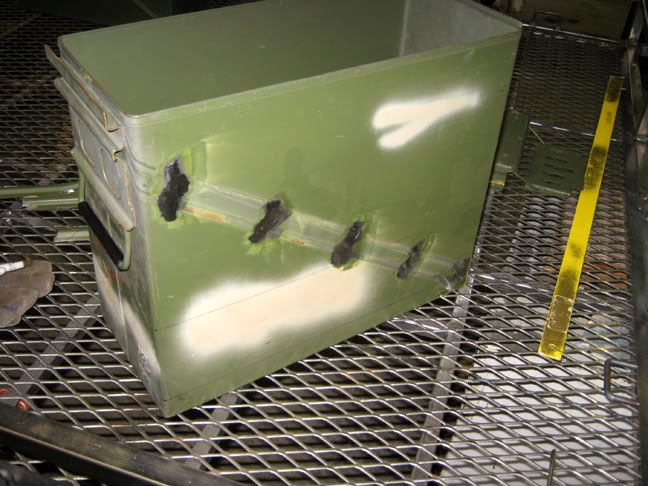
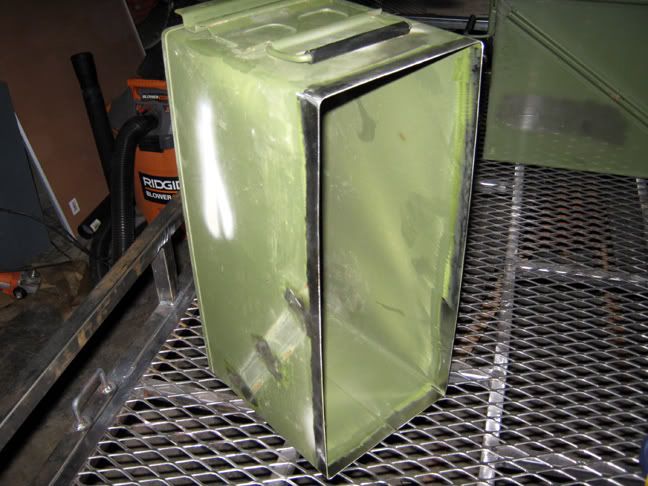
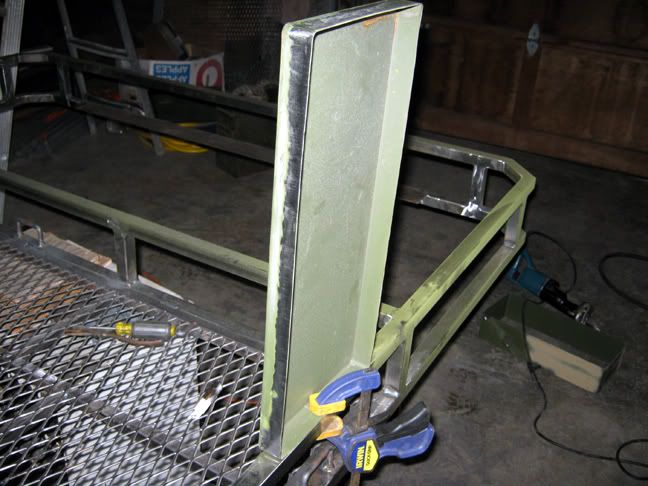
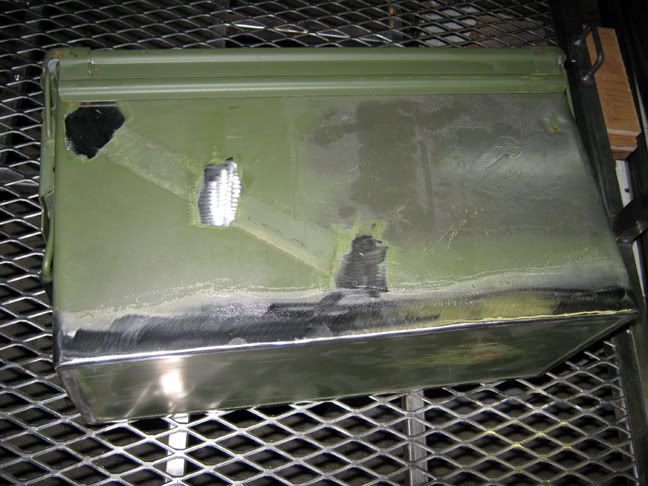
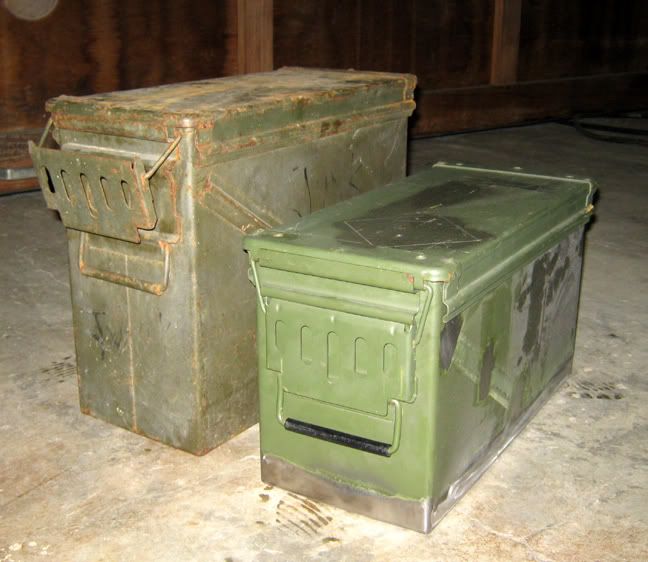
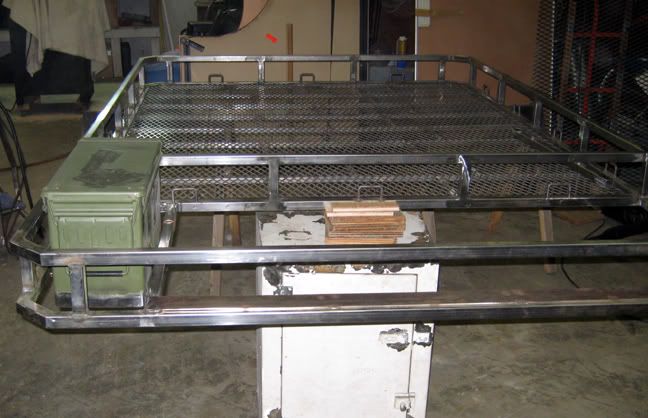
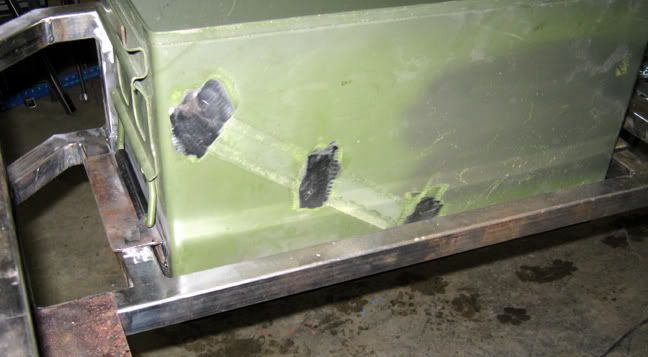
I decided to go with storage boxes in the front corners, but thought for a long time on how or what to make them with. I wanted them water tight. Then I looked around in my shop and came up with great idea. I had an old 20MM ammo can. They have rubber seals in the lid and are water tight. It was the perfect width and length, but too tall. I went and picked up two new ones in good shape. I cut the stiffeners off the side and cut the bottoms off. Then I cut about 5" off the sides, and welded the bottoms back on. I personaly think this was a really cool idea. Being military ammo cans, they kind of pay homage to the Hummer ancestry. I think they suit it well.
I also made and installed tie-down points around the edge of the cargo area. They are made from 5/16" round stock, but in keeping with the design theme, I made them square.
The pre-mod can:
IMG_00001.jpg

Stiffener removed:
IMG_00002.jpg

Bottom cut off:
IMG_00003.jpg

IMG_00004.jpg

Welded back together:
box1.jpg

Modded can next to the old cruddy one that inspired the idea:
box2.jpg

Here is how they will sit. This one is just suspended with wire at the moment for looks:
IMG_000a.jpg

IMG_000b.jpg

IMG_000c.jpg

IMG_000d.jpg

The tie-down points:
IMG_000e.jpg


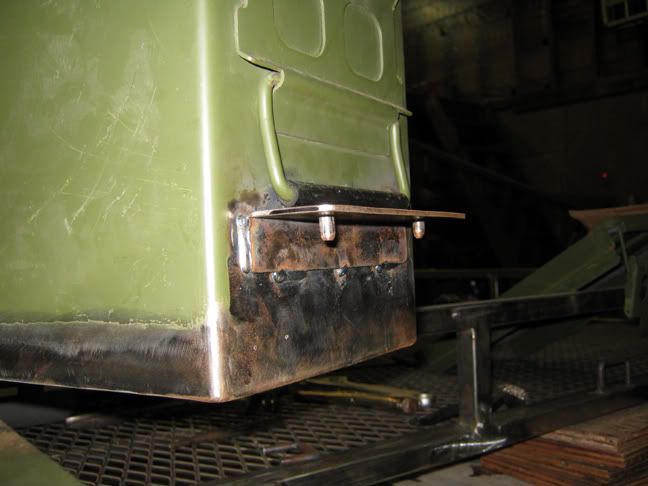
After much thinking and rethinking, I came up with what I think is a pretty good way to secure the boxes and yet easily remove them if needed. I welded an angle bracket on each end of the box, drilled two holes in each one, and made little alignment pins from 1/4" round stock and welded them into the holes.
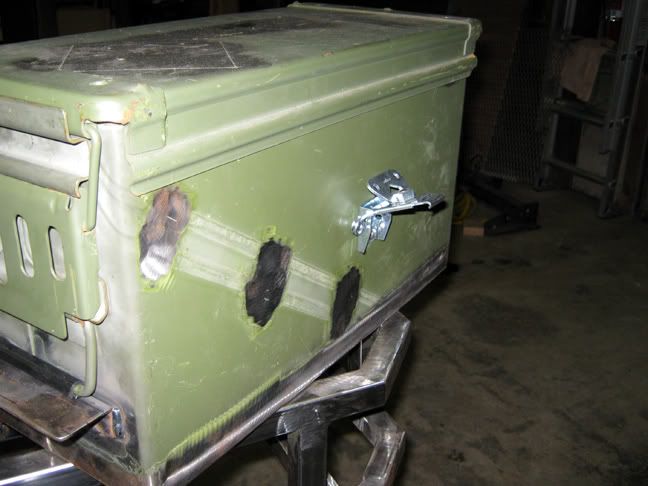
It looks kind of crappy right now with the paint ground off the box and all, but you'll have to look past all that. It will all be sand blasted and powder coated and pretty when it's done!
IMG_0012a.jpg

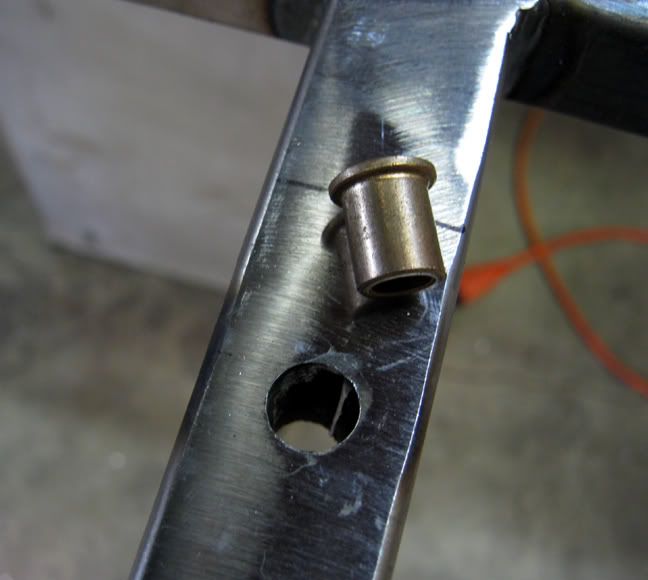
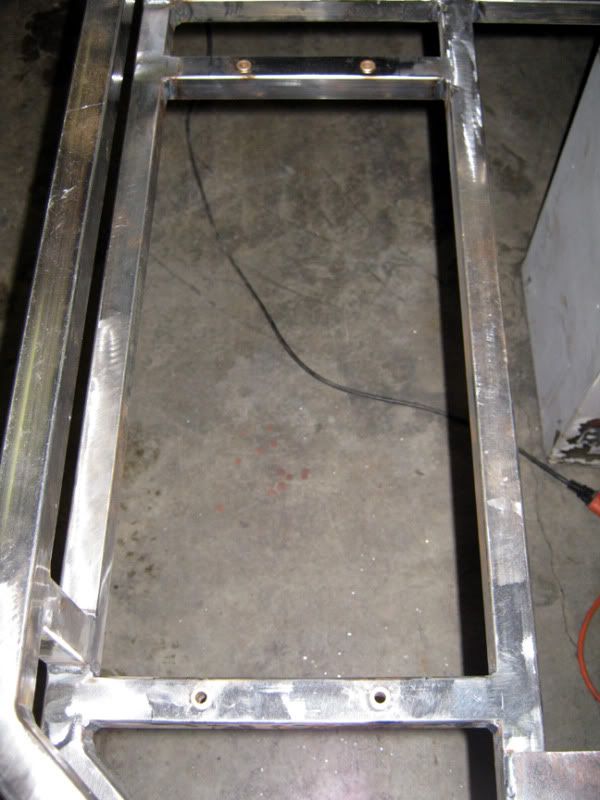
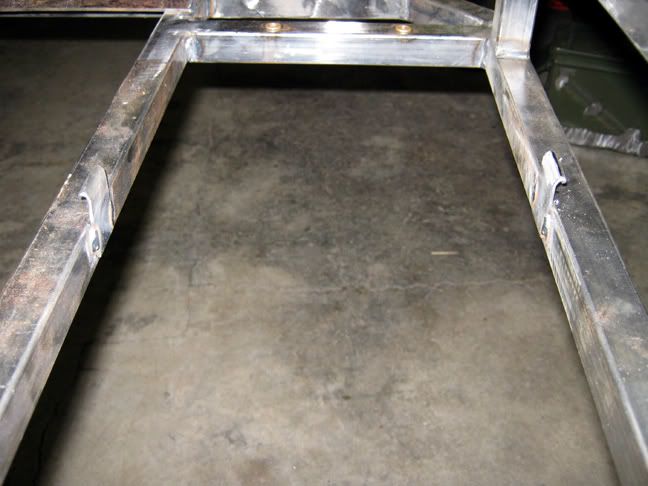
I drilled two 1/2" holes in the cross bars that the angles sit on that line up with the alignment pins. I cut a length of 1/2" OD 3/8" ID tubing and welded them into the holes. Now the square tubing is still sealed up. Plus, with the holes going all the way through, they will never get plugged up with ice, dirt, etc.
IMG_0010.jpg

I got some bronze bushings that were 3/8" OD and 1/4" ID, and put them in the holes in the cross bars:
IMG_0011A.jpg

The box now sits with the pins inside the bushings:
IMG_0013.jpg

After much searching, I was able to find a place to order some rotary draw latches. I mounted them to the sides of the box:
IMG_0015.jpg

I made keepers for the latches and welded them to the frame:
IMG_0014.jpg
 
Last edited:

Scarsman

Sponsor
Messages
1,561
Location
Monroe, WA
And now the box sets down on the frame into the alignment holes. Then you just give the latches a half turn and it is cinched down tight. The box feels like it is welded on it is so solid when it's latched down. But it can be removed in about 5-10 seconds.
IMG_0021.jpg

IMG_0020.jpg

IMG_0019.jpg

IMG_0018.jpg

Now I just need to do the other box, modify the top rail at the front for the lights I decided on, and make the brackets to mount it on the truck. Then it's done.
Here it is on the roof on wood blocks so I could get the measurments for the brackets:
102_2110.jpg

102_2113.jpg

102_2112.jpg

102_2111.jpg


This was the first time I had the boxes in with it up on the truck. I thought it was going to look ok with them on, it looks better than I imagined. I think once it is all finished in black it is going to be awesome and very custom looking. They only take about a minute each to put on or off.
102_2117.jpg

102_2114.jpg

102_2115.jpg

102_2116.jpg
 
Last edited:

Scarsman

Sponsor
Messages
1,561
Location
Monroe, WA
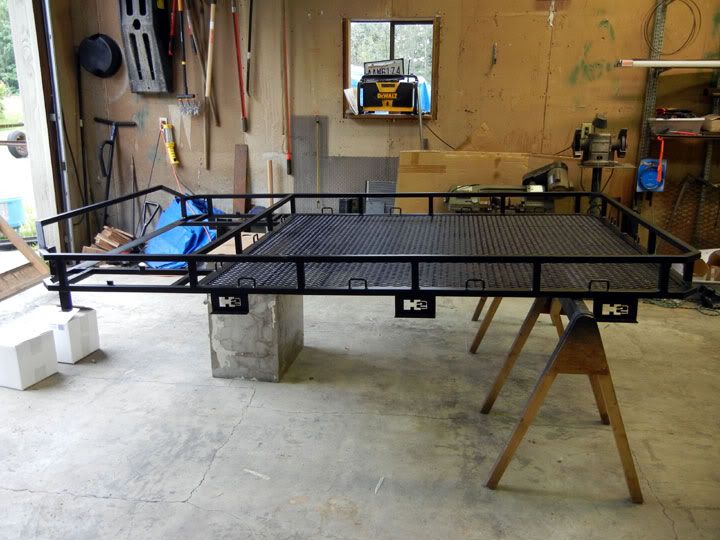
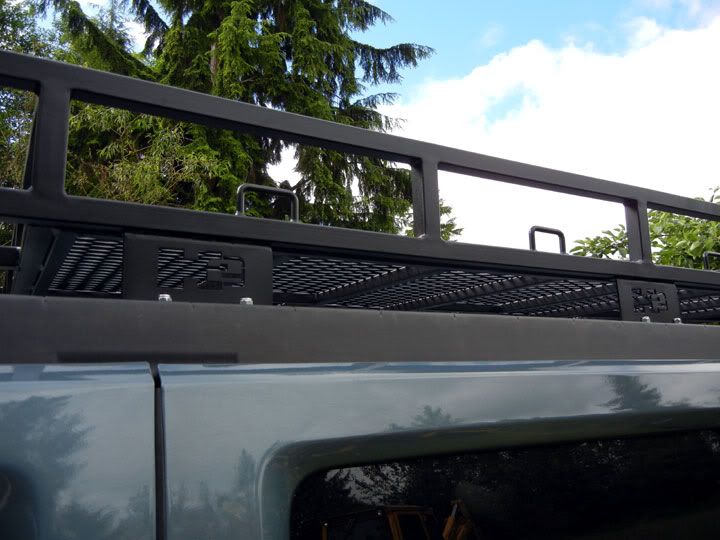
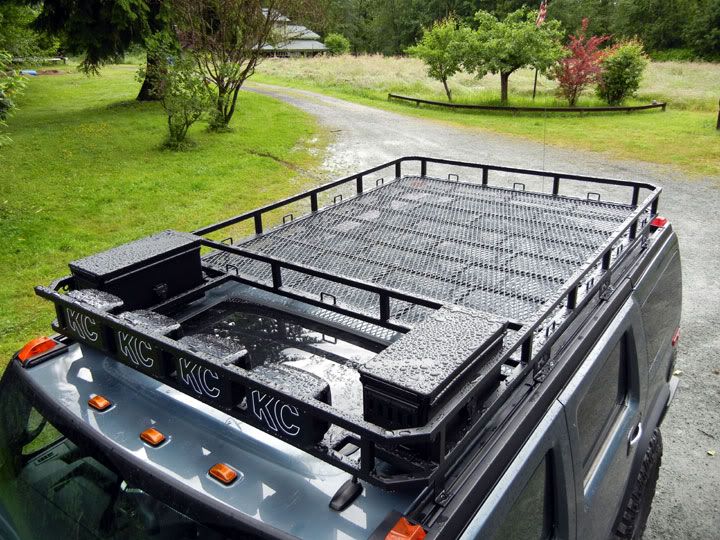
And now, the final product. I do need to paint the nuts for the mounting brackets, so nevermind the silver nuts for now. They will turn black. You will also note that I had the chrome fuel door blasted and powder coated black as well!

Here it is unloaded from the trailer. If you remember, I mentioned a suprise on the mounting brackets. Now you can see what it was:
DSCN0141.jpg


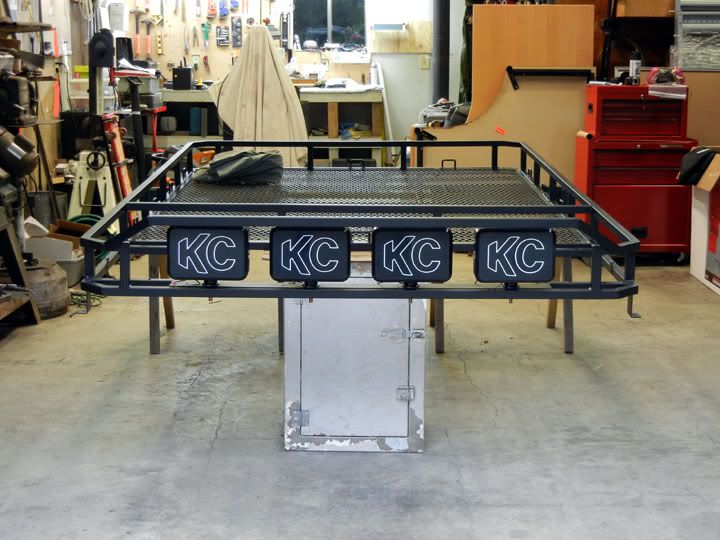
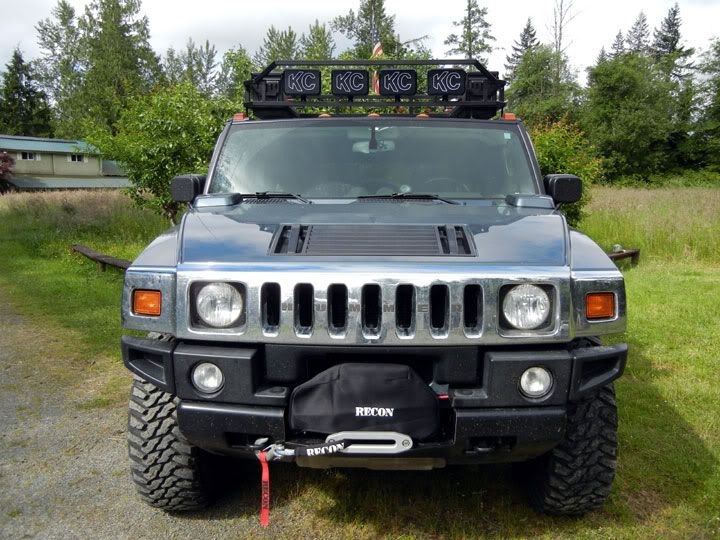
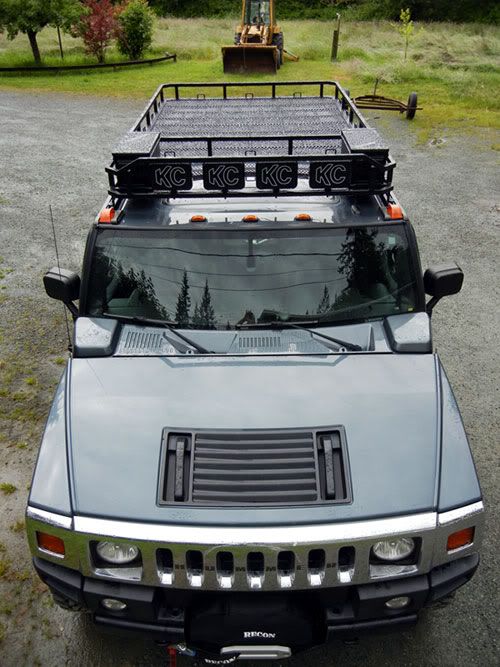
Lights mounted:
DSCN0145.jpg


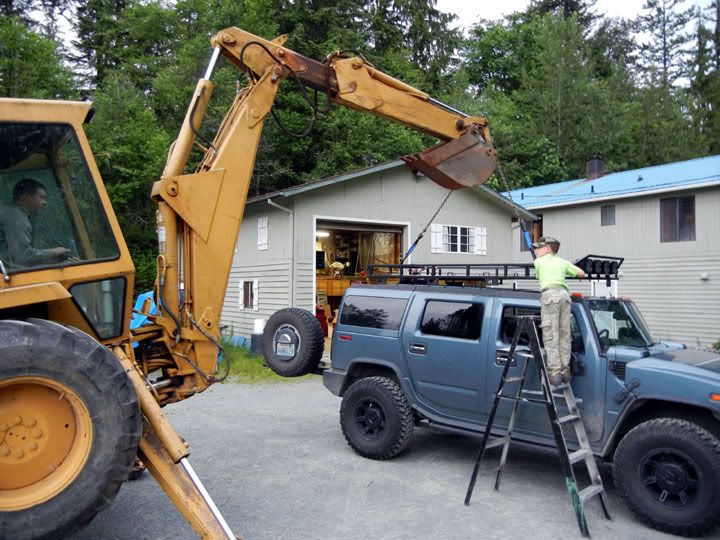
Setting it in place with my professional crew:
DSCN0152.jpg

DSCN0149.jpg


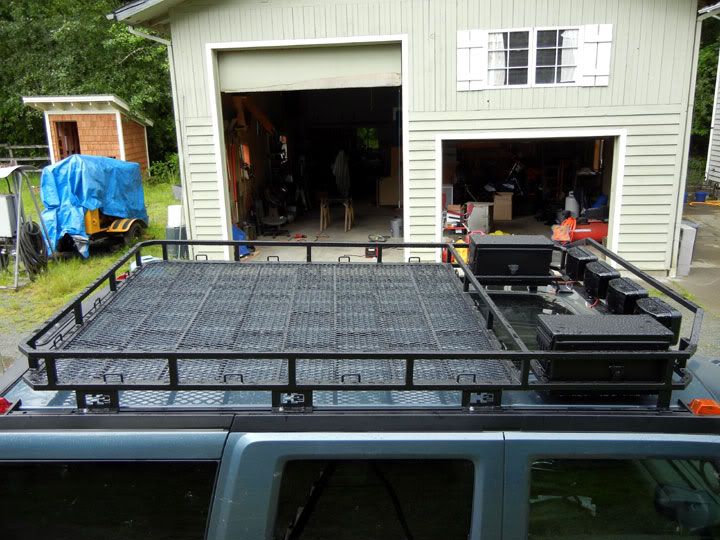
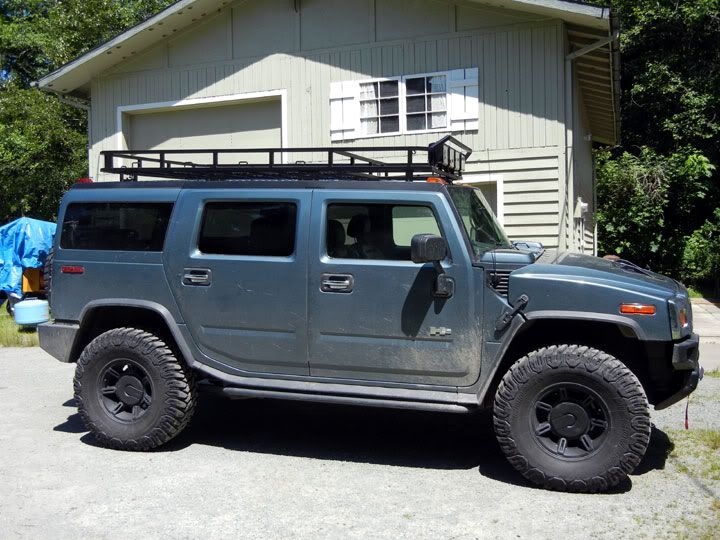
And done! Here you can see the fuel door:
DSCN0183.jpg

DSCN0175.jpg

DSCN0177.jpg


Prius' will tremble and wet themselves!
DSCN0178.jpg


Here is a closer shot of the bracket. I think it gives a very subtle custom feel to it. They don't stand out really loud, they are a very subtle touch. I like it a lot!
DSCN0181.jpg


I will add some more pics as I think of more ways to pose it. The more I look at it the more I love it. I already have a few things I would do different, but that will be for the next one! Maybe it will be aluminum!
 
Last edited:

Scarsman

Sponsor
Messages
1,561
Location
Monroe, WA
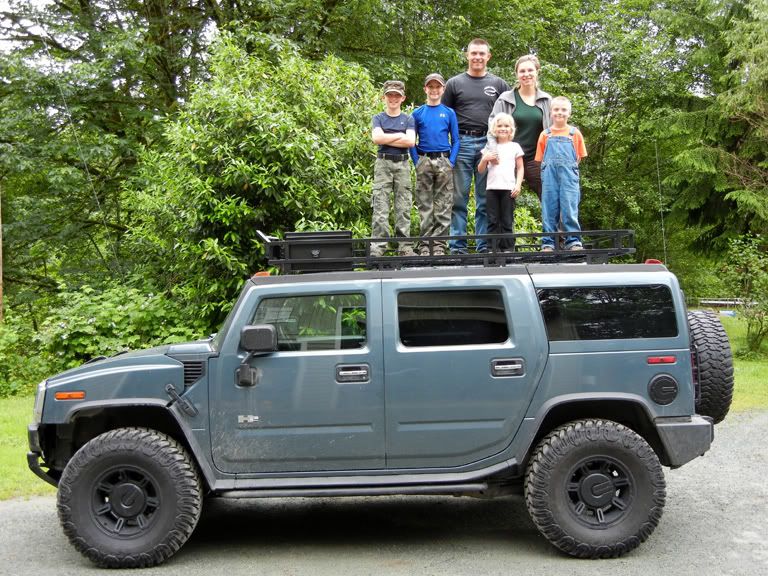
Here is another picture. This is the sophisticated load testing process. This is a highly scientific and technical proprietary test done with the strictest standards. You are all very privileged to be allowed a peek into this behind the scenes test. ;)
Rooftop.jpg

In all seriousness, this is just over 500 pounds, and there was no noticeable flex in the floor. I had a buddy look at it while I walked around on it, and he said it did not bow at all, even when I was right in the middle. I think I actually over built it a little. I stood up there and rocked it side to side as hard as I could, and there was no flexing in the brackets under lateral load at all either.
 
Last edited:

Scarsman

Sponsor
Messages
1,561
Location
Monroe, WA
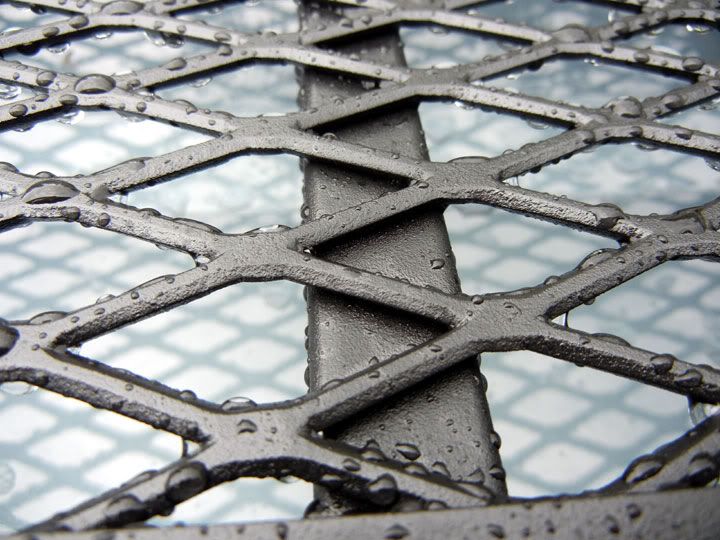
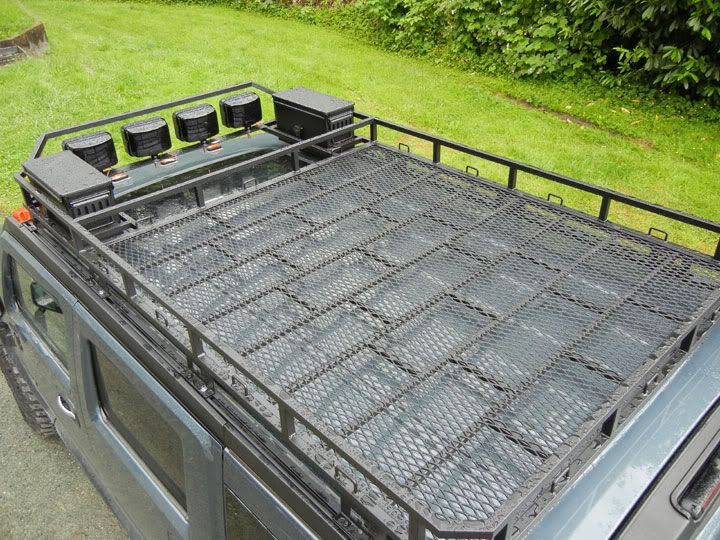
Here are a couple close ups to show the texture. It is almost an exact match to the finish on the factory sliders.
June-30-2011-019.jpg

June-30-2011-018.jpg


Here are some views from above so you can see the cargo area.
June-30-2011-016.jpg

June-30-2011-015.jpg

June-30-2011-014.jpg

June-30-2011-017.jpg


Here are a few shots with the boxes removed.
DSCN0219.jpg

DSCN0218.jpg

DSCN0217.jpg
 
Last edited:

Scarsman

Sponsor
Messages
1,561
Location
Monroe, WA
We went out for a little sight seeing drive since it was raining and we didn't feel like doing anything else. I found a rock pile to do some posing on, and got a few shots of the rack in it's natural environment. I did a test load in the boxes, and I was able to fit the following:
Driver's side:
1 x 20'x1 1/4" nylon recovery rope
1 x 10' chain
1 x roll toilet paper :moon:

1 x wired winch remote
1 x SOG folding saw
1 x snatch block
Passenger side:
1 x 20' tow strap
1 x 10' tree saver strap
2 x heavy shackles
1 x pair leather gloves
1 x tire plug kit
1 x pair coveralls
1 x heavy vinyl shower curtain (for laying on the ground)

And now, pics:
DSCN0228.jpg

DSCN0231.jpg

DSCN0233.jpg

DSCN0236.jpg

DSCN0237.jpg

DSCN0238.jpg
 
Last edited:

H3slate

Brush raked
Messages
983
Location
Tualatin, Oregon
This is such a well built rack! I have seen it in person and pics don't do it justice. When we went camping he had all of his gear up there for a family of five and room to spare.

Sent from my DROIDX using Tapatalk
 

Scarsman

Sponsor
Messages
1,561
Location
Monroe, WA
This is such a well built rack! I have seen it in person and pics don't do it justice. When we went camping he had all of his gear up there for a family of five and room to spare.

Sent from my DROIDX using Tapatalk

Well, six, actually. But who's counting? :jump:
 

Scarsman

Sponsor
Messages
1,561
Location
Monroe, WA
Thats one hell of a rack! I may need to build one like that for my H3

Thank you.


Scarsman, is your shop up and running? would like one of your custom racks for my h3!

Well, I am going to try and get some H3 measurments this weekend during our trail run so I can do some figuring and planning. Then I just need someone who is close enough so I could have their truck for a day for fine tuning of fitment. After the first one I should be able to just make more.

H3slate? Hummjay? Anyone? :sleazy:
 

PacNWAg98

Well-Known Member
Messages
56
Location
Issaquah, WA
Thank you.


Well, I am going to try and get some H3 measurments this weekend during our trail run so I can do some figuring and planning. Then I just need someone who is close enough so I could have their truck for a day for fine tuning of fitment. After the first one I should be able to just make more.

H3slate? Hummjay? Anyone? :sleazy:

Love it!! That is a great looking rack - would love to see what you could do for the H3! Have a great time this weekend - really wish I was going to make it out with you guys! take lots of pictures!!
 

H3slate

Brush raked
Messages
983
Location
Tualatin, Oregon
Thank you.


Well, I am going to try and get some H3 measurments this weekend during our trail run so I can do some figuring and planning. Then I just need someone who is close enough so I could have their truck for a day for fine tuning of fitment. After the first one I should be able to just make more.

H3slate? Hummjay? Anyone? :sleazy:

You know I call dibs on being the guinea pig. You let me know when you are ready. :thumbs:
 

FormerUser

Well-Known Member
Messages
179
Well, I am going to try and get some H3 measurments this weekend during our trail run so I can do some figuring and planning. Then I just need someone who is close enough so I could have their truck for a day for fine tuning of fitment. After the first one I should be able to just make more.


I'd be up for one for my H3 - might be a pain to $hip to SE WI, but who knows.

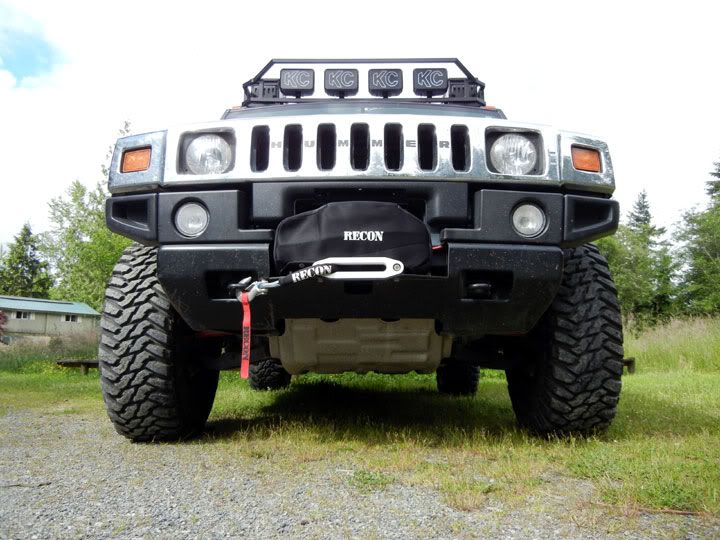
Taking a wild guess, but I'm thinking you made the front winch mount as well? Can you verify, and if you did can you share the build?
 

DJinCO

Well-Known Member
Very nice rack! I am about to learn how to use a MIG welder at the base auto hobby shop. Couple hour class, probably just enough to ruin a bunch of stuff.

I have a question, I need to weld two studs on the frame of my Tahoe for a factory skid plate.

Do I need to disconnect the battery and/or the computer module to keep from zapping them if I am welding on the frame?

Thanks, Doug
 

Scarsman

Sponsor
Messages
1,561
Location
Monroe, WA
I'd be up for one for my H3 - might be a pain to $hip to SE WI, but who knows.

Taking a wild guess, but I'm thinking you made the front winch mount as well? Can you verify, and if you did can you share the build?

Can't be too bad, since they get shipped all the time. We could probably make it work. Yes, I did make the winch mount. I will dig up my pics from that and make a thread for it.


Very nice rack! I am about to learn how to use a MIG welder at the base auto hobby shop. Couple hour class, probably just enough to ruin a bunch of stuff.

I have a question, I need to weld two studs on the frame of my Tahoe for a factory skid plate.

Do I need to disconnect the battery and/or the computer module to keep from zapping them if I am welding on the frame?

Thanks, Doug

I am by no means an expert, but I would do two things.

1. Disconnect the battery

2. Keep your ground clamp as close as you can possibly get it to where you are welding. I do know that is important when welding on a vehicle.


I am actually right this minute drawing blueprints and making a materials list for an H3 rack. Stay tuned!
 
Top