• Welcome to H4O! For a reduced ad experience, please login or register with the forum.

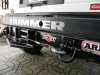
H2 Rear Winch in Bumper Install

Polar Bear

Well-Known Member
Messages
83
Location
Montreal
So I actually did this project in March of 2013!

I really wanted a front and rear winch and for years I simply took the cradle from the front and transfered it to the rear when needed...which was a total pain in the butt, especially if you are stuck!

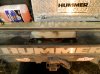
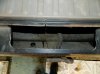
So after taking a good hard look at my OEM rear bumper, I notice a ton of space back there that just might be able to house a rear winch...so guess what I decided to do!

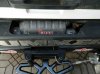
My trusty T-Max winch portable mount has taken a beating over the years since I already can use it in the front or rear of my truck, but recently I have bent many of the components to the point where I needed to do something with it and my T-Max winch. My winch is still good so I decided to give it a new home! A winch condo in my factory rear bumper.

This project turned out better than I imagined and has worked amazingly well!

So here is how I did it!
 

Polar Bear

Well-Known Member
Messages
83
Location
Montreal
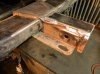
So here is the first round of pictures;

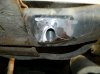
Making the marks before I get the hole saw and the sawzall out.

attachment.php


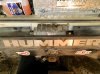
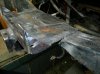
Here is the first cut.


attachment.php


attachment.php


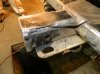
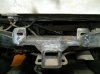
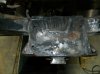
This is my first test fit with my winch...just to make sure it will fit before I go to far...but seeing as I already have a big hole in my bumper I will find a way!

attachment.php


Guess What?? It actually Fits!!!

attachment.php
 

Attachments

  • DSCN3489.jpg
    DSCN3489.jpg
    694.9 KB · Views: 1,409
  • DSCN3488.jpg
    DSCN3488.jpg
    685.9 KB · Views: 1,311
  • DSCN3487.jpg
    DSCN3487.jpg
    779.2 KB · Views: 1,324
  • DSCN3491.jpg
    DSCN3491.jpg
    737.7 KB · Views: 1,342
  • DSCN3490.jpg
    DSCN3490.jpg
    667.5 KB · Views: 1,362

Polar Bear

Well-Known Member
Messages
83
Location
Montreal
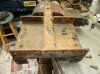
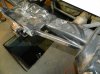
Next, I wanted to reuse the steel from my front winch cradle since all the holes were already done and it was a strong unit!

I started by removing the 2x2 tubing.

attachment.php


I then did another test fit just to be certain things would line up right!

attachment.php


attachment.php


attachment.php


So now that I know everything will fit OK...time to start welding!
 

Attachments

  • DSCN3494.jpg
    DSCN3494.jpg
    692.5 KB · Views: 1,212
  • DSCN3492.jpg
    DSCN3492.jpg
    587 KB · Views: 688
  • DSCN3496.jpg
    DSCN3496.jpg
    607.1 KB · Views: 1,202
  • DSCN3495.jpg
    DSCN3495.jpg
    552.8 KB · Views: 1,269
  • DSCN3493.jpg
    DSCN3493.jpg
    745.9 KB · Views: 1,320

Polar Bear

Well-Known Member
Messages
83
Location
Montreal
Last step before I weld everything solid, I modify the bumper cover to allow space for the roller fairlead to pass thru.

attachment.php


attachment.php


attachment.php


attachment.php


Now that I know all the parts will line up...it is time to make it permanent!
 

Attachments

  • DSCN3500.jpg
    DSCN3500.jpg
    762.3 KB · Views: 1,276
  • DSCN3499.jpg
    DSCN3499.jpg
    572.9 KB · Views: 1,345
  • DSCN3498.jpg
    DSCN3498.jpg
    610.8 KB · Views: 1,269
  • DSCN3497.jpg
    DSCN3497.jpg
    709.5 KB · Views: 1,337

Polar Bear

Well-Known Member
Messages
83
Location
Montreal
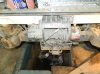
n order to be able to weld my plate in I first needed to level some surfaces to ensure a solid foundation, so a good cleaning with the grinder and away we go!

attachment.php


attachment.php


attachment.php


attachment.php
 

Attachments

  • DSCN3504.jpg
    DSCN3504.jpg
    697.7 KB · Views: 1,254
  • DSCN3505.jpg
    DSCN3505.jpg
    687.6 KB · Views: 1,202
  • DSCN3502.jpg
    DSCN3502.jpg
    643.4 KB · Views: 1,172
  • DSCN3501.jpg
    DSCN3501.jpg
    633.3 KB · Views: 1,152

Polar Bear

Well-Known Member
Messages
83
Location
Montreal
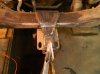
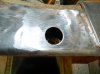
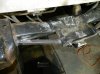
Now every winch is held by a minimum of 4 bolts so in order to make sure that I could actually bolt the winch in place I cam up with a creative idea to be able to pass thru the frame!


attachment.php


attachment.php


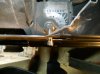
So I drilled a 1 inch hole thru the frame and then welded in some 1/4 wall tubing to give me a pass thru for the winch bolt and enough space for the socket as well!

attachment.php


attachment.php


attachment.php
 

Attachments

  • DSCN3507.jpg
    DSCN3507.jpg
    760.7 KB · Views: 1,169
  • DSCN3509.jpg
    DSCN3509.jpg
    716.7 KB · Views: 1,092
  • DSCN3510.jpg
    DSCN3510.jpg
    739.5 KB · Views: 1,169
  • DSCN3514.jpg
    DSCN3514.jpg
    670.1 KB · Views: 1,201
  • DSCN3513.jpg
    DSCN3513.jpg
    648.5 KB · Views: 1,198

Polar Bear

Well-Known Member
Messages
83
Location
Montreal
Now I weld the winch plate in.

attachment.php


attachment.php


attachment.php


attachment.php
 

Attachments

  • DSCN3518.jpg
    DSCN3518.jpg
    500 KB · Views: 1,068
  • DSCN3517.jpg
    DSCN3517.jpg
    625.7 KB · Views: 1,263
  • DSCN3516.jpg
    DSCN3516.jpg
    567 KB · Views: 1,189
  • DSCN3515.jpg
    DSCN3515.jpg
    683.9 KB · Views: 1,073

Polar Bear

Well-Known Member
Messages
83
Location
Montreal
Since I frequently do side angle pulls I wanted to make sure I compensated for any side loading so I added these braces.

attachment.php


attachment.php


Once I finished up all the welds and I cleaned everything up I put a nice cost of Bed Liner coating over everything.

attachment.php


attachment.php
 

Attachments

  • DSCN3520.jpg
    DSCN3520.jpg
    654 KB · Views: 1,136
  • DSCN3521.jpg
    DSCN3521.jpg
    716.1 KB · Views: 1,207
  • DSCN3539.jpg
    DSCN3539.jpg
    651.7 KB · Views: 1,201
  • DSCN3538.jpg
    DSCN3538.jpg
    577.3 KB · Views: 1,231

Polar Bear

Well-Known Member
Messages
83
Location
Montreal
Here are the final stages.

With the winch bolted in place I reinstalled the bumper cover and made the necessary adjustments to have a clean installation.

attachment.php


You will notice I had to trim the clutch handle in order to allow it to pass thru the bumper.

attachment.php


Since I do pull trailers with my H2. I moved the factory trailer light plug over a bit and gave it a new home!

attachment.php


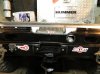
And here is the finished product! Looks Great and Works even better!

attachment.php


attachment.php


attachment.php
attachment.php
attachment.php
 

Attachments

  • DSCN3546.jpg
    DSCN3546.jpg
    554.6 KB · Views: 1,212
  • DSCN3545.jpg
    DSCN3545.jpg
    666.2 KB · Views: 1,140
  • DSCN3543.jpg
    DSCN3543.jpg
    653.5 KB · Views: 1,204
  • DSCN3553.jpg
    DSCN3553.jpg
    775.2 KB · Views: 1,236
  • DSCN3552.jpg
    DSCN3552.jpg
    741.3 KB · Views: 1,116
  • DSCN3551.jpg
    DSCN3551.jpg
    741.2 KB · Views: 1,218

Scarsman

Sponsor
Messages
1,561
Location
Monroe, WA
Nice! That's on my list of things to do as well. Mine will probably be part of a complete bumper though. I'll probably put my 10,000 lb one on the rear and put a bigger one on the front.
 
Last edited:
Top