• Welcome to H4O! For a reduced ad experience, please login or register with the forum.

FJ4overland

SuperBuickGuy

Well-Known Member
Messages
3,403
Location
Woodinville, WA
so I can start on the little things.

full droop

the back looks great

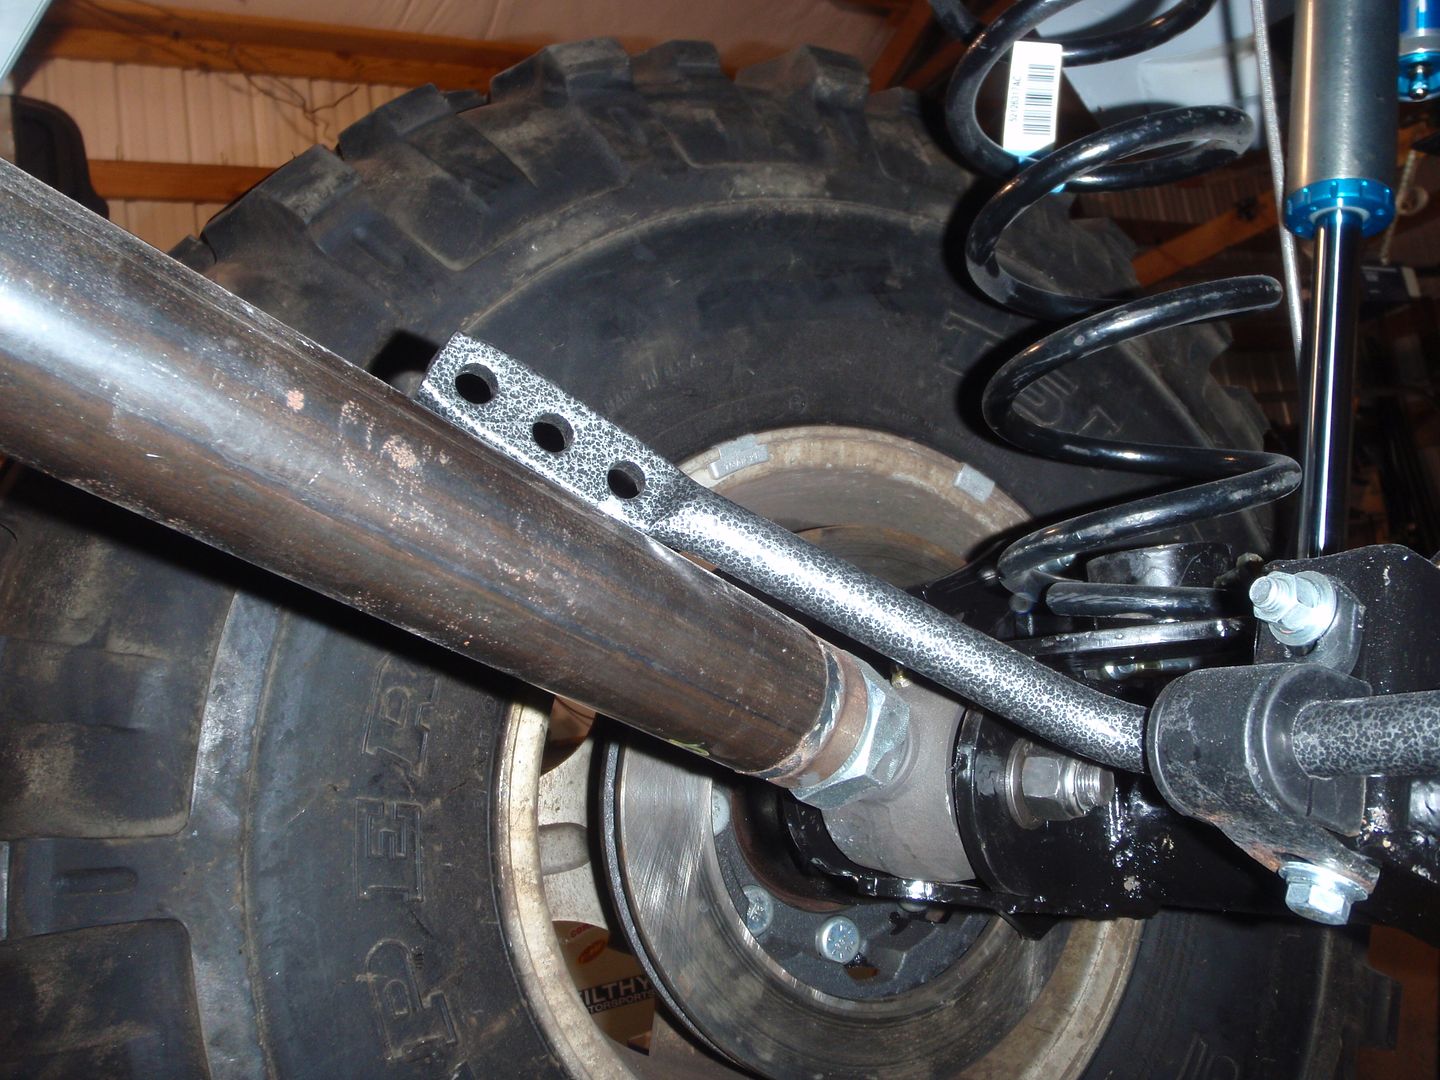
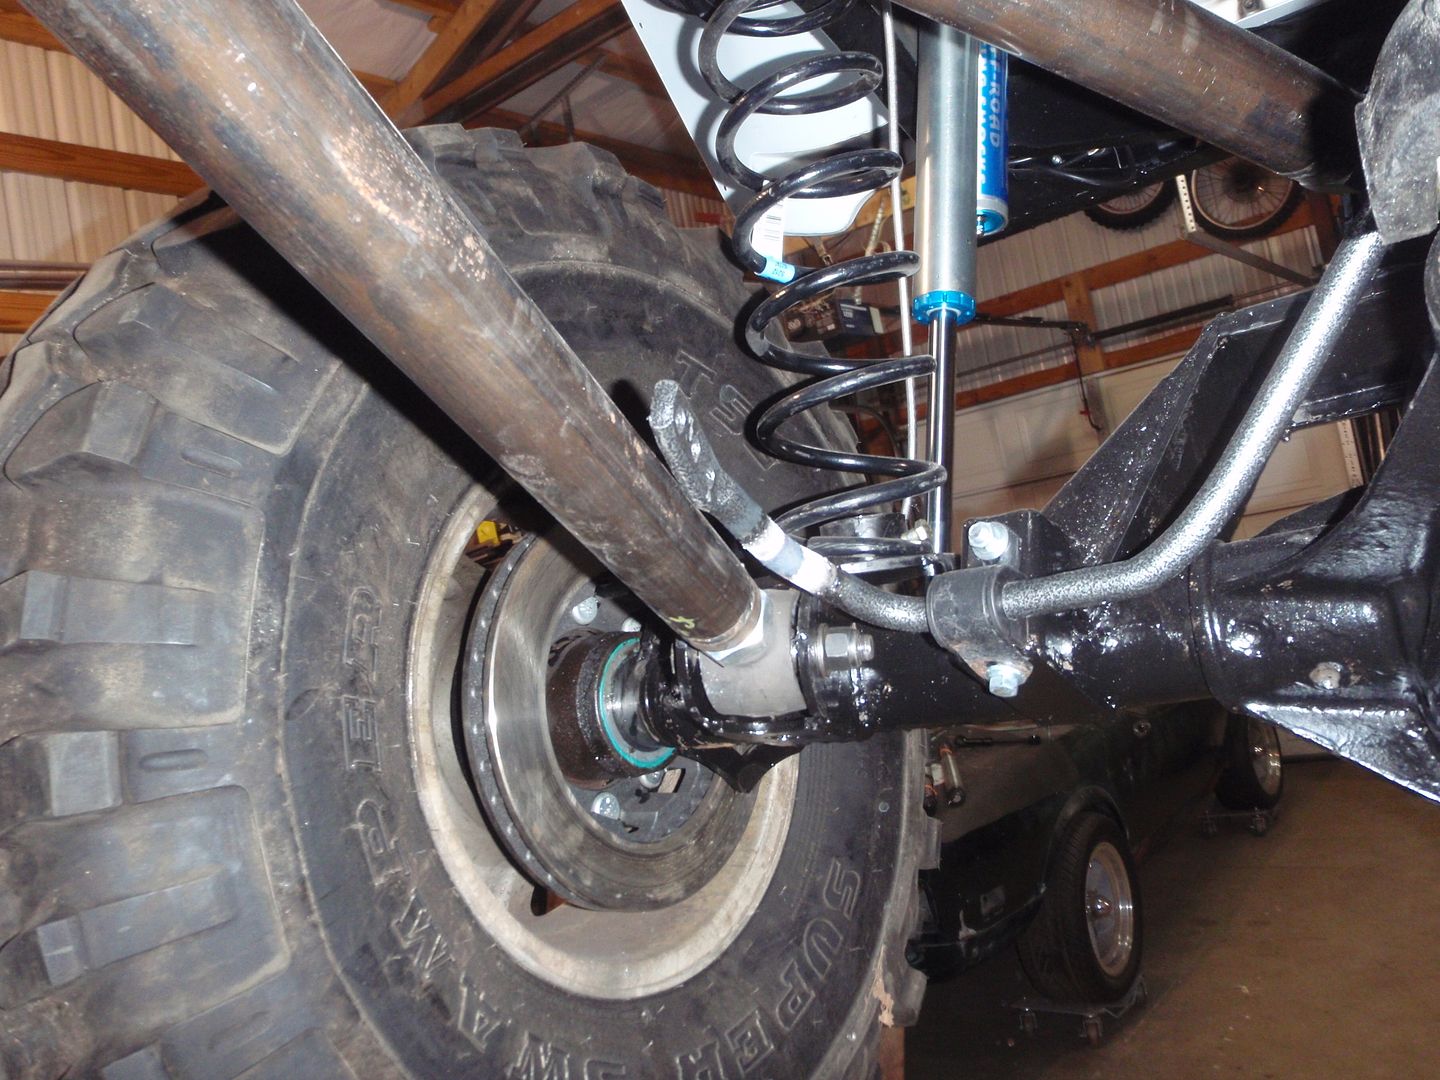
front, I'm not happy with this. because of the angle of the steering cross shaft, the panhard bar needs to parallel it


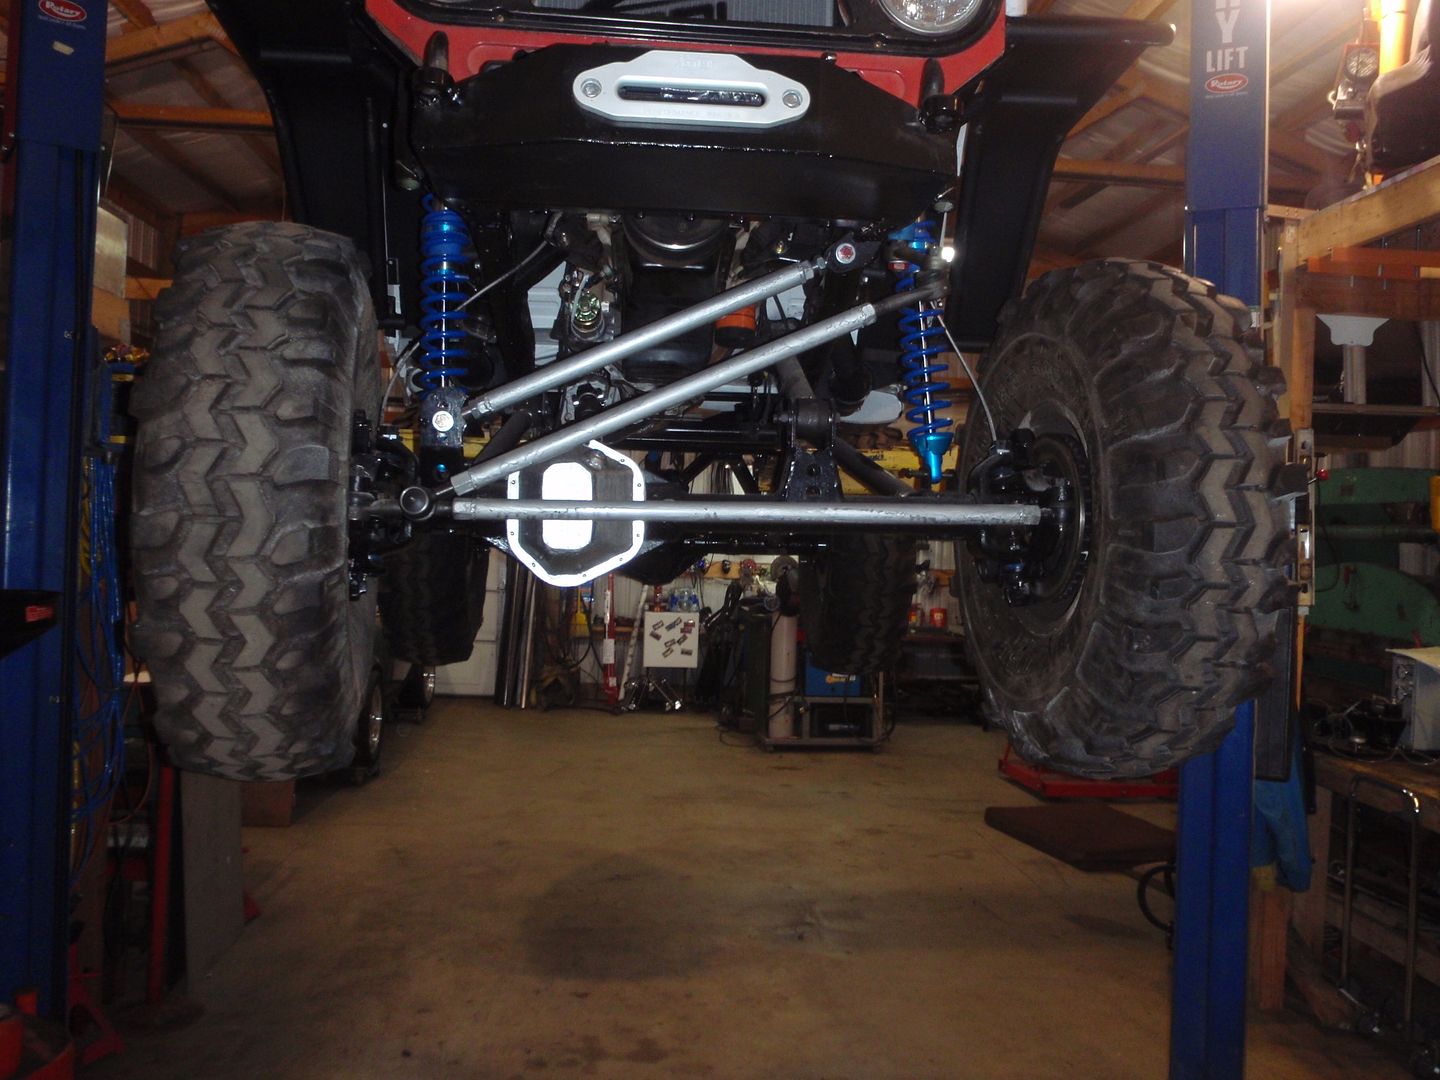
the problem is the front axle will move left as the suspension drops. It will feel weird, but it could be quite an adventure if I was jumping sand dunes with it like this.... the issue was/is that it doesn't seem there are many drop steering arms for the Scout 2 box. I've found one that might work, but I think, before I spend the dollars, I will bend my original one to 4" drop and see what I see. I'll have to extend the frame mount down to get the panhard parallel with it... if it works, I may either simply bend the part I have now (which requires sand and careful cooling) or buy the "right one" though the "right" one may not be long enough.... ah well, if it were easy, it'd be on pirate.

What do you think, Speedy?

in other news, the notch seems fine except I need to do a bit of clearancing at the transmission


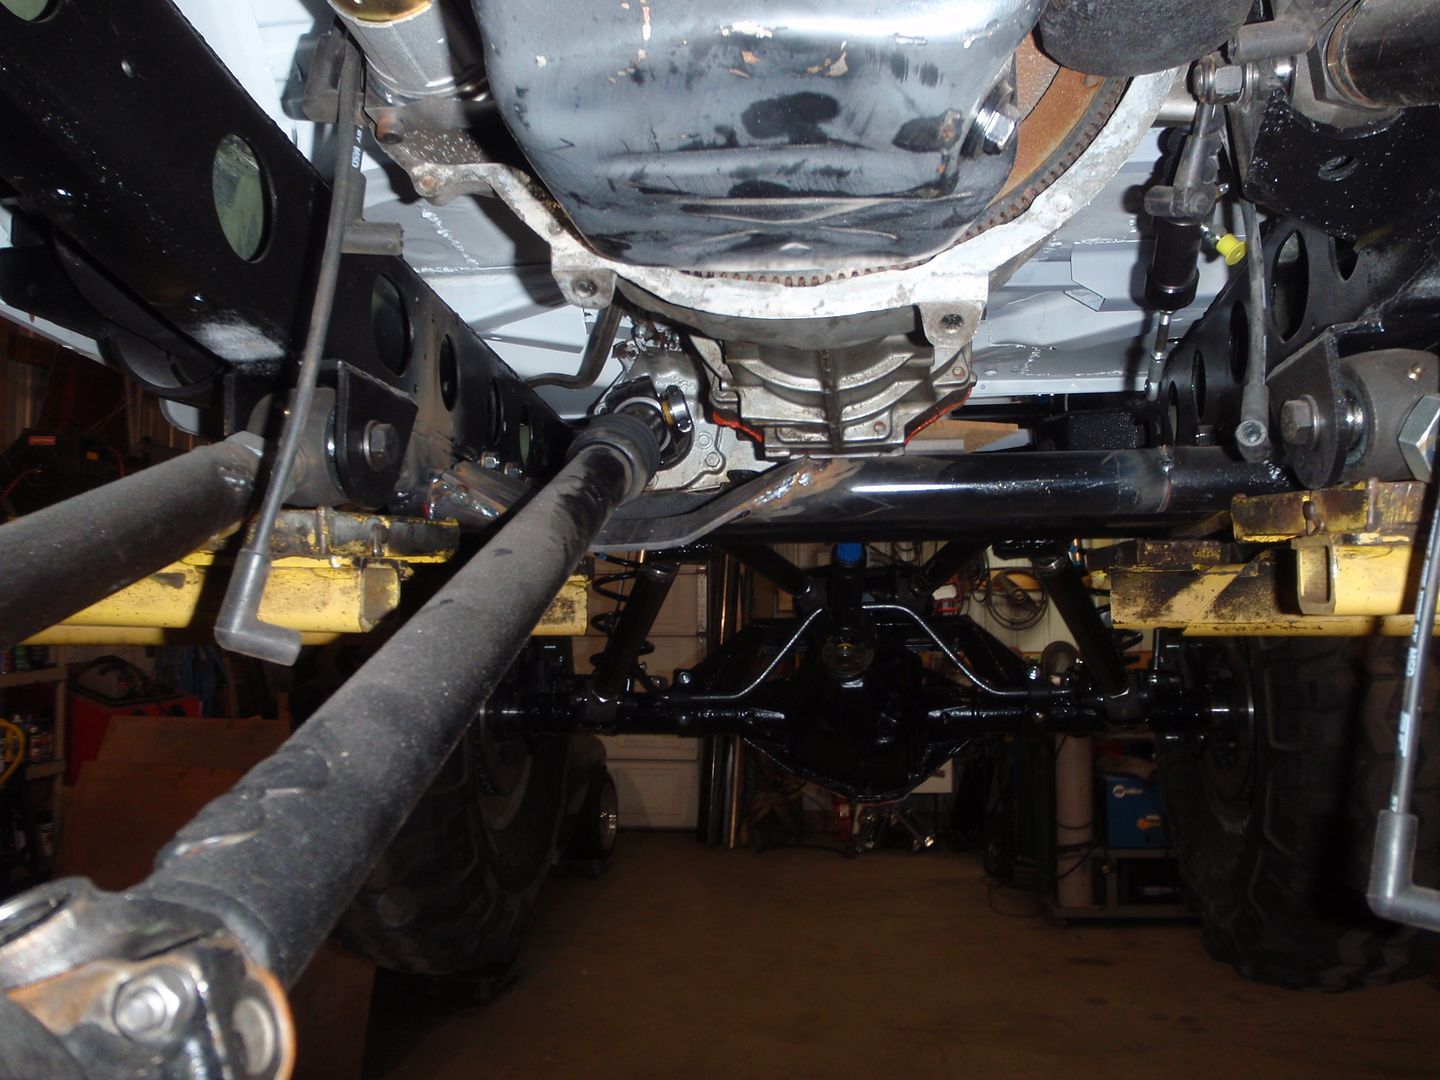
and the only thing I really got forward movement on was this


and that was more of a sideways movement


I spent the day learning how to better save people who do stupid things.... not sure why I did that, but it's what got in the way of doing more on this...
 

SuperBuickGuy

Well-Known Member
Messages
3,403
Location
Woodinville, WA
that sounds like a fun group... around here I get "why did you build it rather then buy a Jeep?"
but it does bring up a quandary - what if you started new, then knocked most of the pieces off (or as I like to say "beat the mall out of it")? :)
 

SuperBuickGuy

Well-Known Member
Messages
3,403
Location
Woodinville, WA
it's been a pretty busy week that has interfered with working on this.... first, started on brake lines


then, to clear a space, a rotisserie


tomorrow is going to be more NFJS but hopefully I'll get the hour or two to finish that....
 

SuperBuickGuy

Well-Known Member
Messages
3,403
Location
Woodinville, WA
back to the rotisserie


went to my 'local' wrecking yard today and got two things that wouldn't work
first was this


the google rumor was there was interchange on the ac pump pulley... there wasn't, but there is an option - buy one from a big-rig so it's on order

the other bit was a cable I didn't have .... and don't need.... dang it - but now I realize I need to buy a different distributor... ugh


simple, yet not elegant at all :)


SuperBuickGuy

Well-Known Member
Messages
3,403
Location
Woodinville, WA
hole filling

if you look carefully, you'll see I got hole-fill-happy and filled two too many holes (brake booster).... ah well I still need to deal with the divot so I'll solve that issue as the same time


more colander holes
 

SuperBuickGuy

Well-Known Member
Messages
3,403
Location
Woodinville, WA
now we're to the stage of the project where it really doesn't look like much is happening because all that's really happening is bodywork (which may explain my mood).

last light installed


got parts today


they even work - hallelujah


mud

lots of mud


​oh well, it'll be purdy when it's done...
 

SuperBuickGuy

Well-Known Member
Messages
3,403
Location
Woodinville, WA
got a bit further


new vent tube


test fit


and a skim coat to try to keep this sealed


and a bit more body work while I'm at it


and really sealed the former vent hole to keep water out of filtering into the new box


SuperBuickGuy

Well-Known Member
Messages
3,403
Location
Woodinville, WA
so how do I close that panel I've just created? I'm thinking of screwing the panel under the dash pads.... this picture it's easy to see


the three holes on top and bottom are for fastening the dash pads - I would use those holes to simply put a panel over the hole. The idea is it makes the engine's computer, switch panel, and start switches a lot harder to access thus making the vehicle a bit more theft proof. I could even be snazzy and make it out of stainless or machine-brushed aluminum, heck, or wood... or do I put it on a hinge? if I do that, I could simply make it a false panel which covers the stereo, radio and switches. access would simply be by turning on an ignition switch or have some kind of proximity sensor (and yes, more electronics on a vehicle that will see water.... makes the idea of a panel even more of a good idea)

There won't be heater controls in the panel... all of that, and by all I mean, an on-off cable to allow water through the heater system and the little knob on the box to force air up to the defroster) will be on the heater box.

thoughts? other ideas? at this point I'm going to frame the hole and carry on with lining and painting since in either case it's a bolt-on deal and I can do it last.
 

SuperBuickGuy

Well-Known Member
Messages
3,403
Location
Woodinville, WA
it can still be towed away because the differential and the transmission can be shifted with the engine off. Also the steering column doesn't lock

As for the batteries, those are probably going in the very back under the floor so they'd be tough to get to

a bit more done tonight
the vent is gone.. forever


and the electronics cabinet is installed


you can't see much of the top or the bottom because of the pads, but figured I'd make it flat while it's easy


and in that same vein, I had extra mud so I filled a hole that no one will see but was bothering me.
 

SuperBuickGuy

Well-Known Member
Messages
3,403
Location
Woodinville, WA
so the frightening bit.... what am I going to do about the dash pad? it didn't come with the purchase price (the lower ones did, fortunately) and my fear is between the roll cage and the dash mods that a 'stock' one won't work. It's okay on one level because I really need to put a grab bar on the dash and incorporating one in now would be pretty cake.... but still, I think I backed myself into building a custom one - which is really easy except for the grab bar and the eyebrow over the instrument panel (which still fits, I check ;))

I wonder if a later pad would work?.... I want to have the tub ready to shoot primer on Sunday, so I need to finish the metal work... and yes, that even means if all goes well, I'll paint the tub Sunday night.
 

SuperBuickGuy

Well-Known Member
Messages
3,403
Location
Woodinville, WA
I think this is a neat idea - not the Heep, silly, the step.

SEMA-jeeps19.JPG
 

SuperBuickGuy

Well-Known Member
Messages
3,403
Location
Woodinville, WA
So, onward.
Tonight I did several things, I'll start at the second bit....
these, http://www.rockcrawler.com/techreports/york_mod/index.asp are awesome instructions. they are, also, my second printing. I started on the air compressor
and got here


and realized the instructions I printed out had blank pages (the last 2 of 4)
so I slogged back up to my house to reprint the instructions. What I didn't find was my original site, but google took me to another site that had pages 3 and 4. On page 3 were these words "okay, now the simple way to do this" the prior instructions included disassembly, saving of a part that's irreplaceable, drilling and tapping a hole, and running a plug in.

page 3 said "well, if you go to the top of the compressor, you can do this same thing in 10 minutes... uh score!

you take the top off (you do have a 12 point 5/16, right?)


and you can clearly see in the instructions to cap the hole on the leftmost side.... as you can see, also, there isn't a hole to plug on the leftmost side... it's on the right


no worries, it's now plugged with a self-tapping screw and a bit of silicone.


then I found the problem


As you can clearly see, the part is a Jeep part. So as I'm doing the rest, I'm pondering and realize that the transmission, transfer case, wiring for the TBI, and the air compressor are all Jeep parts. In addition, as you well know, the flares on the back are a TJ part.... which makes this vehicle far more Jeep then Toyota. Heck, even the dana 44 front axle is a cousin of what's in Jeeps.....

But I digress, there's also Freightliner parts on it
the serpentine pulley.... yep, from a big rig


I had a lot of pondering time because I hate rework and grinding.... and both happened next.
this


the transmission mount... I've got a final solution - which looks a lot like my first "solution".... cause it is lol
which brings me to what I did first.... raised bondo dust (which might explain my rambling nature tonight)


lower pad fits correctly - though a quandry.... what is the hole on the right side of the glove box for? and if the answer is nothing.... should I plug it or use it for something? like...?


and last but not least... clean with holes plugged


and what stopped me was the need to keep the shop at 70 degrees for 24 hours... not sure how that's going to happen...
 

SuperBuickGuy

Well-Known Member
Messages
3,403
Location
Woodinville, WA
Honestly, I don't really have a build plan for it. Part of me wants to screw together one of my countless 350 chevy motors, slap some vortec heads on it, efi and call it a day. On the other hand, I think a 12v cummins diesel would be pretty trick in this thing or a 4bt or a Isuzu diesel.... I have a 5 speed aisin transmission from a Colorado, so I might use that behind this - that would limit power and torque to 200/300 respectively.
For suspension. either I'll do a spring over, spring reversal and power steering addition, or I'll do a 3 bar front 3 bar rear with disconnectable sway bars and coil over springs....

So there that is, either stupid simple or stupid expensive simple.
Exterior... winch, 38" tires some protection like sliders... but nothing to detract from the simple lines of the FJ
Interior - suspended seats, some dynamat and indoor outdoor carpet and a full cage.


But as I only have the raw material - I am listening to what others think... might ignore you, but oth, you might come up with the most awesome idea ever. Lots of my builds wouldn't have happened without crowd suggestions...

Tons of fab work in this. Since a lot of this is custom how much of your original plans for this build have changed?

not much changed (that is my first post), but got a bit more elaborate. with the dakota digital dash and fuel injection. I also wasn't planning one tons or widening the track - but the deal came along and I took it. with that said, this is my 8th fj40; and it's the one that I'm doing all that I wanted to do on the prior 7 with the addition of being a Search and Rescue rig (wasn't in SAR in 6 of the 7 - and when I was in SAR, I owned my 59 and it was solely transportation to Squaw Valley where I worked - if SAR happened, we used their equipment).
 

SuperBuickGuy

Well-Known Member
Messages
3,403
Location
Woodinville, WA
so painting happened... and now I'm waiting for paint to dry....
holes plugged with golf tees


taped


and start spraying the sound deadener/insulation


just a stock toyota fj40, nothing to see here :)


underside will get a undercoating, then tape comes off and the entire body gets primered...


but that's as far as I can go on this for a bit... needs to dry... but I'll get onto the under-stuff (hopefully) in a bit.


SuperBuickGuy

Well-Known Member
Messages
3,403
Location
Woodinville, WA
transmission mount


the paint dried to an almost chalky consistency. Once I get the undercoating, I'll apply then do the top coating for the sound deadener.... my hope is it is durable enough and reduces the need to use the 2nd heater
 

SuperBuickGuy

Well-Known Member
Messages
3,403
Location
Woodinville, WA
alrighty, other then doing a full drop suspension test when the frame slid off the lift... it was an uneventful night (it missed me)


pulled the transmission and transfer case to finish welding and paint the various bits that needed such


and put it back together


this is after the drop - the only damage was the mufflers caught the lift arms and popped out. I was not thrilled with the ball-and-socket design and this just confirmed it. I'll do straight, flat panels and blow-proof gaskets between...

and the next pick of things to do... air compressor


I know it seems like not a lot, but getting the plate to line up and get to this point took a bit of time


SuperBuickGuy

Well-Known Member
Messages
3,403
Location
Woodinville, WA
as everyone knows, I tend to bounce around on what I'm working on.... tonight was a classic case of this
oil pan damage


bfh and block of wood and things are looking better


I don't think there was a hole, but I brazed it to be certain


then bent up a shield (planned to do this before the drop test)


paint


brake line brackets welded


the start of clamps


now in my defense, I was planning on finishing the reservoir clamps - but realized I don't have any stainless strap.... but I do have stainless for the skid plate... yeah, you guessed it

time to yack out the skid plate


anyway, tomorrow I'll continue with more of the same - it's a day off (thank you Veterans!!!!)
 

SuperBuickGuy

Well-Known Member
Messages
3,403
Location
Woodinville, WA
got one of two batteries today - which is good, it means I can start on the battery box.... but first, decide what to do....


I like this position because it will have a flat plate that is even with the bottom of the bumper.... nothing hanging down and access to it will be through the floor

oil pan is fixed, skid plated and reinstalled


and one skid plate is in place, eventually I'll replace the bolts with button head bolts
 
Top