ChihuahuaRide
Active Member
- Messages
- 27
- Location
- Malaysia, Borneo
Greetings All,
As promise during the fresh meat intro I did earlier, I am posting photos of my ride prior upgrade prep on a road trip early this year, all in wonderful reliable stock setup except for the tires using 32" Simex Extreme Treckker II on 16" stock rims, this setup survived the Borneo Safari 2012 trip without much damaged:
View attachment 12652View attachment 12651
The ride being reworked at a friend shop with Thor Parts bumper being installed on the shop lift jack:
As last year Borneo Safari 2012 was my 1st year and introduction trip to some very hardcore off-road adventure on the expedition group trip and during the journey the wish list for this year vehicle prep was in the making and by the time when the trip was finish it was decided that this year prep will be focusing on upgrade of all stock area components with reliable proven after-market upgraded parts that can withstand the torture of wet & dry hardcore off-road driving without changing much of the H3 factory design and geometry in mind, I have made the following upgrade:
1. Super Flow electric fans for radiator and AC condenser to have better cooling on the 3.7L L5 motor and also bringing the AC efficiency up.
2. Long Ranger 81L fuel tank add on to extend vehicle range without refill requirements for 500KM above.
3. Super-Pro steering rack bushing upgrade to reduce steering arm play and wear during hard off-road driving.
4. Skylone Pre-Filter head to improved air flow and also reduce debris for intake air.
5. Front & Rear Thor Parts bumpers to improved off-road driving approach angle and vehicle clearance.
6. Bigger Timbrim Bum Stops replacing worn out stock ones for front and rear.
7. Bilstrein 5100 Series Shocks upgrade with 2" Front lift (23 1/2" Height) and 3' Rear lift setup (Did not measure the center to wheel barrel line yet).
8. Extended Rear Spring Pack Shackles installation.
9. Tuff County Add A Spring for rear spring pack to improved load carrying capabilities and also assist on lift setup.
10. Old Man Emu Torsion Bar upgrade with re-index Tuff County torsion bar key installation for front lift setup.
11. Disc Brake Australia (DBA) Rotor front and rear upgrade with 4000 series slotted and grooved rotor to increase stopping power couple with Bendix ceramic high performance brake pads.
12. Self fabrication of under carrier skid plate for front bumper joining to axle cross-member area and also long ranger tank bottom protection.
13. JAGS performance large heat shink double pass type transmission oil cooler installation.
14. Run Cool 1 piece, Front hood louvers installation.
15. 35" Simex Extreme Treckker II tires replacing previous 32" tires.
16. Re-wiring the winch eletrical system to have control on interior dash and also plug in remote control on the front grill area.
17. Extended after-market adjustable front and rear sway bar linkage upgrade to ensure limits on angular movement of front and rear setup to reliable reported limits possible.
18. OEM Rock Slider Bar Installation.
Photo's of my ride nearly finish sitting at the friend shop awaiting installation of some final touch items by this weekend (The hood louver, adjustable sway bar link, heat shink trans-oil cooler and under carrier skid plate front and long ranger tank under protection)
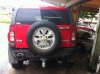
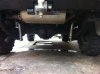
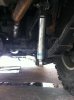
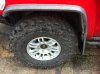
The final outcome of this H3 prep for this year with lots of uphill off-road trail will be off-road tested next week prior the starting of the trip this month end and I will post more photo's of the details of the build by then. Anyone like to know more on this coming 24 year running off-road event in Borneo can visit:
http://www.borneosafari.com.my/public/default.asp
I was expecting another H3 to participate in this year trip but looks like the owner properly is not prepare to wheel his drive to the extreme that I was in a shock to experience and go thru as a 1st timer joining it. What I can say for the H3 after having it for more then a year now is it's all worthy of the advert HUMMER " LIKE NOTING ELSE " slogan. Again I will along with all the heavy mod Toyota's LandCruiser & Other Japanese make for the fun of it. It's an adventure driving the H3 itself daily.
As promise during the fresh meat intro I did earlier, I am posting photos of my ride prior upgrade prep on a road trip early this year, all in wonderful reliable stock setup except for the tires using 32" Simex Extreme Treckker II on 16" stock rims, this setup survived the Borneo Safari 2012 trip without much damaged:
View attachment 12652View attachment 12651
The ride being reworked at a friend shop with Thor Parts bumper being installed on the shop lift jack:
As last year Borneo Safari 2012 was my 1st year and introduction trip to some very hardcore off-road adventure on the expedition group trip and during the journey the wish list for this year vehicle prep was in the making and by the time when the trip was finish it was decided that this year prep will be focusing on upgrade of all stock area components with reliable proven after-market upgraded parts that can withstand the torture of wet & dry hardcore off-road driving without changing much of the H3 factory design and geometry in mind, I have made the following upgrade:
1. Super Flow electric fans for radiator and AC condenser to have better cooling on the 3.7L L5 motor and also bringing the AC efficiency up.
2. Long Ranger 81L fuel tank add on to extend vehicle range without refill requirements for 500KM above.
3. Super-Pro steering rack bushing upgrade to reduce steering arm play and wear during hard off-road driving.
4. Skylone Pre-Filter head to improved air flow and also reduce debris for intake air.
5. Front & Rear Thor Parts bumpers to improved off-road driving approach angle and vehicle clearance.
6. Bigger Timbrim Bum Stops replacing worn out stock ones for front and rear.
7. Bilstrein 5100 Series Shocks upgrade with 2" Front lift (23 1/2" Height) and 3' Rear lift setup (Did not measure the center to wheel barrel line yet).
8. Extended Rear Spring Pack Shackles installation.
9. Tuff County Add A Spring for rear spring pack to improved load carrying capabilities and also assist on lift setup.
10. Old Man Emu Torsion Bar upgrade with re-index Tuff County torsion bar key installation for front lift setup.
11. Disc Brake Australia (DBA) Rotor front and rear upgrade with 4000 series slotted and grooved rotor to increase stopping power couple with Bendix ceramic high performance brake pads.
12. Self fabrication of under carrier skid plate for front bumper joining to axle cross-member area and also long ranger tank bottom protection.
13. JAGS performance large heat shink double pass type transmission oil cooler installation.
14. Run Cool 1 piece, Front hood louvers installation.
15. 35" Simex Extreme Treckker II tires replacing previous 32" tires.
16. Re-wiring the winch eletrical system to have control on interior dash and also plug in remote control on the front grill area.
17. Extended after-market adjustable front and rear sway bar linkage upgrade to ensure limits on angular movement of front and rear setup to reliable reported limits possible.
18. OEM Rock Slider Bar Installation.
Photo's of my ride nearly finish sitting at the friend shop awaiting installation of some final touch items by this weekend (The hood louver, adjustable sway bar link, heat shink trans-oil cooler and under carrier skid plate front and long ranger tank under protection)
The final outcome of this H3 prep for this year with lots of uphill off-road trail will be off-road tested next week prior the starting of the trip this month end and I will post more photo's of the details of the build by then. Anyone like to know more on this coming 24 year running off-road event in Borneo can visit:
http://www.borneosafari.com.my/public/default.asp
I was expecting another H3 to participate in this year trip but looks like the owner properly is not prepare to wheel his drive to the extreme that I was in a shock to experience and go thru as a 1st timer joining it. What I can say for the H3 after having it for more then a year now is it's all worthy of the advert HUMMER " LIKE NOTING ELSE " slogan. Again I will along with all the heavy mod Toyota's LandCruiser & Other Japanese make for the fun of it. It's an adventure driving the H3 itself daily.
Last edited: