• Welcome to H4O! For a reduced ad experience, please login or register with the forum.

Hunter Edition H3 Alpha

Hunner

Well-Known Member
Messages
2,334
Location
Arkansas
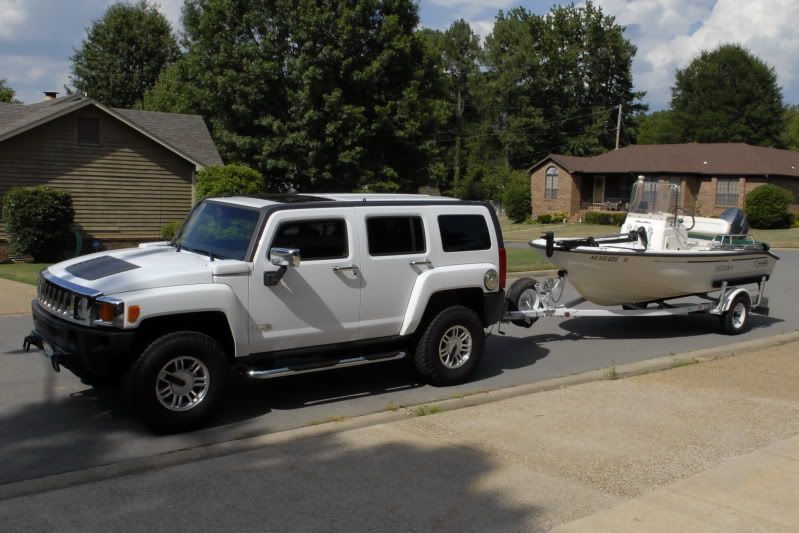
I bought a new H3 in 2006.
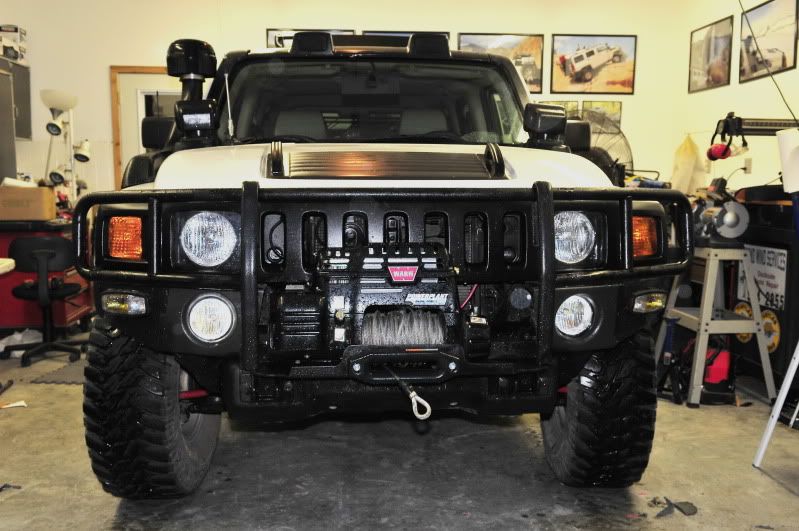
I took a bunch of chrome stuff off.
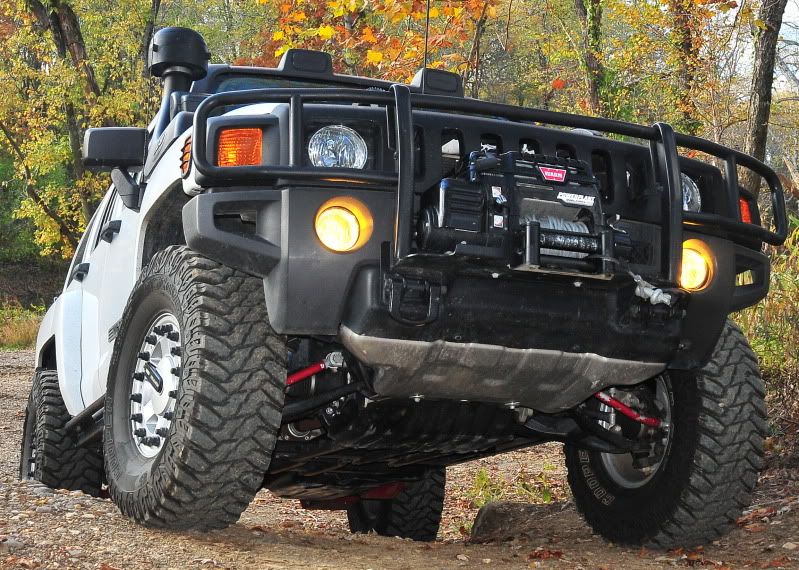
I put on a winch.
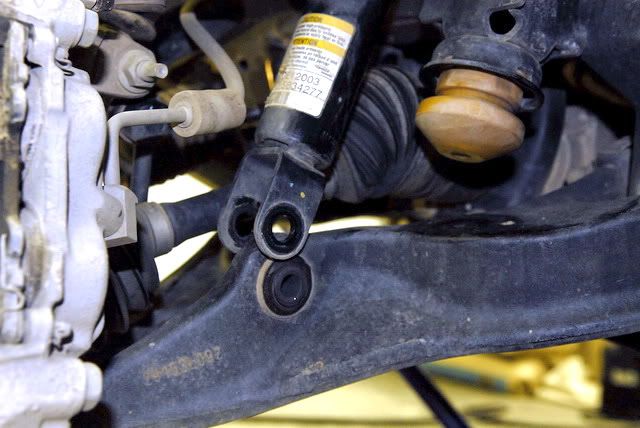
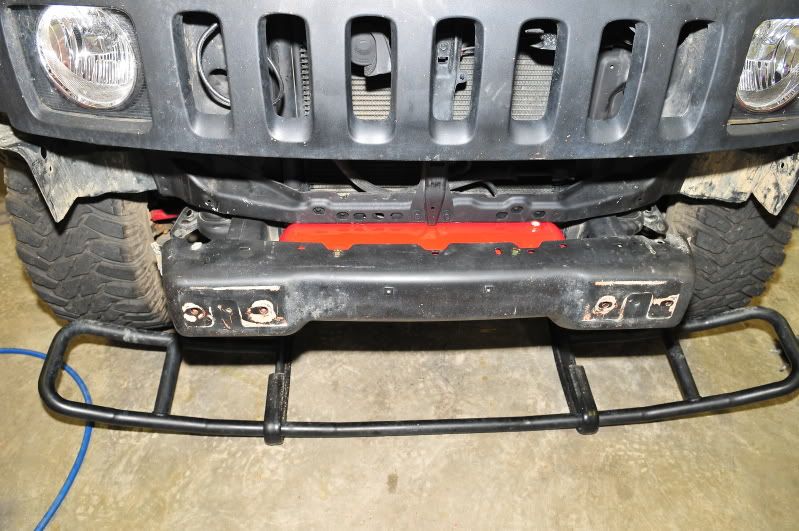
I made some skid plates for the springs.
I went wheeling a lot.
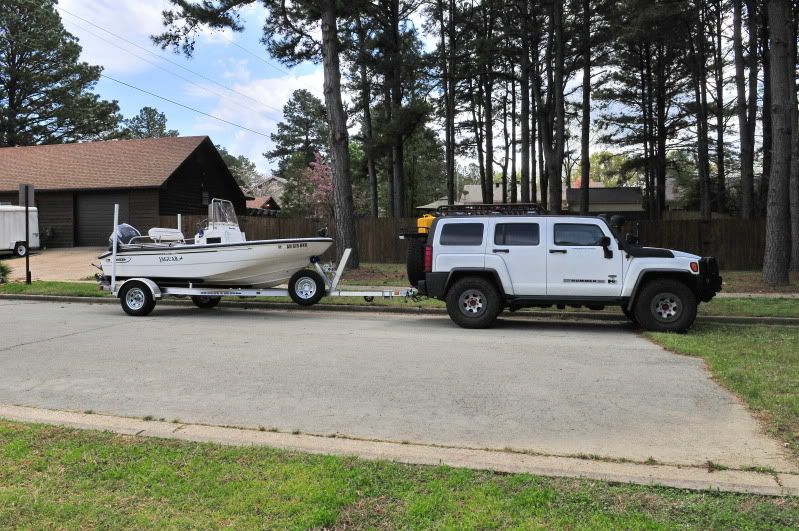
I traded for a new 2008 Alpha lux offroad
It looked a lot like the other one at first.
I took all the stuff off the 06 and put it on the 08.
I added some more stuff
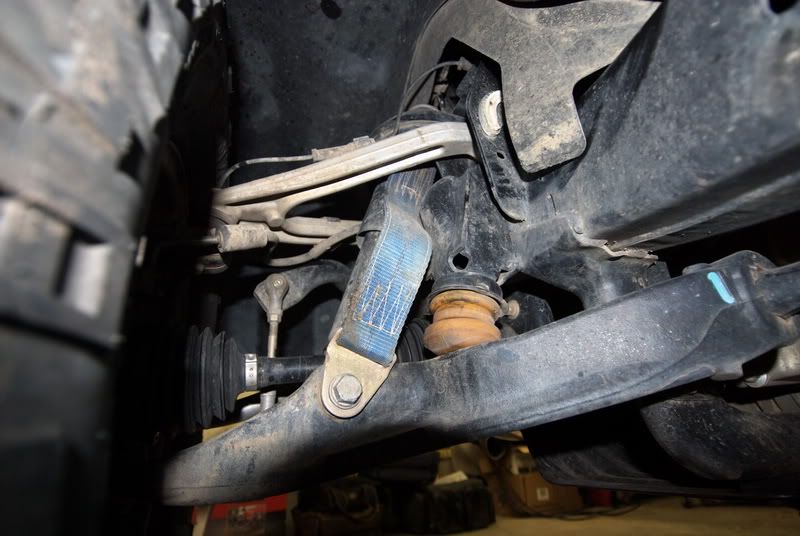
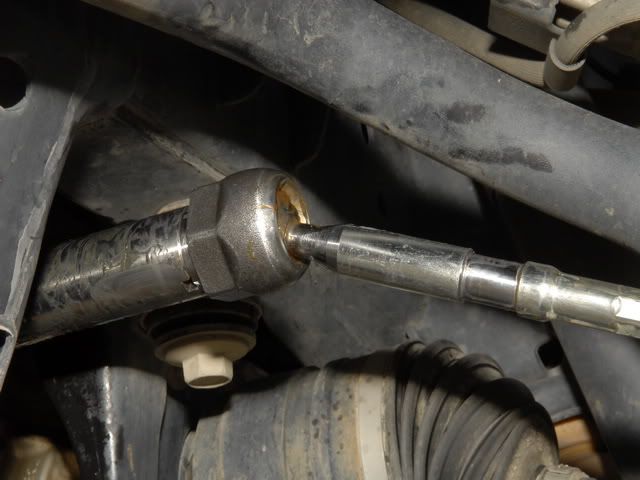
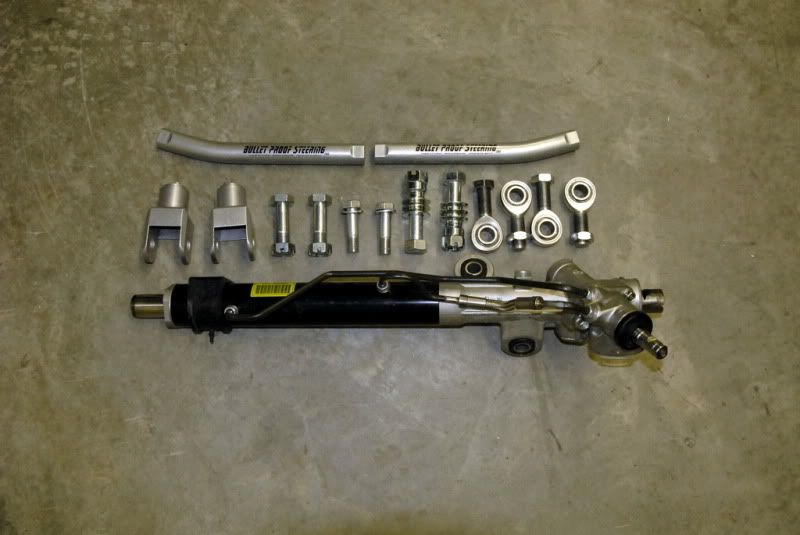
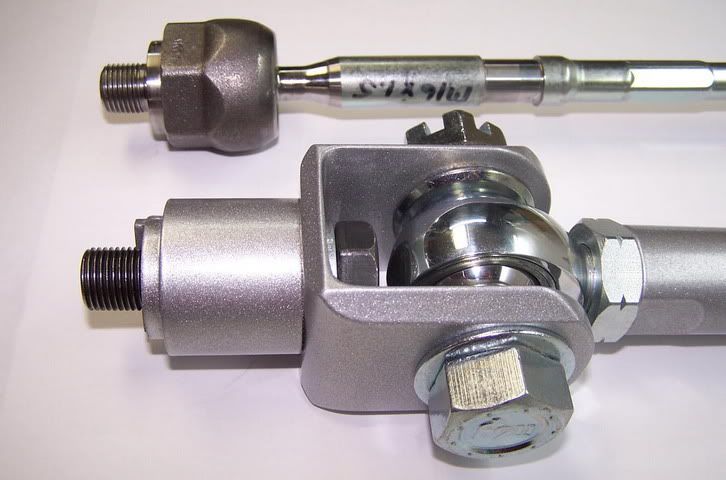
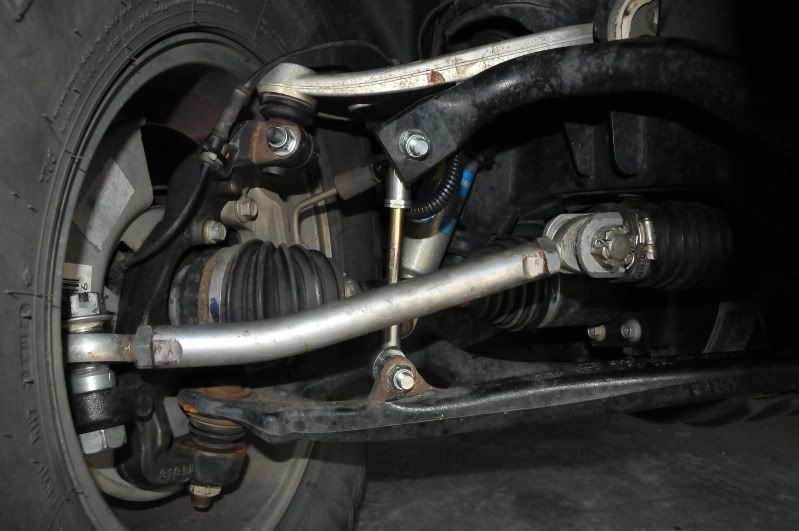
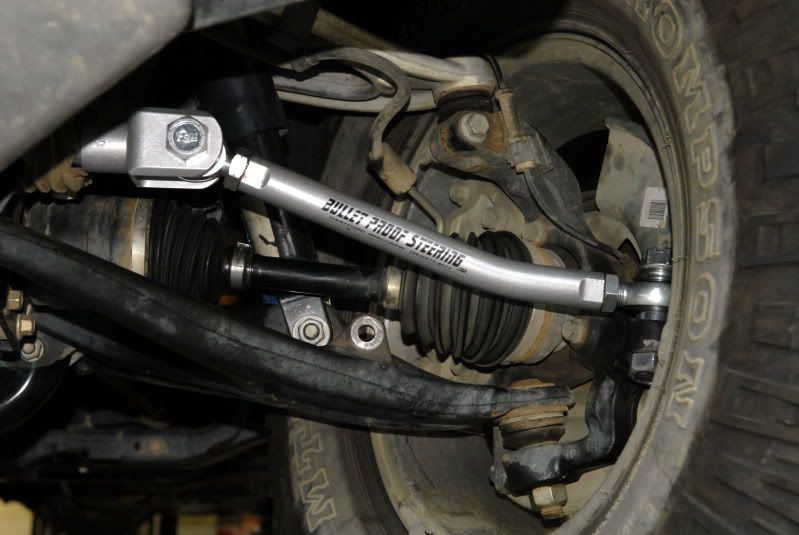
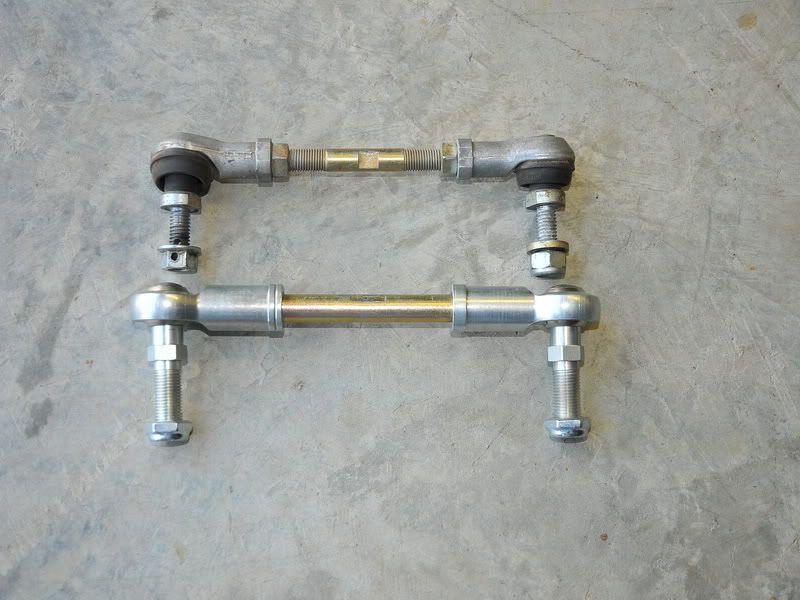
I had some tie rods made just for my H3
I put on some more stuff
I did lots of traveling

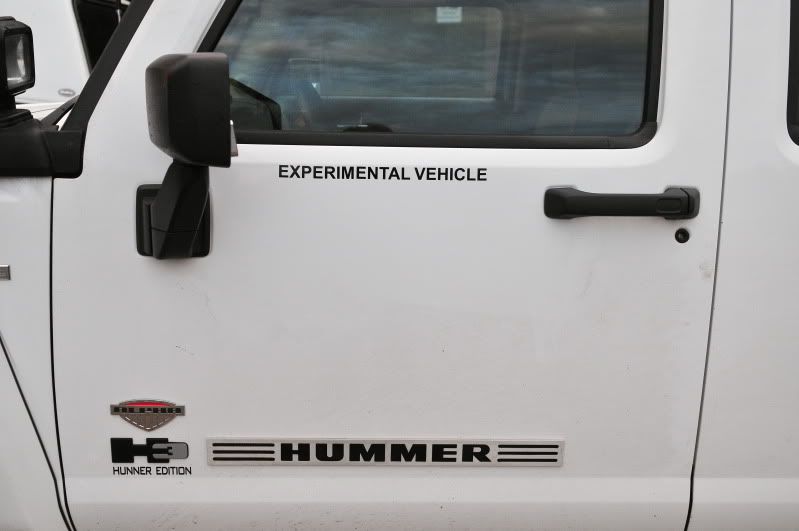
Vehicle 2008 HUMMER H3 Alpha Hunner Edition
Engine Type 8 Cylinder Naturally Aspirated
Vehicle Class Mid-size SUV
Color Snowflage
Mileage 52,000
Price Priceless!!
Purchase Date July 2008
Total Modifications 120+
Total Spent on documented items $9,394.91++ USD

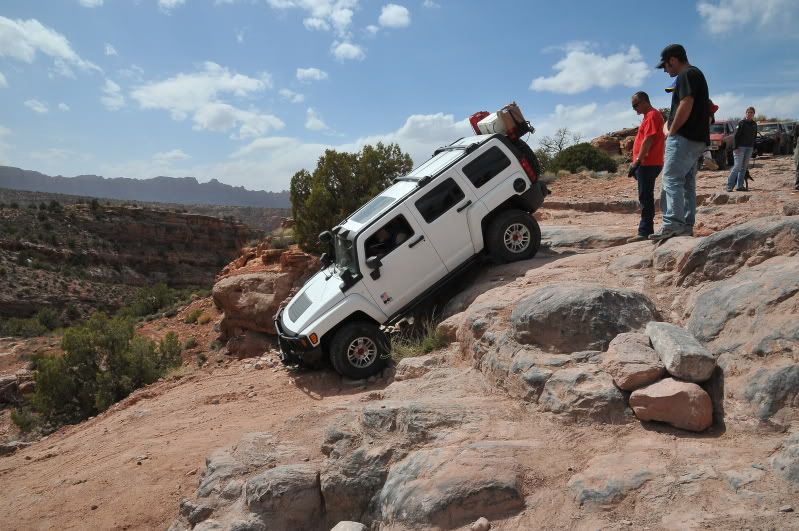
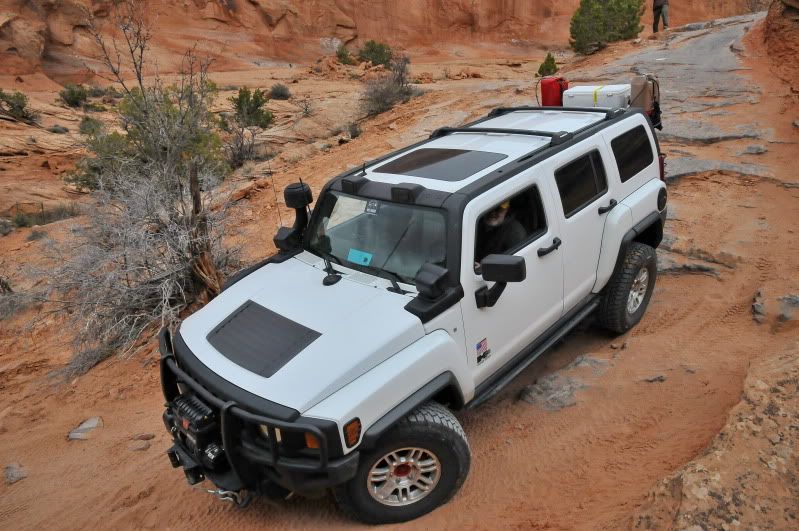
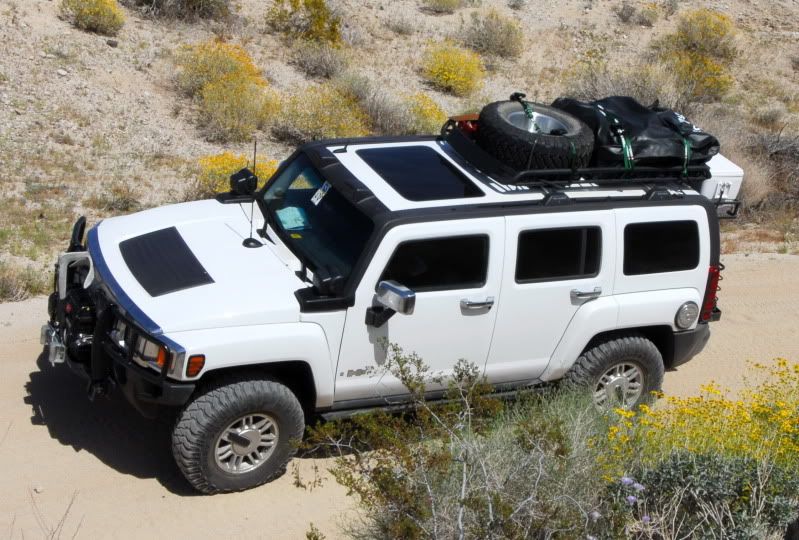
Trip to Moab 2010 loaded up to see what would happen in Expedition mode. 6600 lbs.
DAH_5324.jpg

DAH_5124-1.jpg

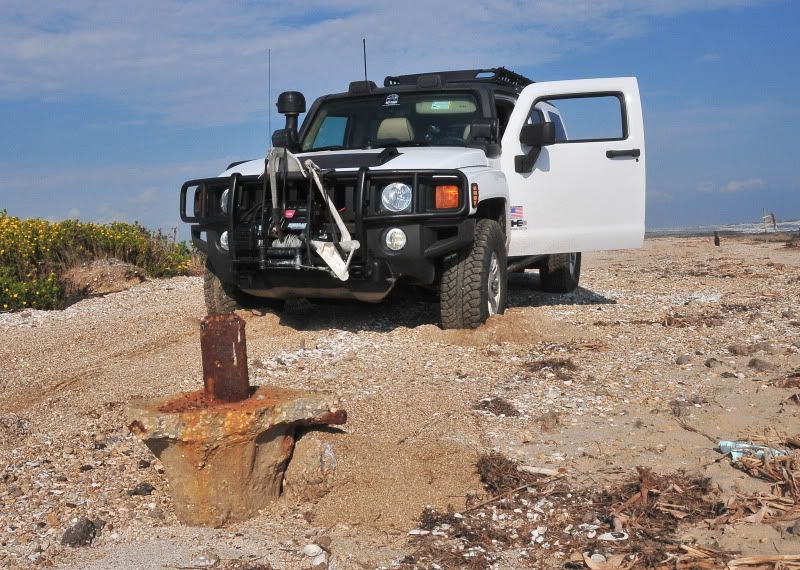
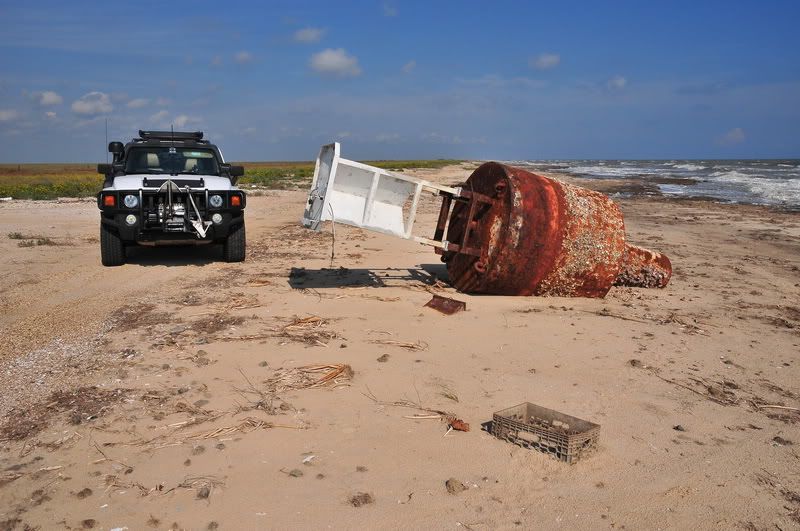
It got sandy on two trips to Hwy 87 beach run in Texas
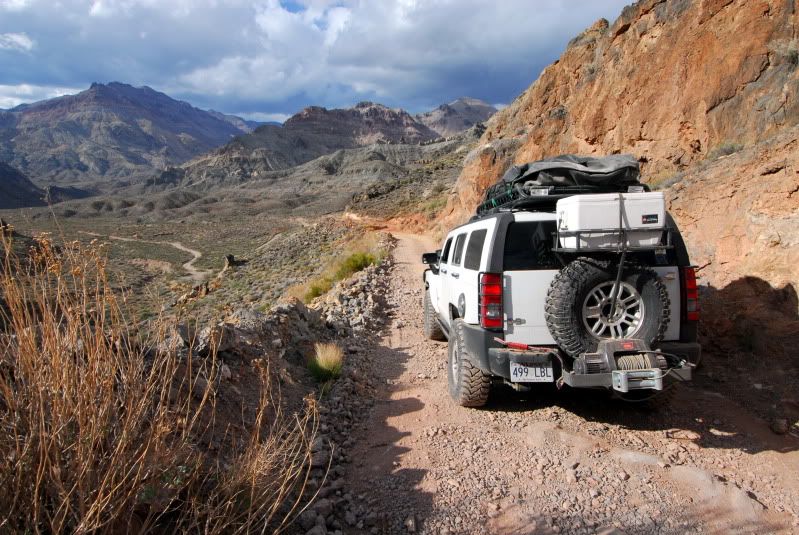
8269.jpg

DAH_8260_resize.jpg

or the Mojave Trail
8707sh.jpg

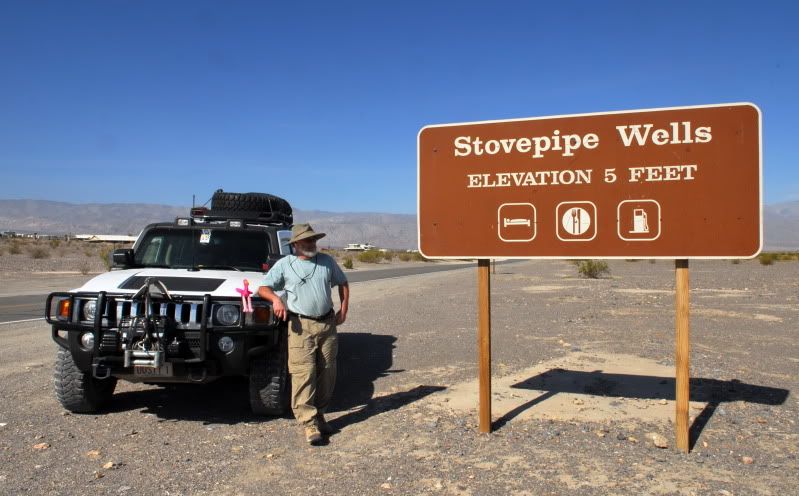
or Death Valley area
9118a.jpg

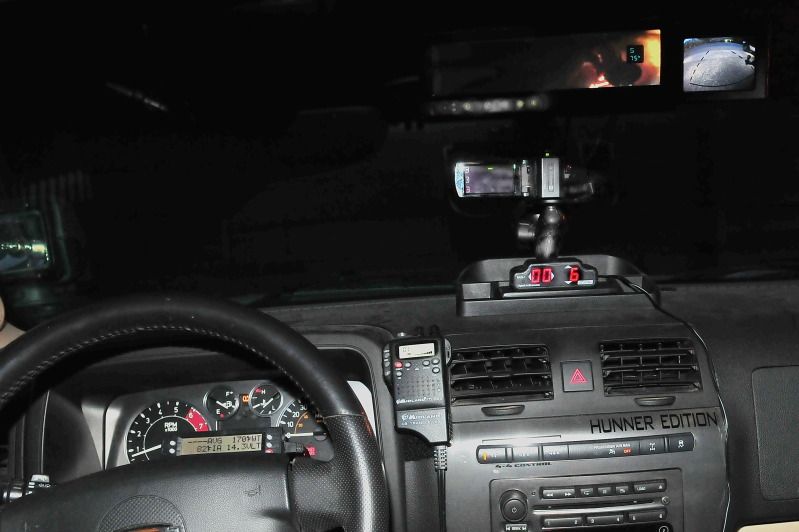
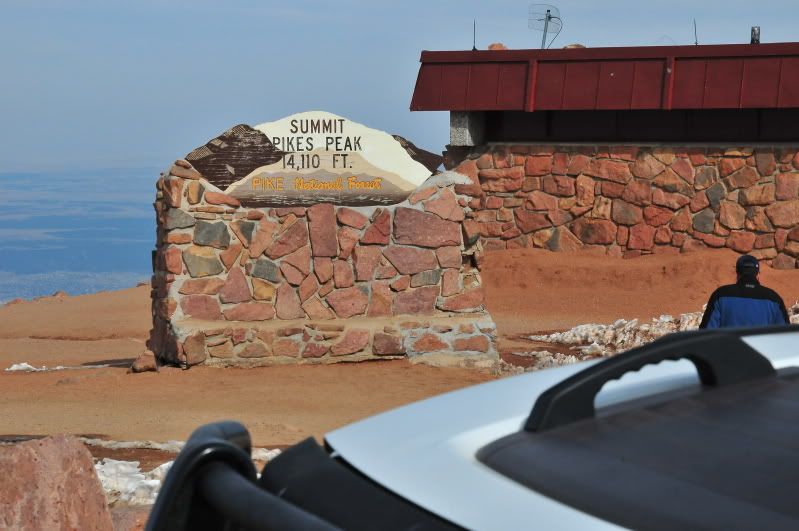
Navigation but can loose GPS in the canyons
DAH_9156sh-1.jpg

Dash toys, Scan gauge, CB/WX, RAD1 inclinometer, dash cam and backup cam on mirror.
7112a_zpsaf1b29db.jpg

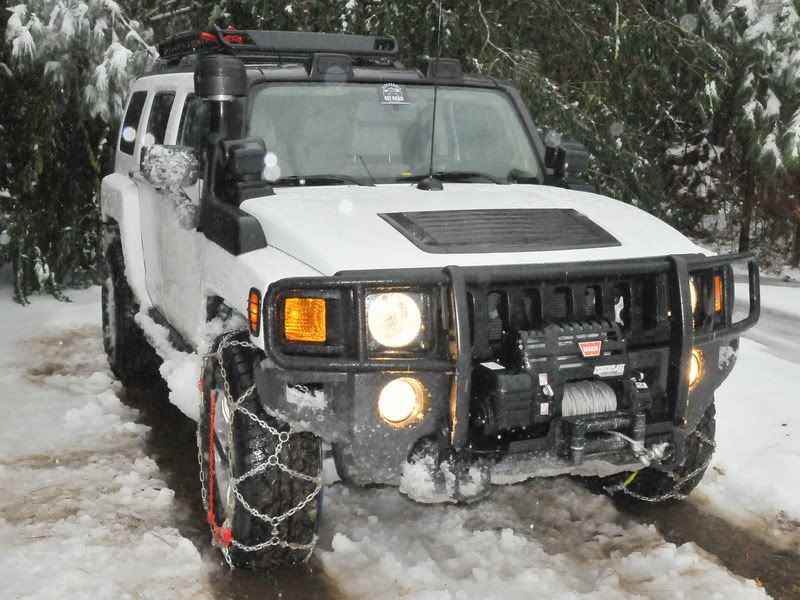
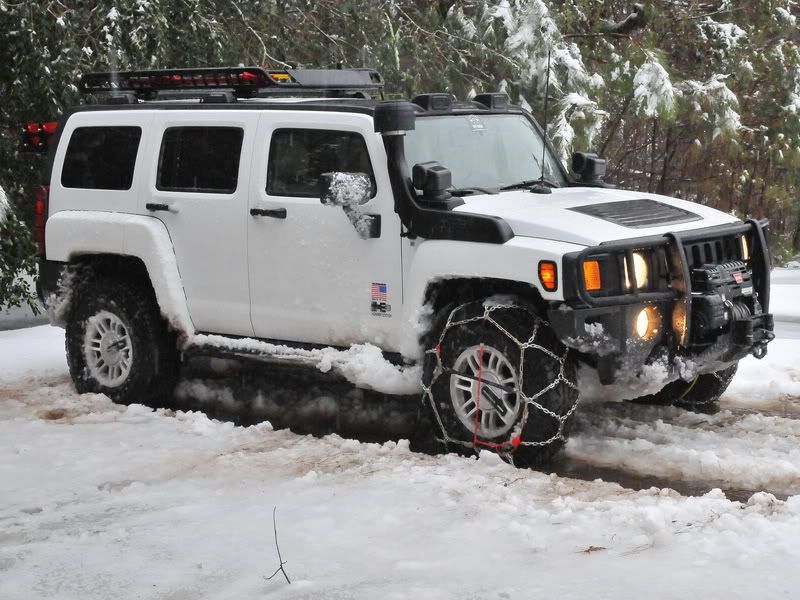
and snow and ice when we get it or I go to it.
e8x64493.jpg

5x4500re.jpg

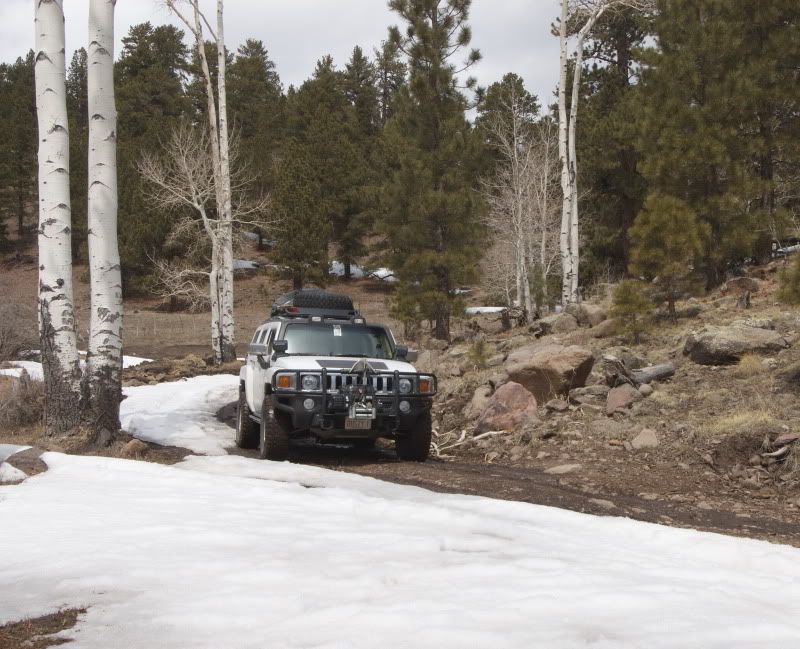
like the mountains around Bryce Canyon
9548.jpg

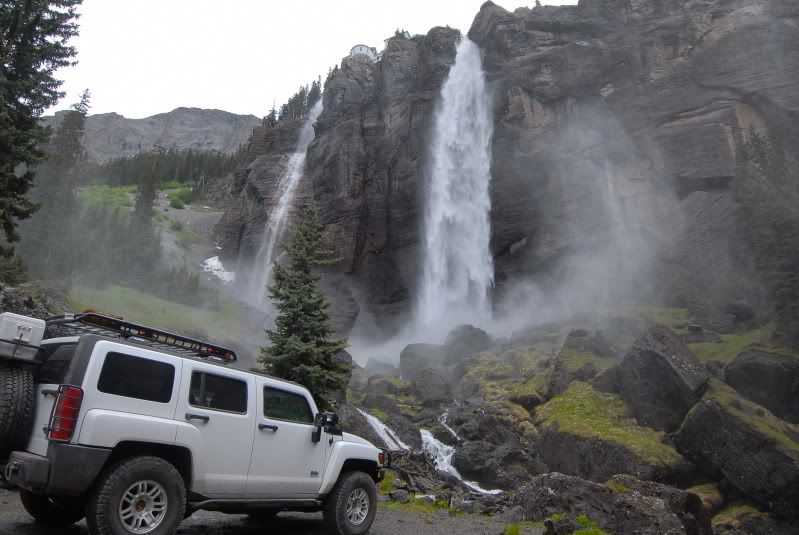
I like scenic runs like Telluride
DAH_1403fx.jpg

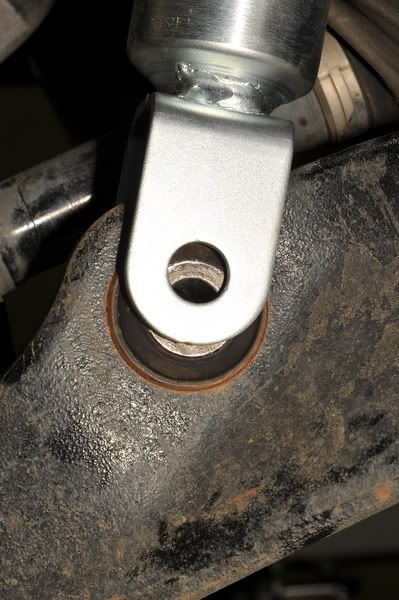
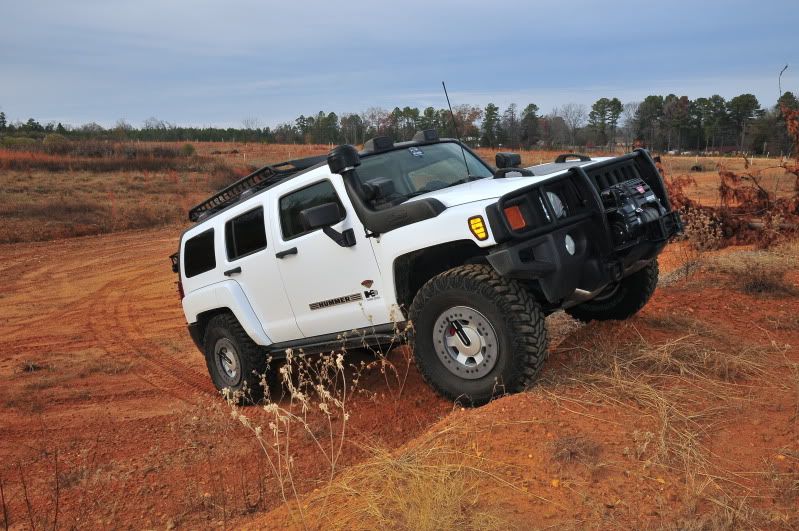
The rock rings I had made to protect the Hutchinson beadlock rim bolts can be fitted several ways.
DAH_8892.jpg

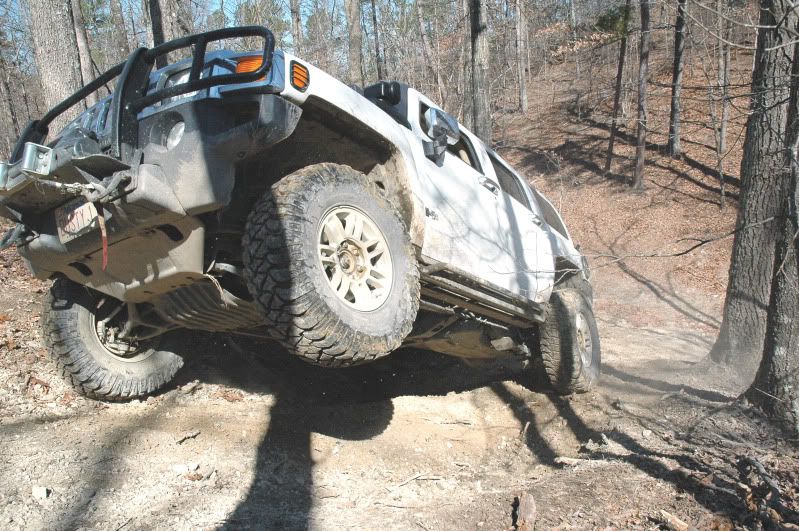
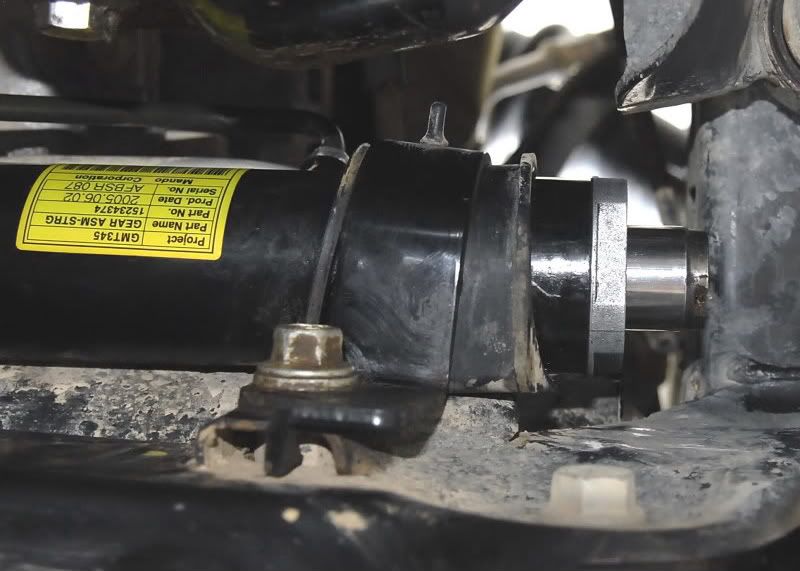
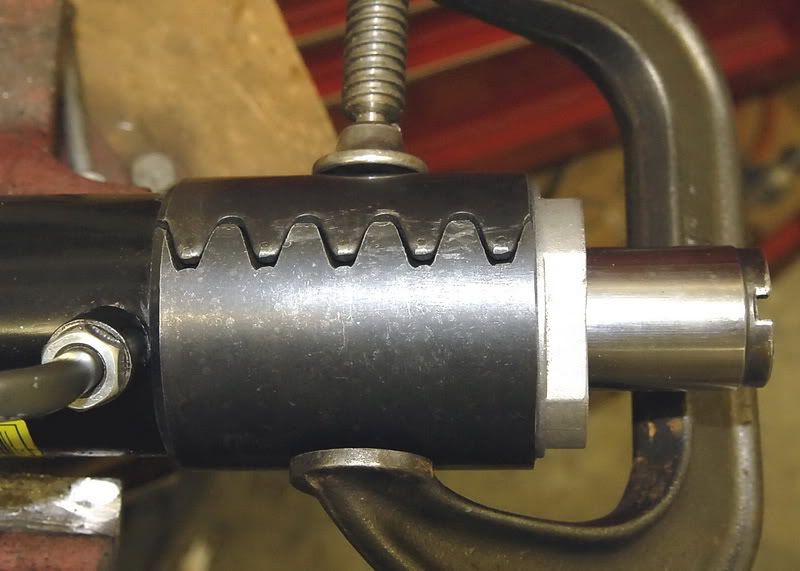
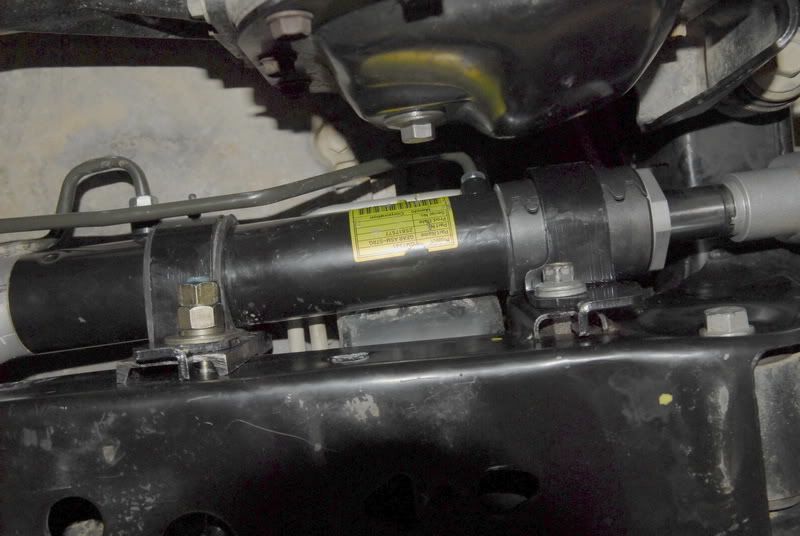
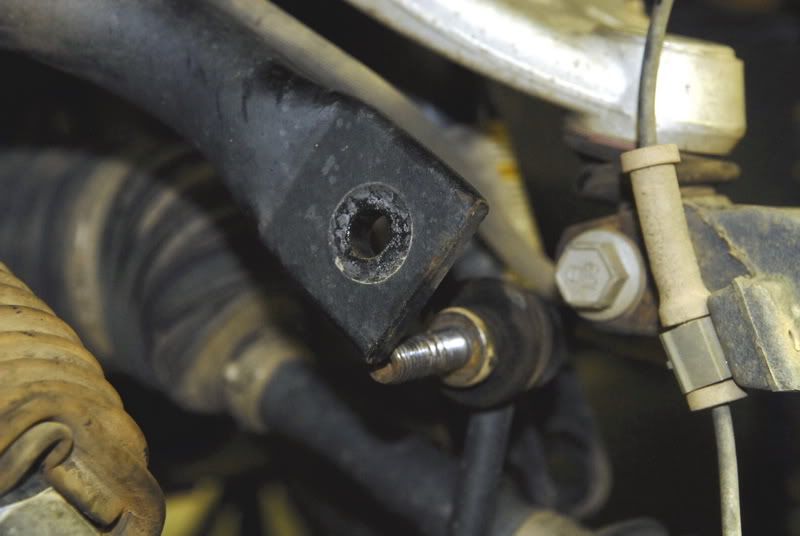
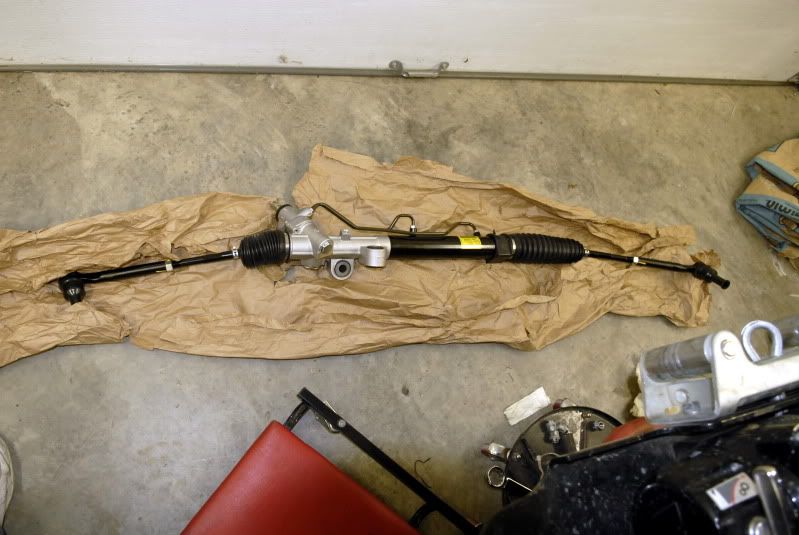
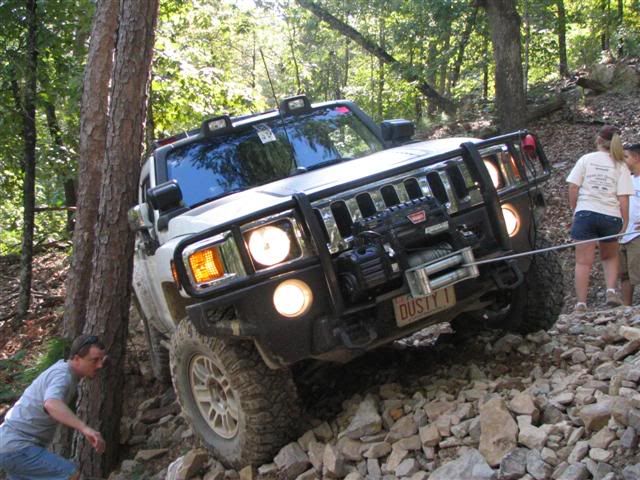
A nice mod is a front and rear winch so you can winch sideways after you break a steering rack before modding that. This was just before going off a deep ravine I did not care to go down. I came over a rise at about 25mph and lost steering. The trees saved me. NO damage to the trees! or the H3. I drove out because the Bulletproof tie rods did not break when the rack let go.
Superliftpinetree-1.jpg

This sort of covers the high and the low of it or is that top to bottom?
DAH_2648.jpg

DAH_9188sh.jpg

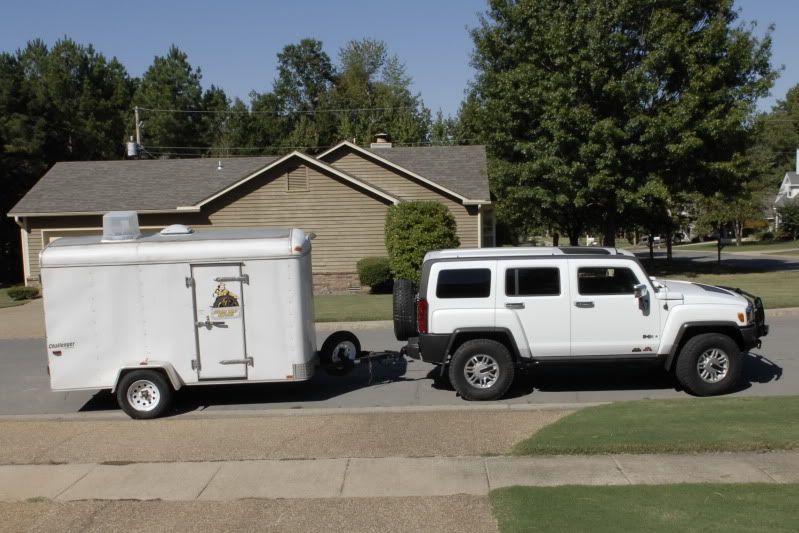
When towing now I use the Flashpaq mod in tow mode and it really smooths out the 5.3L shifts and power range. I like this option so I can change for different types of trips and remove it in case there is a warranty issue.
Awhile back
2262-1.jpg

Awhile back
1440-1.jpg

Current
4022.jpg

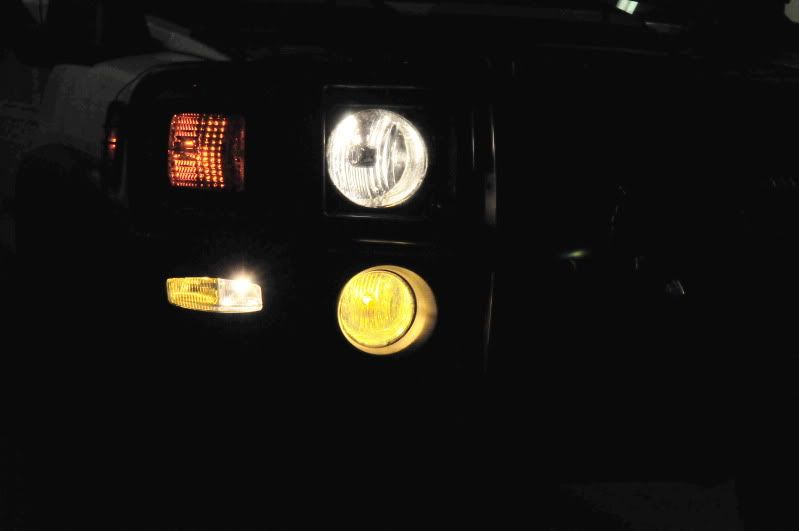
I did the yellow fogs for those froggy mornings when there is an air inversion and high humidity or freezing fog, that one gets me!
cr_8474.jpg
 
Last edited:

Hunner

Well-Known Member
Messages
2,334
Location
Arkansas
Here are a few of the mods
I tried to clean this up 9/22/12, too many cut and paste and out of order entries.
Caution, can cause drowsiness;

Updated again 6/1/2017

Cooper Tire STT 315
5 on Hutchinson double bead locks
Mud/Rock Compound and muddin on Cooper Armour tech carcass 3ply sidewall 1 angled. Tough when aired down.
Second Spare Tire on Beadlock

Winter tires and road trips
Mounted on 5 Hutchinson bead locks
Hybrid aggressive AT mild mud tread on Cooper Armour tech carcass 3ply sidewall 1 angled. Tough when aired down.
Second Spare Tire on Hutchinson bead locks

Hunner Beadlock Wheel and Bolt Protector Rock Rings
To protect Hutchinsons 6
5 spare Hutchinson bead lock rims (investment)

General Motors
Spare OEM Aluminum Hummer rims 11 I think?

Power Tank Brand
Tire Repair Kit #8131

Staun
Tyre Deflators

Modifications - Audio -
Apelco Marine Electronics
VHF Radio carried only for use in my Yacht repair business. Not land to land.

Cobra
WXST CB Radio and weather

Radio Shack*
Mag Mount CB/weather Ant
$40.00
Replaced with truck stop unit

Wilson cell booster and outside antenna

General Motors
SiriusXM Receiver Active
ONSTAR Service Active

Radio Shack
Weather Radio Alert

Modifications - Engine
ARB Snorkle
Hunner EXtreme
Air Intake Tube
Turbo boot transition
Turbo boot 90 degree

SyKlone Pre-filter

Wix dry filter
STP dry filter (still think the paper is the best)

SyKlone Pre-filter
$200.00

Exide dual terminal deep cycle AGM
AGM Deep Cycle #1
Exide dual terminal deep cycle AGM
AGM Deep Cycle #2

Custom Battery Cables with Hydraulic Swedged Ends (no wimpy set screws)
Hunner custom dual mounting mod

Jegs
Battery Insulation and Tie Downs

Superchips Flashpaq
Engine Tuner 2865 mostly used in tow mode

ScanGuage II Code Reader (very handy in the boonies read codes and to reset code)
Computer Readout

Modifications - Exterior - approx. $3,618.76 and counting, counting a lot more now!
3M Non-Skid Tape on rock rails
3M blind spot mirrors, big round like in the mini-mart!

ARIES AUTOMOTIVE ACCESSORIES, INC.
OEM "style" Roof Cross Bars (have heard they were the manufacturer of the OEM by someone working there)
You just have to install the letters for brand protection reasons? lol
Mounted third cross bar
One spare cross bar

Replaced my prototype 1/2" longer Hunner Frankenstops made from two OEM
for Trail Duty 1/2" longer firmer bumpstop (springs) as GM calls them. Thanks Phil and Nugget

Extended adjustable Currie fabricators custom cut front anti-sway bar links.

Blitz
Metal Can Mount Tray #1
Blitz
Metal Can Mount Tray #2
Blitz
5 Gallon Metal Fuel Can

CQR Anchor
Anchor for mud, sand no vehicle or trees to pull to.
Bruce Anchor
When one is not enough!

Custom
Over Spare Rack large Paul
Custom
Over Spare Rack small CB

DefenderWorx
Hummer Black Locking Fuel Door
Highlighted Hummer letters

General Motors
SunRoof Option
Hitch Cover
Black Mirrors
Black door handles (swapped with dealer

General Motors
OEM Roof Mounted Lights
$370.00

Generic Lights
Rectangle Backup Lights
$35.00

HiLift Jack 60"
Large Base Plate (you need this) paid for itself on the beach!

HUMMER/GM (OEM Part)
Towing Hitch
Rear-View Camera
Luggage Carrier Cargo Tie Down Loops alot!

Grill textured black by Hunner

Magnalight.com
GoLight Radioray 2051 #1
Wireless remote control
Magnalight.com
GoLight Radioray 2051 #2
Wireless remote control mounted on cowls

Pair of Ext Range FM walky Units

Nokya KYO H10 Wire Harness
$15.00
Nokya
Yellow Foglight Bulbs
$45.90

Putco dechromed textured black
Side Marker Covers
$59.90

Quik-Fist Clamp
Shovel mount

RainX
Wiper Blades and fluid

DeLorme
Hocky puck GPS

Streets and Hwys Software upgrade 2011
Southwest Quads Software

DeLorme Topo USA
PN-40 GPS
Garmin GPS

RAM Mount Laptop Mount designed for H3 (guess how that happened)
Toshiba 12 Inch Laptop
With drive shock protection
ipad II
ipad pro 12.6 inch on pedestal mount

HUMMER/GM (OEM Part)
6 CD AM/FM Monsoon Radio
Universal Garage Remote
Heated Leather Seats ahhh
Floor Mats - Front and Rear Premium All Weather rubber logo

Panavise Products, Inc.
Mobile Accessory Mount
For cell phone

Modifications - Security
Night Owl NOCX5M Night Vision Scope
For Zombies

Modifications - Suspension - approx not complete $973.15 and climbing
Bilstein 5100
Front Shocks

Bilstein
Rear shocks

Connex Bushing/Hunner modded for Steering Rack 100,00 miles combined two H3's

Replaced my 1/2 longer Hunner Frankenstops
for Trail Duty 1/2 longer firmer bumpstop (springs) as GM calls them.
Extended adjustable Currie fabricators custom cut front anti-sway bar links.

General Motors
Steering Gear Bracket #2 added a second one in the middle.

HUMMER/GM (OEM Part)
Upper a-arm Assembly 2 each spare

Torsion Bars at 23 1/2"

Hunner EXtreme design
SS Flex Line for Short Steering Rack Line (should do both)
$50.00

Hunner EXtreme Skids
Front Hanger protector
Hunner EXtreme Skids
Rear Spring Rear Ubolt and lower Shock mount and bolt Protection

Innovative Motorsports
RAD1 Inclinometer oh snap meter
$89.00

Oklahoma Offroad
Front Limit Straps
$50.00
Custom length triple ply mounts bent in opposing direction to clear shock tower

Purple Cranium Half Spider
$94.15

HUMMER/GM when upgrading to Alpha
Cast Iron Front Diff Housing
Included like on the 06 but 4:11 gear
Rear Eaton Locker

Hood Handles (to hold louver on)
$165.00

Rocky Road Outfitters Super Sliders
Hunner mod, of course!

Rola Roof Rack
Rack Fairing
Rola Rack Extension
Extra mounts for third cross rail.

Rustoleum
Rubberized Undercoating
In areas of welds

Scepter
MWC (Military Water Container)
Heavy gauge pvc/vinyl

Sears
DC Impact Tool carried in tool bag

Husky jumper invertor/battery pack

Sears
Roof Top Cargo Carrier Container

Shopsar.com (E & G Classic)
Fender Flares and Flaps
$425.56
Hunner modded for 315 tires.
Fender Flares and Flaps set plus some extra pieces
For modding
Ridgedemon.com

Steelcraft
Tail Light Guards
$152.70
Steelcraft
Brush Guard W/Winch Mount

Sylvania
Silverstar Headlight Bulbs

US General Tool
Lt.Wt. Racing Jack
Carried in the H3

Warn
Snatch Block #1
Heavy Duty
Warn
Snatch Block #2
Warn
and 1 more for rigging reverse winching.
Quick Connect Power Leads
For rear winch.
Warn
Quick Connect Power Leads
Pos and Neg
For custom jumpers
Warn
Winch Mount Plate
$133.09
Modded to fit rear receiver
Wireless Remote
$138.08
Warn Winch
9000ti
Rear mounted for Expeditions
Warn
9500 Powerplant front with added air tank I modded

Wolo Electric Horns
$24.90

Modifications - Interior - approx incomplete $470.00
American Fire Extinguisher
ABC B402 5lb
Front
American Fire Extinguisher
ABC B402 5lb
Rear

Brandmotion
Seatback Backpaks Hummer Design 2 each
$80.00

Custom
First Aid Kit

DayStar Dash Organizer

Oh yea
BulletProof Suspension Custom Tie rods (priceless)
I got to enjoy working with them to design changes to fit H3.
Probably more mods when I think of them. Including mods of mods!!

Knight Metal Works full underbody skid
Tatton drive shaft and 4speed's adapter

and many moooorrreeee......
 
Last edited:

Hunner

Well-Known Member
Messages
2,334
Location
Arkansas
A few early mods I did on my 06 have carried over to the 08 Alpha and some have been improved. Most of this has been seen in bits and pieces and there are threads. I will briefly, ha ha bring you up to date.
The steering rack fix has just now seemed to start getting some attention as vehicles age and mileage has gone up. I guess I started out wheeling the H3 hard and aged fast, sort of like me.
I found out there was some more travel by extending the stock shocks. back in about 2006.
OEMH306fulldroop.jpg

Later replaced with Bilstein longer shocks.
DAH_3577_resize.jpg

That led me to believe I should limit the travel to stop before hammering the upper metal a-arm frame mounted stop when doing this.
nx3121.jpg

So I had straps made to fit.
Hunnerextendedbumpstop.jpg

After cranking the T-bars up to use this extra travel I wanted to eliminate the nose dive caused by the gap between the (spring) bump stop and lower a-arm. So I made the infamous "Hunner Frankenstop" 1/2 inch longer. circa 8.29.07
_DSC6976_resize.jpg


Next thing I fixed was the passenger side steering gear mount. I think the original design was to allow some movement (which it certainly has) to ease the pressure on the internal seal at that end and possibly soften road feel. (on a truck?) plus it was supposedly designed to be forced down in a collision.
Adding the metal sleeve instead of the rubber dubber floppy bushing seems to have fixed some steering slop and wear on other components. I don't believe that will interfere with the self destruction of the sacrificial bracket in a collision, but I am not an engineer. The goal was also to prevent (or delay) the separating of the rack tube from the other end at the cast aluminum pinion housing. This might prevent the collision in the first place!! This image is from the bottom but flipped so the label can be read on your American made vehicle with a MONDO Corporation Korean made rack. (KIA?? could be??) thanks GM.
Anyway to update this about 40 people have bought these to use.
7424.jpg

8152A_resize.jpg

I decided the winter I did that in the warm shop I should just go ahead and go a couple of steps further. I added a center bracket and made a flex line for the short (pipe) hydraulic line. That gets broken when the rack breaks. If you only do the end mount this would save your power steering fluid and pump on the trail. Hopefully if the wimpy tie rods do not break you could gently as possible steer to the trail head.
_DSC7891.jpg

_DSC8158_resize.jpg

Between naps on the creeper and hearing reports of broken tie rods, 14mm at that time I figured I might as well check that out.
After seeing this OEM awesome heavy weight inner tie rod end I rarely went over 60 mph for awhile! Changing the shaft to 16mm did NOT change the size to the ends!!
640_6487.jpg

I worked with BulletProof Steering to design their product to fit the H3.
_DSC7917_resize.jpg

BULLETPROOF-H3_comparison5_resize.jpg

These articulate 30 degrees. The OEM all I could measure was 23 degrees.
BULLETPROOF-H3_much-steeper-maxi-1.jpg

DAH_5085-1.jpg

_DSC7129.jpg

I added an adjustable Currie heavier sway bar extension to line things up for all the extra travel. The OEM were not allowing full travel.
_DSC6779_resize-1.jpg

My original replacement did not have the larger mounting bolts so when I found these I upgraded.
re5083.jpg

It never ends right?? However I am starting to run out of ideas. Creeper time.
 
Last edited:

kflips

Well-Known Member
Messages
776
Location
Virginia
Reading Moby Dick took less time than walking through all of those mods. Pretty extensive.

Thanks for posting this up.
 

Hunner

Well-Known Member
Messages
2,334
Location
Arkansas
Thanks, I am working on the War and Peace version now.:)
I had just entered all of that in garage "over there" in January for ROTM. Man it was alot of work and had to get mods and manufacturers approved and figure it all out. I'm going to give it some time and try to enter all of that here so the images will be with the mods.
 

ReconH3

Guardian Angel
Messages
2,288
Location
Raleigh, NC
Some of the best mods done to a stock H3. I remember seeing all these mods way back when I first got my H3. If I hadn't jumped off the deep end, these would have been my first mods I would have done to my H3.


"Ex Umbris Venimus"

Sent from my iPhone
 

Hunner

Well-Known Member
Messages
2,334
Location
Arkansas
Thanks, I'm glad to throw them out there. All of the stuff I did was to improve reliability and function because I knew I was going to lots of remote places. The better the rig the more trouble you can get into? In 06 when I got my first H3 there was not much info out there or aftermarket parts.
I like to think my early 60's life growing up on a large farm and watching the guys mod crappy farm equipment to not just fix it but make it better was my foundation for that mindset. I also thank my Dad for being involved. As I got older I got in on doing those repairs and learned some skills from very innovative men.
Hmmm an H3 tractor:shifty:
I went on to restore cars, convert street cars to road race cars and maintain those and Formula Fords and Atlantics for a race team and on and on.
Most all of my mods can be done by anyone with a few tools and some imagination. They are just my opinion as I see it and may not be the best but will get you thinking.
As some of you know I love this stuff!! I will be glad to share any details (well maybe not the clevis details on the BP tie rods) to help people that don't mind getting their hands dirty and want to build from there to increase the life of our now endangered species H3's.:thumbs:
hmmm now what was I going to do next.............
 
Last edited:

Hunner

Well-Known Member
Messages
2,334
Location
Arkansas
As some regulars know, (and maybe are tired of seeing it) they started off as a custom design with me providing Randy at BP the info he asked for me to come up with using some of his proven ideas and parts, and made some to fit an H3. He of course wanted to sell some to recoup some R&D. I have not visited the site in awhile but they were more than some of the other ones I saw on there. These were machined and welded specifically for the H3. There are even some custom bolts he had made to clear in tight areas where the clevis goes between frame members. Since there has not been much of a market for them he does not make them up to keep in stock as far as what he told me at the time. There have been more than a few people over the years ask me about them but seem to be scared off by him requiring the buyer know enough to do some measuring he lists so he can confirm there are no differences in year models or design changes. I have had mine on my 06 Adventure and my 08 Alpha Offroad and all is well.
Unless somebody saw them in my posts or new of his business to even look for them I doubt there has been much advertising.
I just knew I wanted something I could depend more on than the OEM.
His website is loaded with information and it takes awhile to read and comprehend.
http://bulletproofsteering.com/gmifstierod.html
Here are the H3 tie rods, they are listed under the GM tie rods.
http://bulletproofsteering.com/gmpricingoptions.html
I have the trail-proof size because I thought you have to stop somewhere! and was not sure about clearance. Not sure if bigger ones would fit or needed.
I'm not sure of the angle of mine without checking that.
I see he has listed two types now, I had mine cranked to about 24 inches at the time but came down to 23 1/2 mostly for some things to clear. This is why he wants people to measure their H3. I have the ones with the bend and as I have stated used them on my 06 and 08.
If you get serious for more info I can send you copies of several emails I have written most all the details in. They may not flow as they were direct answers to questions different people asked but the details are there. I like to pass on what I do know and unless there is one other person with them, I may have the only install details that I figured out and passed on to some guy that I thought was going to get them and several who have not for whatever reason.
I paid about what two sets of OEM cost in 2007 for my work.
I guess a knockoff could be made but for reliability I went with someone that knows a heck of a lot more engineering than I do and he was right about all the things some naysayer stated without direct knowledge of "these" tie rods. I still stand by my decision to use these and would not if they did not work for over 50,000 miles and until some of my latest long distance commuting to places to wheel a big part of that was offroad.
Most of the time I only post the details to those that are really interested, rather than defend them to those that have negative comments that have been dis-proven.
My email is the same for all my Hunner EXtreme stuff so let me know and I will try to help.
 
Last edited:

ReconH3

Guardian Angel
Messages
2,288
Location
Raleigh, NC
This was one of the definite mods had I kept the OEM IFS setup. Along with you rack mod. I would suggest that people don't get these without the rack mod. It's easier to replace the tie rods than the whole rack in the middle of nowhere.


"Ex Umbris Venimus"

Sent from my iPhone
 

Hunner

Well-Known Member
Messages
2,334
Location
Arkansas
Yeah, I have to agree, probably a good idea.
It was part of the goal with these that they would help reduce the stress on the rack. I hope that continues to be true. I know some people go on the assumption these stronger tie rods would eliminate the "fuse" theory of replacing with a stronger part will put more stress on the next component. However the thought was that by increasing articulation to a greater degree without binding like the OEM can at extreme angles especially with the torsions turned up these could help the situation. OEM I have stated as best I can figure going thru the movement can only go to 23 degrees before the ball on the inner is prying on the rack. The BP will go to 30 but I don't think the suspension can go to that extreme because of the metal bump stop on the frame. They will get all there is with longer shocks and longer anti-sway bar links. The bend in the end was to keep the heim at rest fairly flat so you can go with it's full articulation from that point in any direction. That allows the rod ends to move more rather than exerting force on the rack. So far that has worked.
I did however reinforce the rack at the center and pass side as well as add that piece of flex line, and carry a spare rack, before I got the BP tie rods. I wanted to do everything I could for reliability. I would recommend, of course, do the rack fix or fixes first and carry spare parts even if you don't get the BP. I think it would have saved a lot of breakage as well as driver adaptation to the fact IFS on the H3 can't stand flogging and spinning and sudden stops of the spinning. I must have this ingrained in my mind because I have typed this many times all most the same way.
I like redundant systems!
You are right though the rack takes a bit more work to replace but it comes as a complete assembly with tie rods attached and some shops replace them that way, which also means you would not have to break the staked inner end of the tie rods. It has a tapped down, once only tab on the inner tie rod nut.
There are five more bolts to the rack mounting as it comes in stock configuration and one more if you add a center bolt. One is the steering shaft and two at each end of the rack.
I have not added the center mount to the Alpha yet. After I figured out the pass side sleeve/bushing I decided when I moved to the Alpha to run without that center one until at some point I thought it again might be necessary. If there is only a small movement in the rack after adding the pass side sleeve/bushing I believe that may be sufficient.
I don't claim this to be a fix all but I do think it will add some reliability to the system.
I also agree that a lot of people have stated that rather than spend the money on these just buy a pile of tie rods, which I did before getting the BP knowing at that time the number of them having problems. I also did not spend the current price for mine and had a great time figuring all of this out.
I probably have repeated myself, again but while the topic is hot I hit it again.
I could still break a rack and think about that all the time, I never claim to have all the answers but like to share my progress on this.
_DSC7485.jpg

_DSC8090_resize.jpg
 
Last edited:

FOXedupONE

Well-Known Member
Messages
92
Location
Blue Ridge Mountains,VA
Thanks. Got your skidz on today.

Wow that's quite some reading. 15 pages about a steering rack bushing. Guess I should start taking stuff apart and see how I can slip your bushing into the pass. side bracket without taking the rack out. Is that approximately correct?
 
Last edited:

Hunner

Well-Known Member
Messages
2,334
Location
Arkansas
Apparently my first post years ago was oversimplified. This time it kept getting longer as I answered questions as I am doing now.

You have to take the bracket off with stock tie rods installed. The sleeve fits against the hydraulic nipple on one side and the OEM tie rod boot on the other. I don't think it can be slipped under the bracket by just loosening it. So rather than removing the clamp and going thru the process or expense of getting the right tools for that the clamp for the tie rod boot this is the way to go for most people.
I checked several H3's and noted where the boot was and made the sleeves 2 inches to fit in there.
I have BP tie rods since I have done this so my boots are only on with hose clamps not the crimped ones so I had no problem either way. However I took the bracket off several times figuring out how to make the bracket tight. It just takes patience to get it right. I can use a 3 inch one on mine but I have been running a two inch since before I started selling them. I just have to make sure my boot is slid over against it to see how that works. The clamp will of course hold it if you are certain you got it tight against the sleeve. I recommend checking after installing and running it some. There are lots of factors how the leverage from the tie rods affect that and the rack. I think that is why some people do not think their rack is loose because they check it when it is in a bind and not slack.
 
Last edited:

Hunner

Well-Known Member
Messages
2,334
Location
Arkansas
Just wanted to add this in.
Currently working on a modular replacement for the tuperware lower facia in a one off state right now to adapt to what components I already have. It will incorporate an air tank and two "offroad" lights that are a combo yellow fog and driving. These will be mounted aiming down and out and switched using an OEM lower grill light switch. So will not be used on road. It will be 10 gauge steel and supported in as many places as needed to firm it up. I removed the lower portion that drops down and covers the bumper mounts. I have smash both sides of mine. I am using the existing bumper and skid plate since the are already there and fit nice. I reversed the braces and was able to use them to support the light pods. I removed a lot of plastic blocking air flow in the center. Presently they are mocked up with cardboard and black duct tape until I can get in at the fab shop.
Check here for progress
http://www.hummer4x4offroad.com/forum/showthread.php?1180-Hunner-EXtreme-exploratory-bumper-thread
3678_exposure.jpg

3671.jpg

DAH_3427.jpg
 

Hunner

Well-Known Member
Messages
2,334
Location
Arkansas
Latest funny mod.
So I go to pickup a 4 ton truck with a bucket lift on it to step a mast. I leave the H3 for the day at my friends sign shop. I come back and his wife says she really likes all the things I added to the H3. They are car buffs and have several sweet rides.
She said there is one more mod on there since you left. I can't imagine what she is teasing me about until I go out to get in to leave.
DAH_3978.jpg

I got to thinking about that and how I write off expenses to make the skids, steering sleeve, tie rods, intake tubes and other things, might be true?
Now if I could just burn Arky moonshine, oh yea Ethanol..............
 
Last edited:

Hunner

Well-Known Member
Messages
2,334
Location
Arkansas
Until I'm too old to drive! Then I may just go out and sit in it!:giggle:
The H3 and my 95 Dodge Cummins turbo diesel with 232,000 miles have been my most favorite two vehicles for all the things I still do the most.
 
Last edited:
Top