
-
Welcome to H4O! For a reduced ad experience, please login or register with the forum.
You are using an out of date browser. It may not display this or other websites correctly.
You should upgrade or use an alternative browser.
You should upgrade or use an alternative browser.
ReconH3
Guardian Angel
- Messages
- 2,288
- Location
- Raleigh, NC
What an amazing build thread!! The transformation is unbelievable. I really hope to see it (and wheel with it) in person someday.
Hopefully we'll be able to meet up in one of the future east coast events, or maybe even in Moab.

ReconH3
Guardian Angel
- Messages
- 2,288
- Location
- Raleigh, NC
Once they finished the exterior, now they had to get the interior to match the OEM one, and make it look like it came that way from the factory. The only addition was going to be a six point roll cage. I was about to have my first child, and wanted to make sure he was safe if I ever decided to take him wheeling. The first thing they had to tackle was the rear panels where the slant back had been made. They used part of the original panels, where the airbags sat, so as to maintain everything working like OEM, if the airbags where ever to deploy.
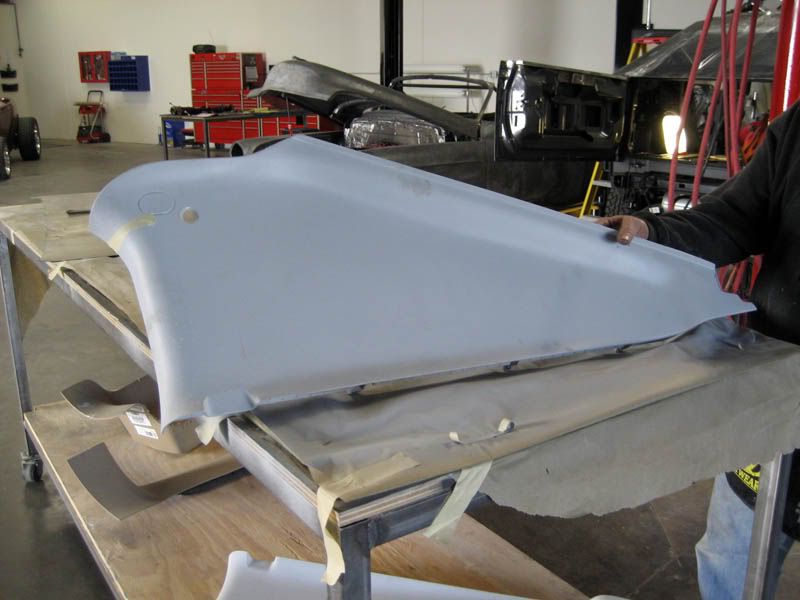
This is how it looked after it was modified and prepped for painting.
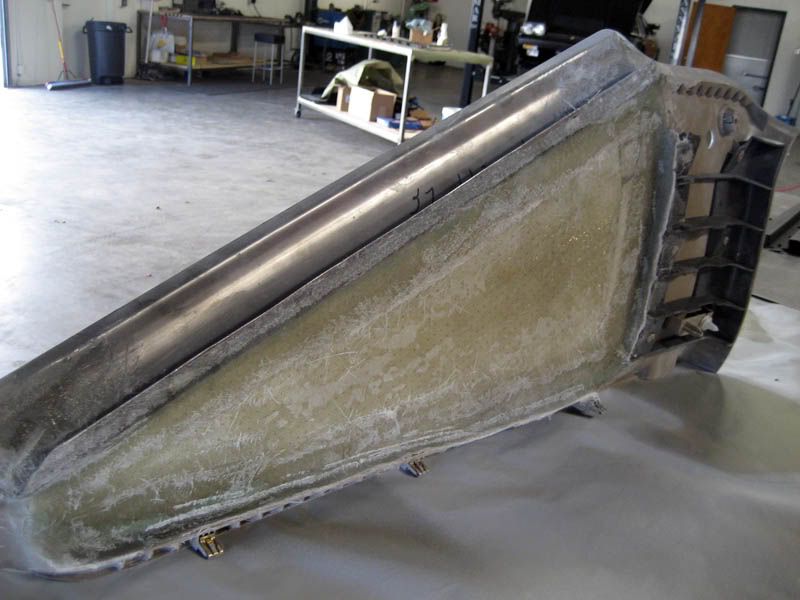
This is what it looked like from behind. You can see the original part, where the airbag sits, and the new custom molded fiberglass attached to it.
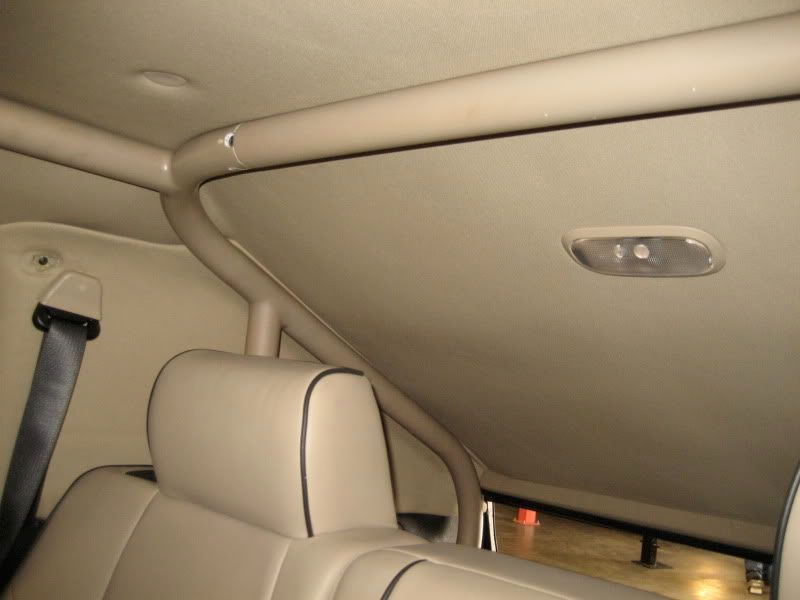
Here you can see the part installed, as well as the roll cage. The roll cage now has padding. The trick thing Gabe the upholstery guy did, was hide under the roll cage the roof liner extension.
View of the trunk.
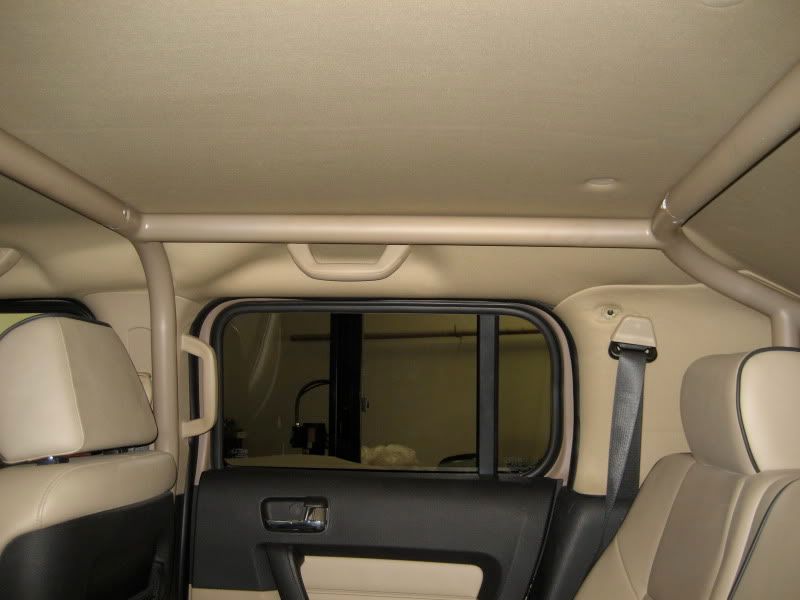
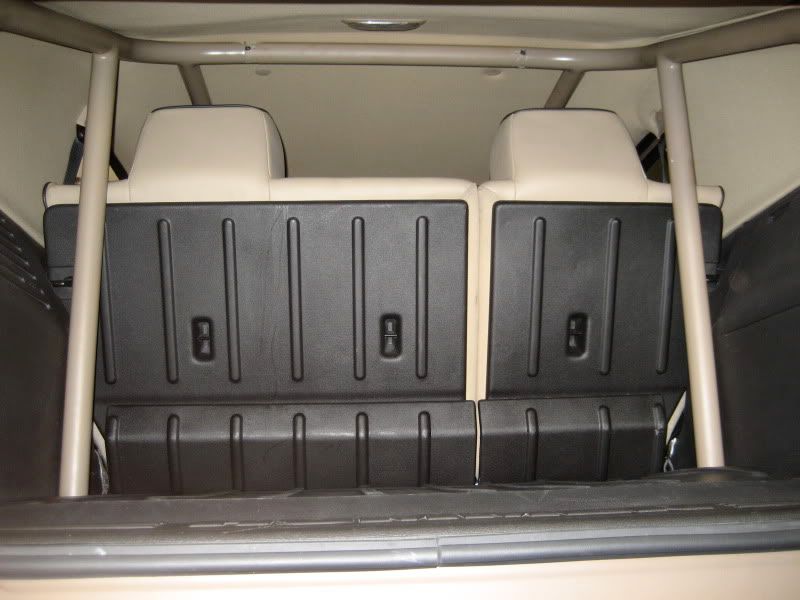
Rear seats area. Roll cage ends behind the driver. We didn't continue it all the way forward because it would have required too much hacking of the dash. My main concern was the rear seats, which is where my son would be ridding.
This is how it looked after it was modified and prepped for painting.
This is what it looked like from behind. You can see the original part, where the airbag sits, and the new custom molded fiberglass attached to it.
Here you can see the part installed, as well as the roll cage. The roll cage now has padding. The trick thing Gabe the upholstery guy did, was hide under the roll cage the roof liner extension.
View of the trunk.
Rear seats area. Roll cage ends behind the driver. We didn't continue it all the way forward because it would have required too much hacking of the dash. My main concern was the rear seats, which is where my son would be ridding.
ReconH3
Guardian Angel
- Messages
- 2,288
- Location
- Raleigh, NC
Now that Duane and Bernt's work was done, it was time to give it back to ORE so they could do their part.
ReconH3
Guardian Angel
- Messages
- 2,288
- Location
- Raleigh, NC
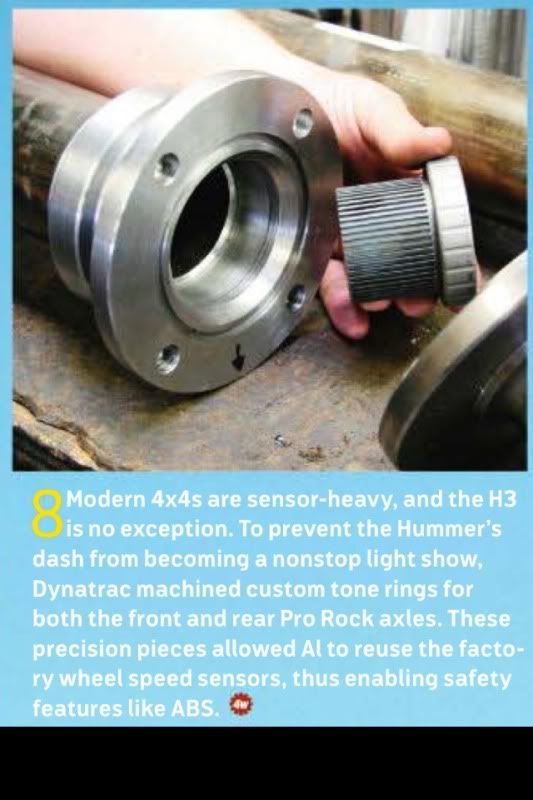
One of the reasons the build was being delayed was due to the axles. Dynatrac was going to build the first aftermarket axles that were going to be 100% compatible with all the OEM electronics. This was partly possible because the original sensors and tone rings were going to be used. They had to do some R&D to see which would be the best and most reliable setup. I was overseas for this part so I didn't get to see it or take any pics. The guy that wrote the article did since this was a first time thing. Here is a portion of the article that talks about it and shows a pic.
ReconH3
Guardian Angel
- Messages
- 2,288
- Location
- Raleigh, NC
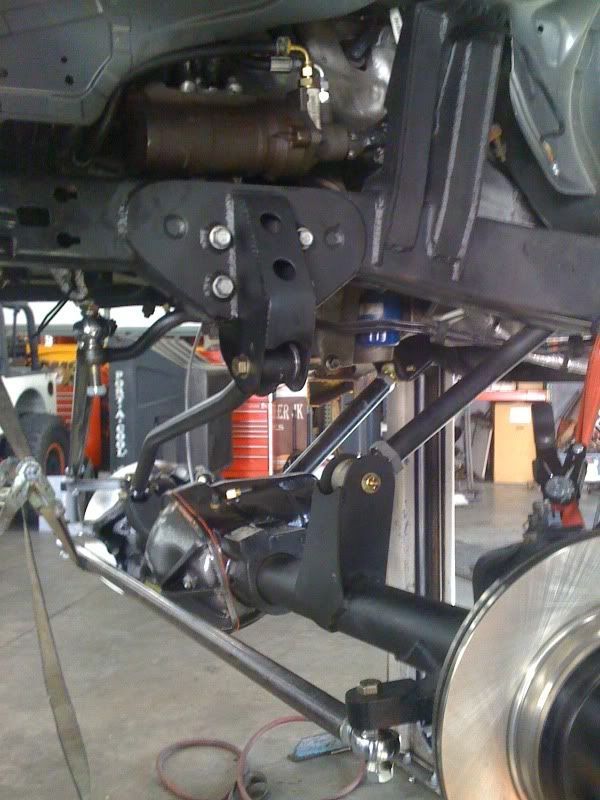
Front axle installed and all brackets welded. It's basically a copy of a JK setup but with a 3 link. JK steering box. The diff is also on passenger side which makes finding an axle harder if you don't want to get a custom axle.
ReconH3
Guardian Angel
- Messages
- 2,288
- Location
- Raleigh, NC
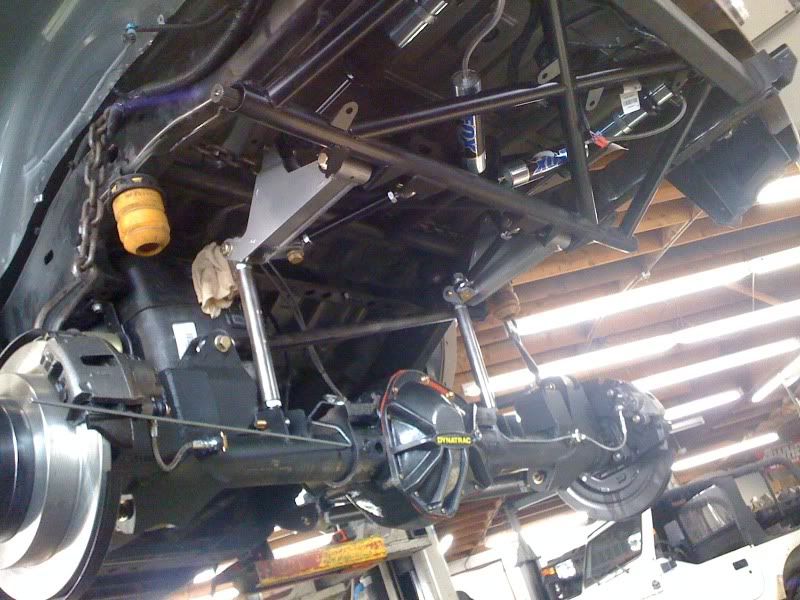
The rear is the very unique ORE Evo-Lever cantilever suspension. It's not a JK suspension adapted. The H3 setup is too different that a custom geometry had to be engineered just for the H3. The advantage of this setup is that you have an 8" coilover laid horizontally next to the frame rails, that puts out 14" of travel. If you were to have 14" coilover, it would have to go through into the trunk space like on race trucks. It's a very trick setup thats works very well. F1 and Indy cars use this setup. Another advantage is that you have less weight on the axle bouncing around which usually creates more inertia in the suspension. It also allows less offset so the wheels don't have to hang out farther from the body.
ReconH3
Guardian Angel
- Messages
- 2,288
- Location
- Raleigh, NC
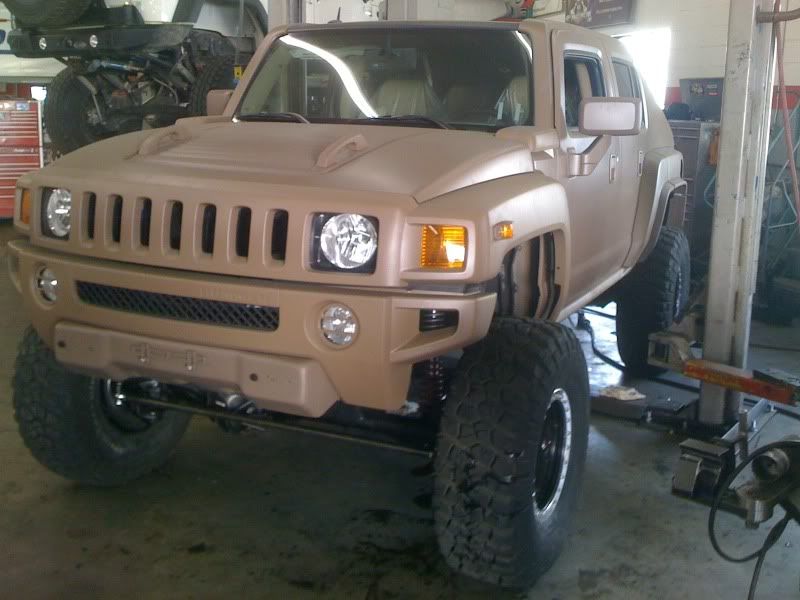
This was the first time the H3 stood by itself with the new setup. It was far from done, but this is where you start seeing what works and what doesn't. Still has the OEM bumper and many other parts still need to be added.
ReconH3
Guardian Angel
- Messages
- 2,288
- Location
- Raleigh, NC
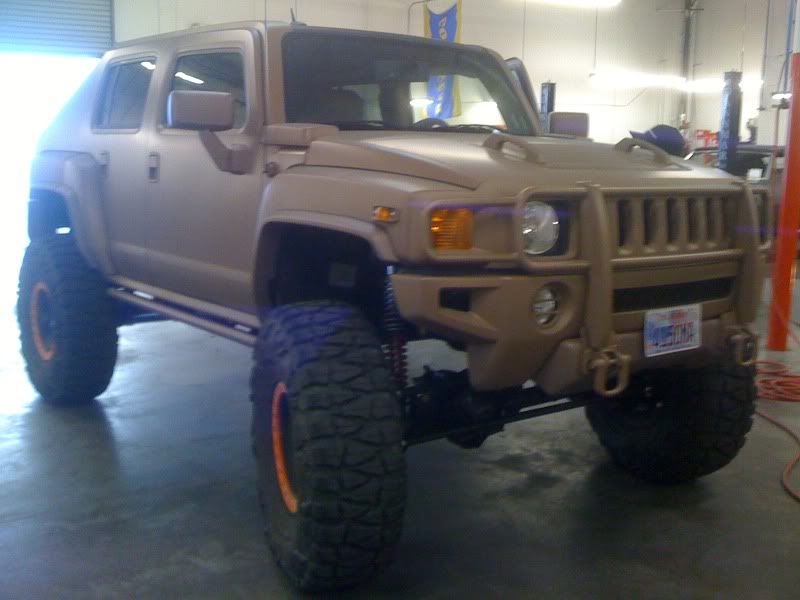
On 42s and OEM brush guard installed. Good thing about having the 5x5.5 wheel pattern is that we got to play with many different wheels. 42s were way too big. They rubbed everywhere if you just turned the wheel slightly. Plus it wouldn't fit in my garage. Looks great though
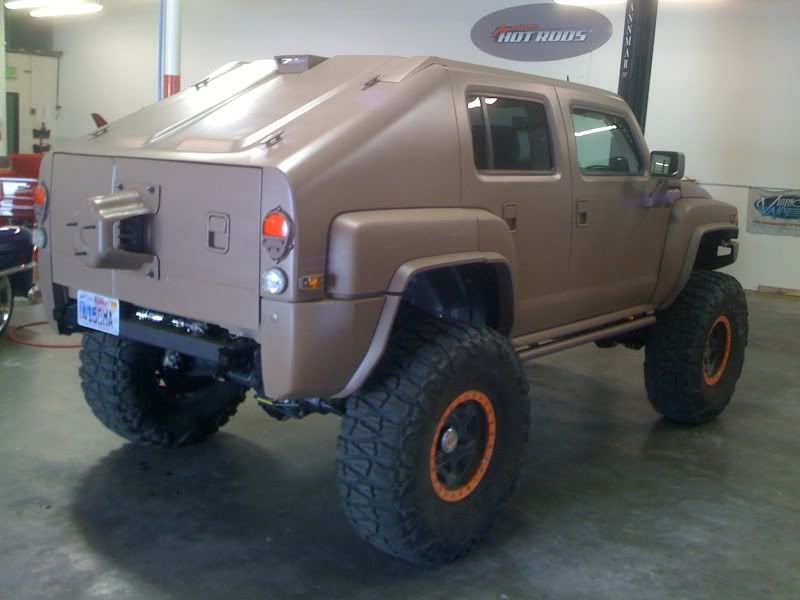
Rear view. Still no rear bumper.
Next to a JK also on 42s.
ReconH3
Guardian Angel
- Messages
- 2,288
- Location
- Raleigh, NC

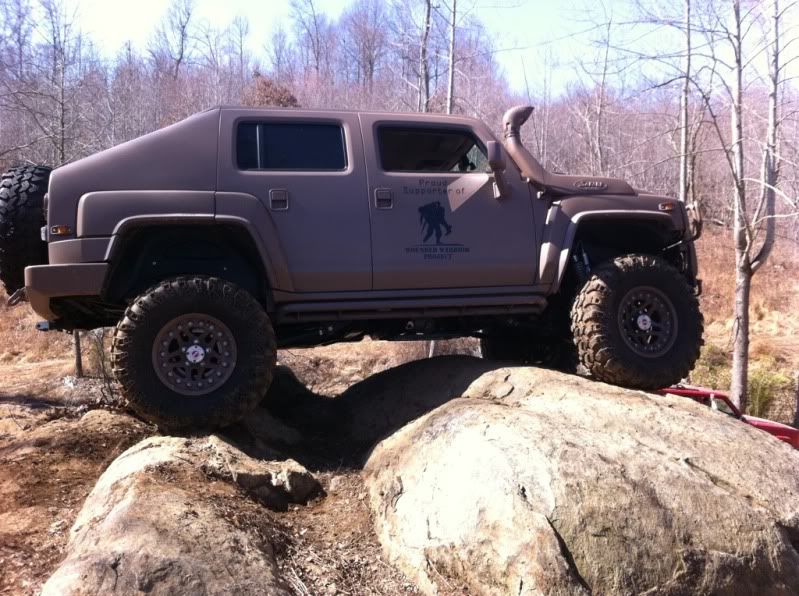
Hutchinsons beadlocks with 37" IROKs installed. Currently the present setup. May upgrade down the road since the axles can handle much bigger.
Rear view with the spare installed. Still no rear bumper.
Most important mod to date.
MaxPF
AGNTSA
- Messages
- 1,394
- Location
- The dark side of the globe
I can't really tell what axles you have by the pics. Are those Dynatracs 44's or 60's?
ReconH3
Guardian Angel
- Messages
- 2,288
- Location
- Raleigh, NC
I can't really tell what axles you have by the pics. Are those Dynatracs 44's or 60's?
ProRock 60s. For if you weren't familiar with them, they are heavily modified 60s with the ground clearance of a 44. That's probably why it's hard to tell. Originally I was going to go with the setup on my TJ which is 60 rear, 44 front. Since the H3 has the V8 and much heavier, I figured I would play it safe with the 60s. More peace of mind on the trail.
"Ex Umbris Venimus"
Sent from my iPhone
Last edited:
MaxPF
AGNTSA
- Messages
- 1,394
- Location
- The dark side of the globe
Cool

HUMMER INVESTMENTS
[o O IIIIIIII O o]
- Messages
- 3,518
- Location
- Black Hawk, SD
Have you ever considered adding an exterior rollcage?
ReconH3
Guardian Angel
- Messages
- 2,288
- Location
- Raleigh, NC
Have you ever considered adding an exterior rollcage?
Too much weight. Makes it top heavy. I am going to make something like the Aussies have, which are just some pipe around the fenders. Enough to keep it off rocks and trees.
"Ex Umbris Venimus"
Sent from my iPhone
ReconH3
Guardian Angel
- Messages
- 2,288
- Location
- Raleigh, NC
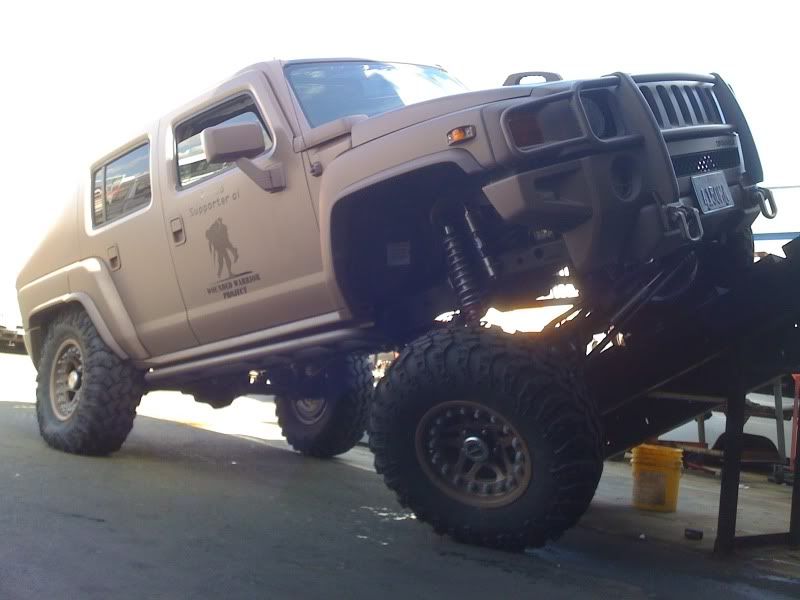
I was getting ready to leave again overseas but I couldn't go without ramping it. This is 30 degree ramp. There was some minor rubbing. To stop it we would have to move both the front and rear axle 1" out. Also discovered that the JK steering setup couldn't handle to weight of the V8 H3
. Ram assist will be needed.ReconH3
Guardian Angel
- Messages
- 2,288
- Location
- Raleigh, NC
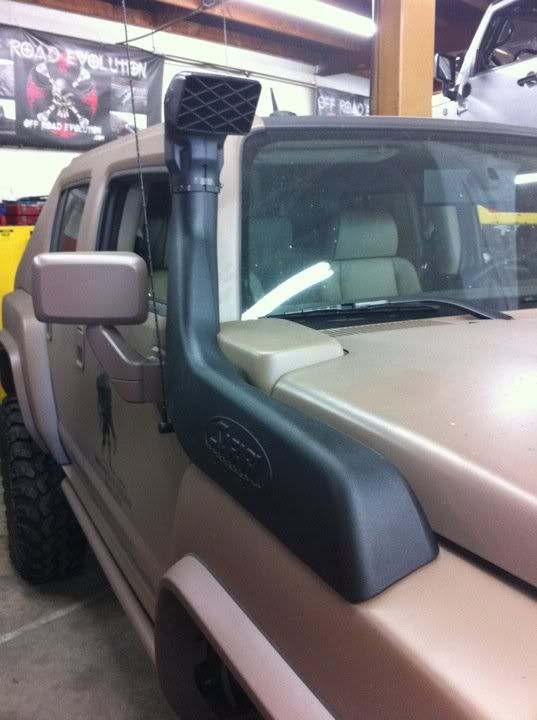
Time to get the snorkel on
ReconH3
Guardian Angel
- Messages
- 2,288
- Location
- Raleigh, NC
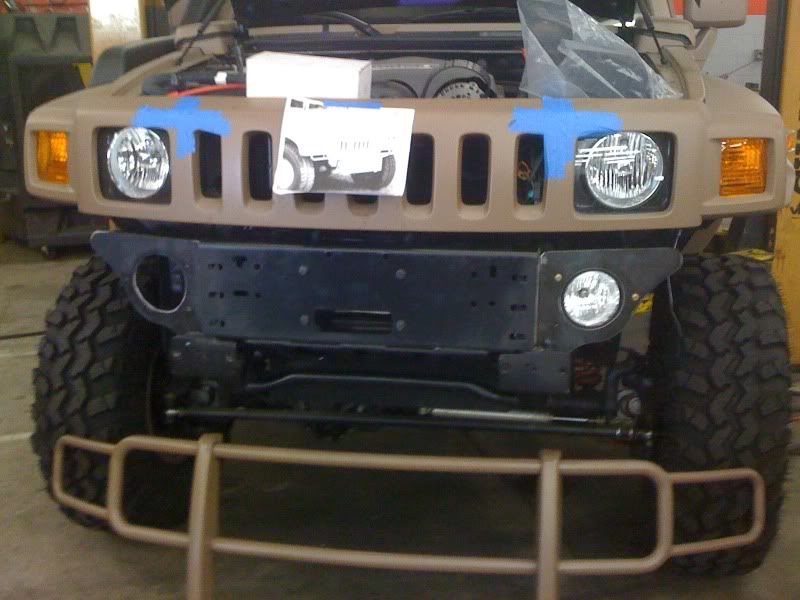
Now it was time to make a bumper and winch mount. I knew I wanted to get a winch with 12,000 lbs pull, since all the 9,000 lbs winches would eventually burn out with the weight of the H3. When we removed the whole IFS setup, we found a huge empty space in the frame rails. Perfect for tucking a winch in there. I called my friend at Warn with the measurements, to see what we could fit in there. He got back to me telling me that the best would be the HMMWV short drum M12,000. It was powerful enough and fit perfectly in the frame rails. The winch come with it's own bumper and mounting kit made specifically for the HMMWV. When it arrived, and we started to see how it would fit, we notice that the whole HMMWV bumper/mount kit actually fit like a glove in the H3! Only difference is the side plate couldn't be bolted on, so we welded them in place. Once everything was in place, we noticed that the OEM body mounts and bumper bracket where sticking out and it looked ugly. To just hack them off, would require too much fabrication. The simpler solution was to make some brackets for the OEM fog lights. This way I would cover everything up, and at the same time have my fog lights back. Couldn't have worked out better than anything solution I could have come up with.
ReconH3
Guardian Angel
- Messages
- 2,288
- Location
- Raleigh, NC
The next step was the rear bumper. I went with the ARB bumper as a compromise, because ORE had dragged their feet for so long, and their solution was far from adequate. The ARB bumper is very well made, but has no provisions for mounting the factory back-up cam. We made a hole for it. Another thing we weren't going to use is the license plate mount, since mine sits in the spare tire. Without anything there it looked ugly, so I decided to add another OEM d-ring to balance out the look. Right now it's just for looks, because we didn't have time to tie it into the frame like the OEM one on the other side.
ReconH3
Guardian Angel
- Messages
- 2,288
- Location
- Raleigh, NC
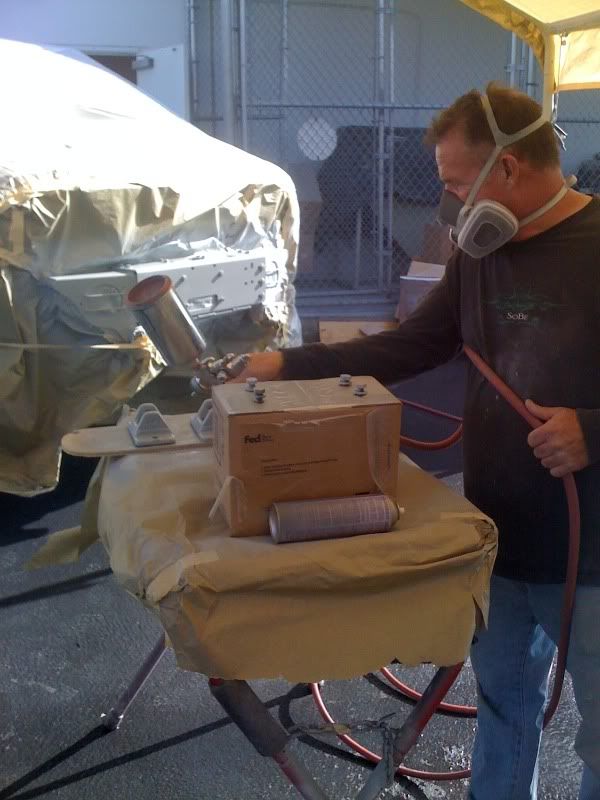
Now that most of the last minute additions and fabrications were done, it was time to give it back to Duane and Bernt to finish things off to match the rest of the vehicle.
ReconH3
Guardian Angel
- Messages
- 2,288
- Location
- Raleigh, NC
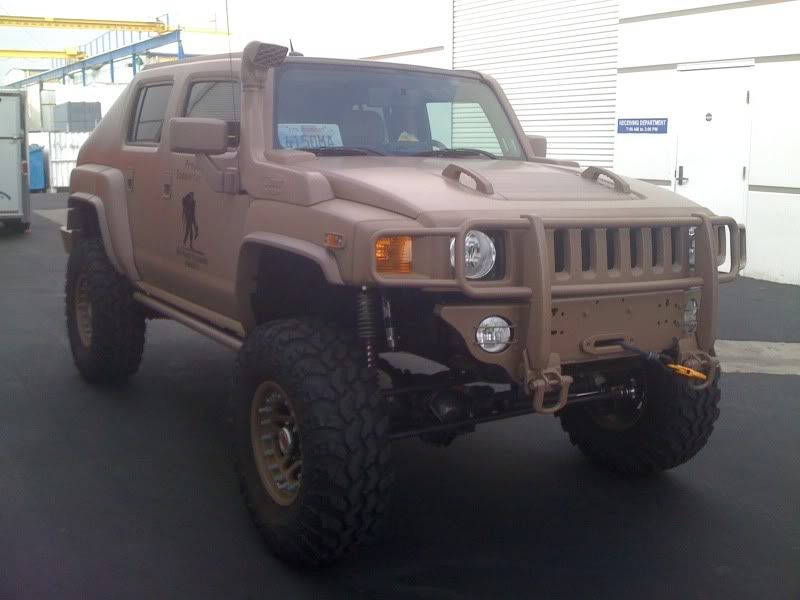
This is what it looked like after Bernt did his magic. We also added a Master Pull aluminum fairlead and winch line.
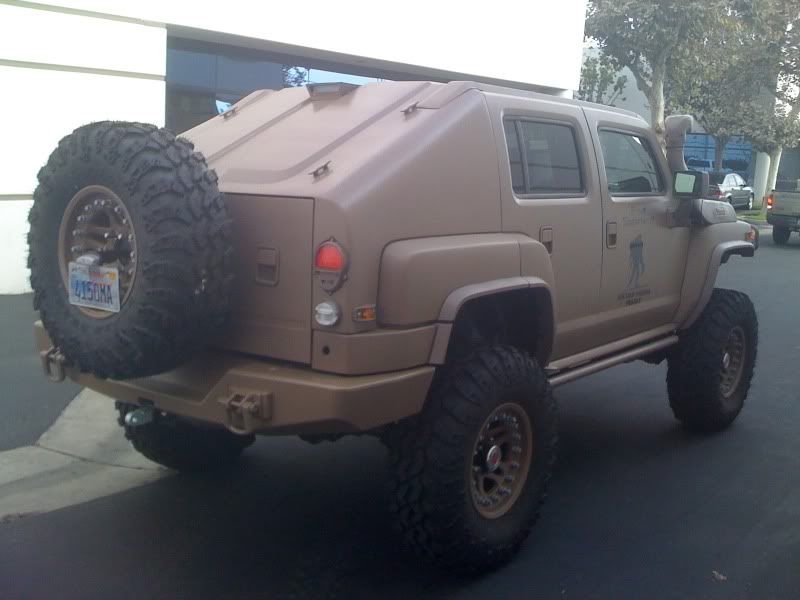
Rear view where you can see the ARB bumper.
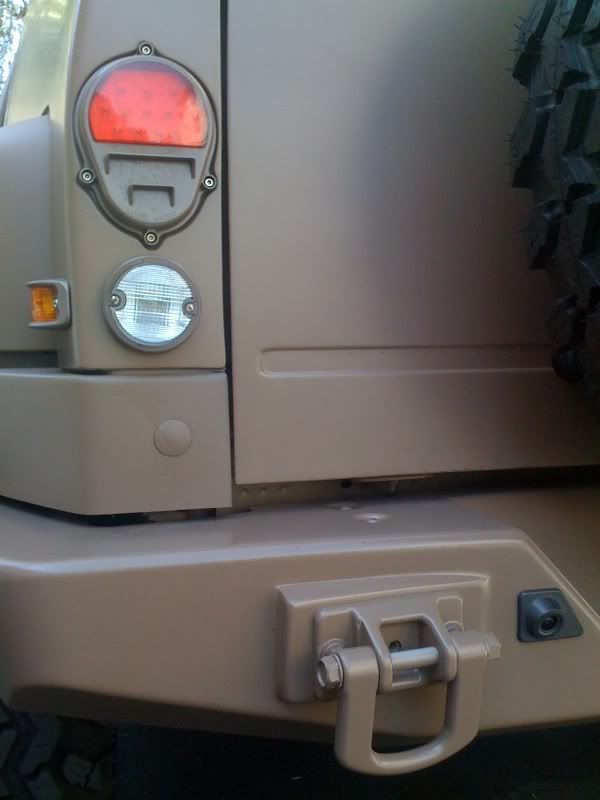
Close up of the camera mounted, and the fabricated second d-ring in the place of the license plate.
ReconH3
Guardian Angel
- Messages
- 2,288
- Location
- Raleigh, NC
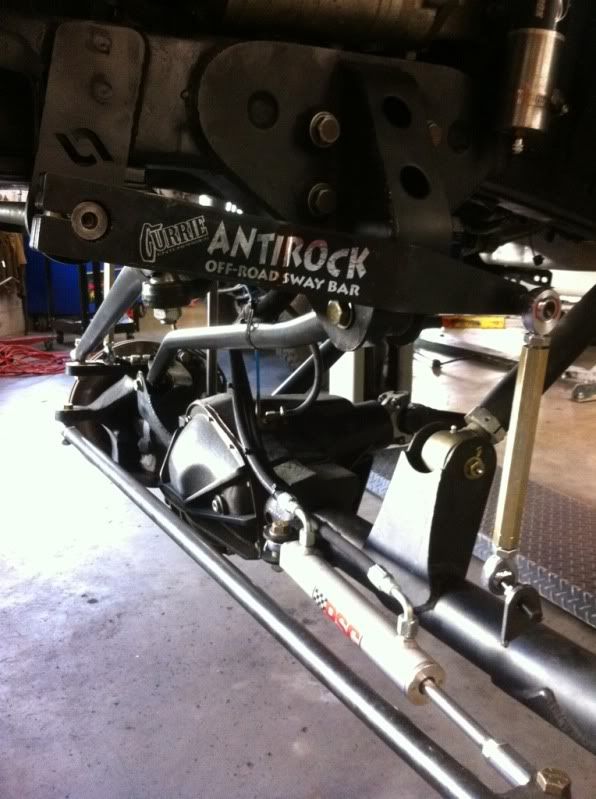
Got the ram-assist installed as well as the Currie anti-rock sway bar. The rear also got a Currie anti-rock, but I don't have any decent pics.
ReconH3
Guardian Angel
- Messages
- 2,288
- Location
- Raleigh, NC
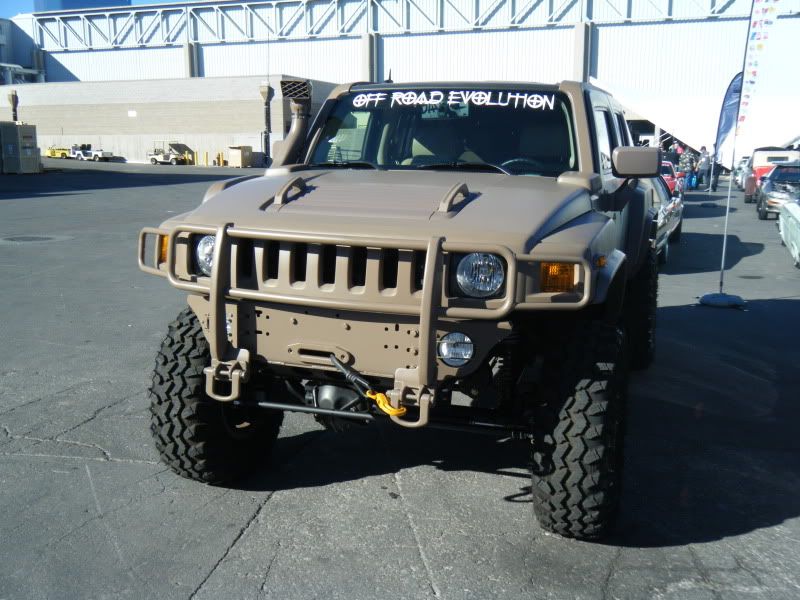
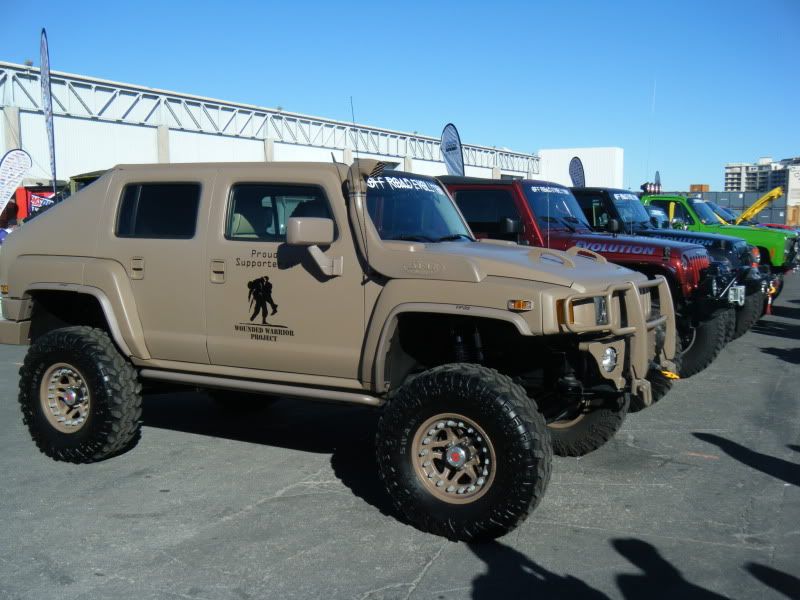
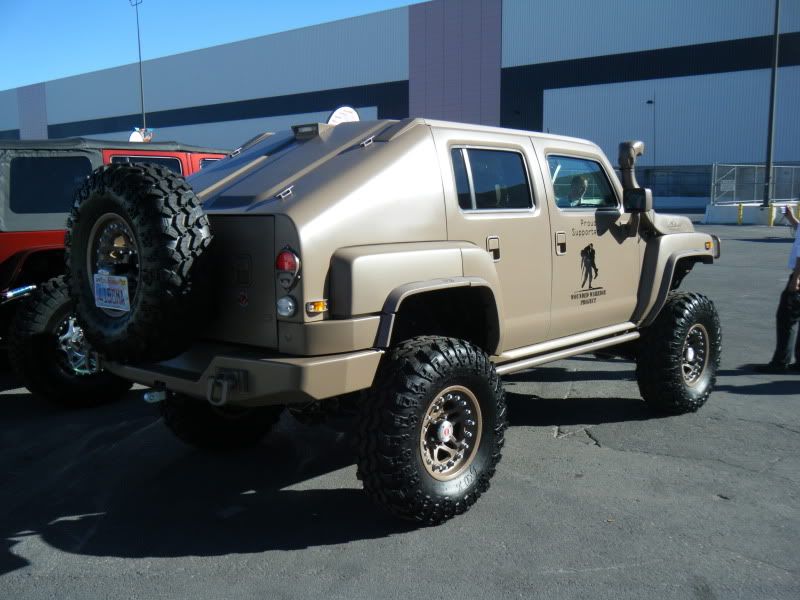
By now I was off again. They asked if they could take the truck to SEMA. I agreed. A friend that was there took some pics. Here they are:
ReconH3
Guardian Angel
- Messages
- 2,288
- Location
- Raleigh, NC
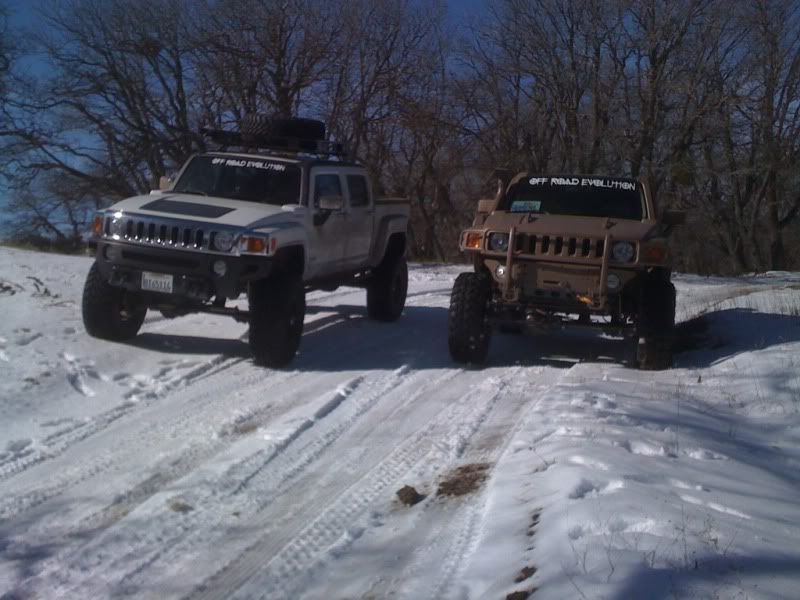
When I got back it was time to move out to NC. Like other times, ORE dragged their feet and didn't get things done on time. Rig had never been tested off-road, so we had no clue if it had any issues. Organized one outing to try to test both H3s since the H3T was also just getting done. The trip was a fluke. All the trails were closed so all we got to do was ride around snowy roads.
I had to go to the SHOT Show before heading out to NC, so I took it to Vegas. The Outdoor Channel featured it on their Media Day at the Range, but I never got to see it. On the way back from Vegas, the truck shut down in the middle of nowhere. I linked up my iPhone to the OBD to see what was wrong, and there more issues than I could recall. I reset it, to see if it would start, and it did. I drove back to Cali, having to stop every 45 minutes, because it would go back into limp mode, and eventually shut down. I dropped it off at Tustin Hummer to see if they could figure it out in two days, because after that it was going on the trailer to NC. Unfortunately they couldn't figure it out. Despite having it for two days, they didn't charge me a cent. The guys at Tustin were amazing, and I was really going to miss them. So we were leaving Cali with an unfinished H3, with no UCP, and a fried electrical system. All courtesy of ORE. They do amazing work, but they also drag their feet and leave other things unfinished. I had no clue if I would find anyone decent in NC, so I left kind of unmotivated.
I had to go to the SHOT Show before heading out to NC, so I took it to Vegas. The Outdoor Channel featured it on their Media Day at the Range, but I never got to see it. On the way back from Vegas, the truck shut down in the middle of nowhere. I linked up my iPhone to the OBD to see what was wrong, and there more issues than I could recall. I reset it, to see if it would start, and it did. I drove back to Cali, having to stop every 45 minutes, because it would go back into limp mode, and eventually shut down. I dropped it off at Tustin Hummer to see if they could figure it out in two days, because after that it was going on the trailer to NC. Unfortunately they couldn't figure it out. Despite having it for two days, they didn't charge me a cent. The guys at Tustin were amazing, and I was really going to miss them. So we were leaving Cali with an unfinished H3, with no UCP, and a fried electrical system. All courtesy of ORE. They do amazing work, but they also drag their feet and leave other things unfinished. I had no clue if I would find anyone decent in NC, so I left kind of unmotivated.
ReconH3
Guardian Angel
- Messages
- 2,288
- Location
- Raleigh, NC
First thing I did when the H3 arrived to NC from Cali, was to drop it off at the local dealer (Hendrick Hummer). I had heard good things about this dealer, and was keeping my fingers crossed that they would solve all the electrical issues caused by ORE. In the mean time I joined the local 4x4 forum (NC4x4) to see what I could find as far as quality 4x4 mechanics and fabricators. The guys on the forum were of great help. Found a tranny expert that wheels (Lee @ TLC Transmissions). The local 4Wheel Parts is actually a great place to get work done, and are very knowledgable. Then there was East Coast Gear Supply (ECGS). These guys came very highly recommended as far as any custom extreme fabrication. There were more, but all quite far away. Things were looking up.
Two days after having dropped off the H3 at the dealer, they call to say that they had fixed everything. Turns out that ORE had left unplugged parts of the wiring harness, and left it hanging over the exhaust. This had melted everything, and caused some serious shorts. Finally all the lights and warnings on the dash had been turned off. :d Only thing still on was the TPMS and the rear locker since it couldn't find the OEM one. Trailbreaker had told me a quick easy fix to fooling the system into thinking the rear OEM locker was there. It worked. Only thing left is the TPMS, and pending for a solution still to date.
On NC4x4 I had found out that a local 4x4 club, Mud Devil's Playground, was going to do a fundraiser, and that everyone was invited to ride their trails. It's on private property and usually not open to the public. I wanted to go but was skeptical with ORE's work. I didn't want to go all the way out there and have stuff blow up. I also had no UCP, because ORE had never done it as requested. I had an idea to go to the local 4Wheel Parts and test the suspension travel on their 20 degree ramp.
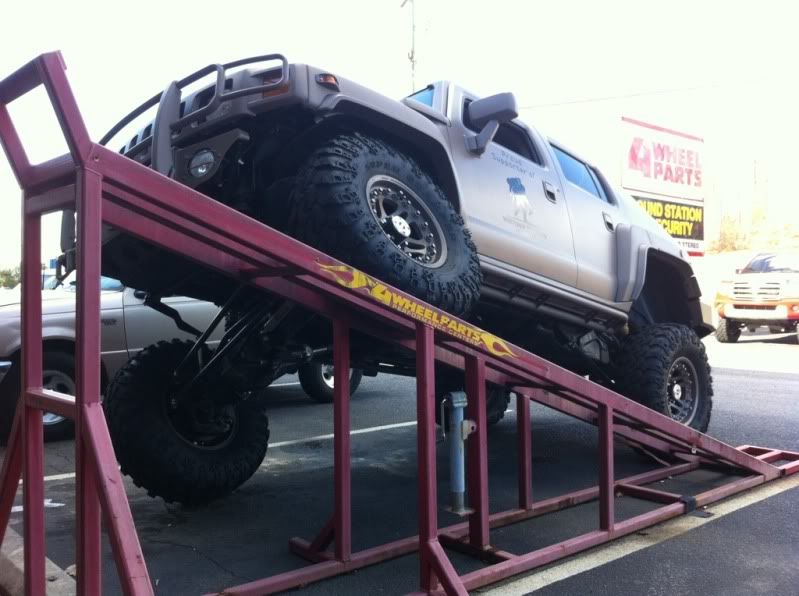
This was best thing I did. I got to see some issues, but nothing extremely serious. Things that ORE should have tested and solved a long time ago. The left side e-brake had been routed badly and would get extremely tight. The heim on the pitman arm was also at it's limit and could pop. Both the front and the rear axle were not centered, and were rubbing. Despite all that, the H3 was ramping very close to 1000! Despite all these minor things, and with no UCP, Redlyner convinced me to go to Mud Devil's Playground. We were going to take it easy, and test out the H3 without banging up the underside. Here are some pics both Redlyner and some of the guys at NC4x4 took:
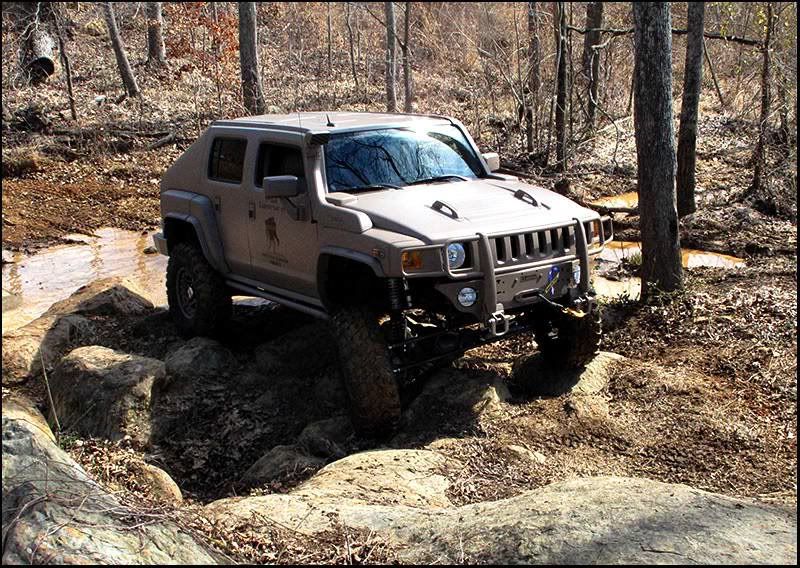

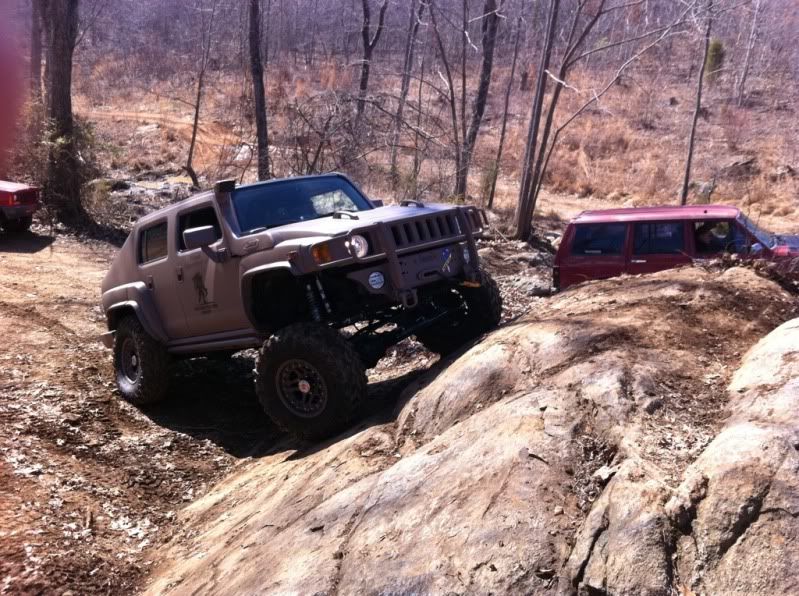
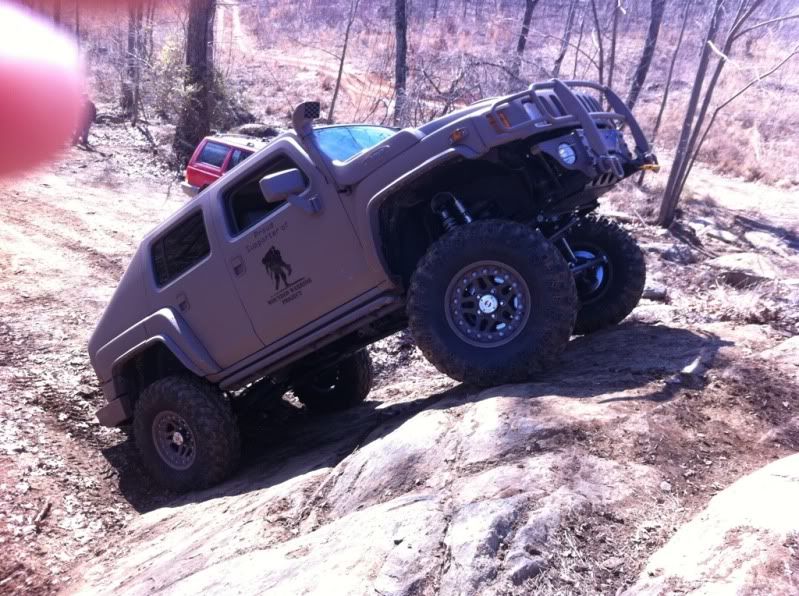

All in all it was a great day. Got to try the H3 for the first time on some real terrain. Nothing too extreme. It did well. It was my first time wheeling an auto tranny 4x4. Much prefer manual, and wish I had bought it that way. Also the first time wheeling such a heavy vehicle. I had a great time. Finally starting to see the light at the end of the tunnel.
Two days after having dropped off the H3 at the dealer, they call to say that they had fixed everything.
Turns out that ORE had left unplugged parts of the wiring harness, and left it hanging over the exhaust. This had melted everything, and caused some serious shorts. Finally all the lights and warnings on the dash had been turned off. :d Only thing still on was the TPMS and the rear locker since it couldn't find the OEM one. Trailbreaker had told me a quick easy fix to fooling the system into thinking the rear OEM locker was there. It worked. Only thing left is the TPMS, and pending for a solution still to date.On NC4x4 I had found out that a local 4x4 club, Mud Devil's Playground, was going to do a fundraiser, and that everyone was invited to ride their trails. It's on private property and usually not open to the public. I wanted to go but was skeptical with ORE's work. I didn't want to go all the way out there and have stuff blow up. I also had no UCP, because ORE had never done it as requested. I had an idea to go to the local 4Wheel Parts and test the suspension travel on their 20 degree ramp.
This was best thing I did. I got to see some issues, but nothing extremely serious. Things that ORE should have tested and solved a long time ago. The left side e-brake had been routed badly and would get extremely tight. The heim on the pitman arm was also at it's limit and could pop. Both the front and the rear axle were not centered, and were rubbing. Despite all that, the H3 was ramping very close to 1000! Despite all these minor things, and with no UCP, Redlyner convinced me to go to Mud Devil's Playground. We were going to take it easy, and test out the H3 without banging up the underside. Here are some pics both Redlyner and some of the guys at NC4x4 took:
All in all it was a great day. Got to try the H3 for the first time on some real terrain. Nothing too extreme. It did well. It was my first time wheeling an auto tranny 4x4. Much prefer manual, and wish I had bought it that way. Also the first time wheeling such a heavy vehicle. I had a great time. Finally starting to see the light at the end of the tunnel.
Last edited: