58Bisc
Well-Known Member
- Messages
- 186
- Location
- Warminster, PA
First I'll warn you that the pictures I used are not of the final assembly. I dropped my camera and broke it before I could get the final pictures. I'll make every effort to show where a difference was from the final vs. the pictures. Second is that I will be building and editing this thread as I go along. I will do my best to let you know where the edits are. I removed my set up a couple of different times to see what could be done differently to aid someone in installing this set up from below. You would be better off only installing this once, sealing it up and then forgetting about it. Once trimmed to fit your truck (after the first install), installing a second time becomes much harder. There is nothing left to grab onto to pull it up through the hole. There is no leverage, this makes it a push-pull process 1/16 at a time. Trust me on this one. Install it and forget it.
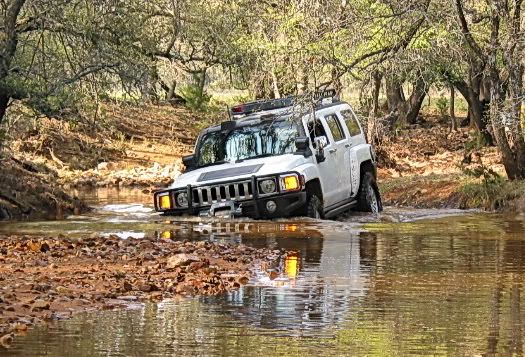
My first goal when I started this process was at the very least to move the air intake point away from the nose of the truck and in the process raises it up about 10 inches by putting it under the factory air intake cover. My second goal was to get it out from under the truck without cutting anything if at all possible. I designed the ducts to work and fit in the channels between the fender and fire wall. I did have to cut a strip of metal about 3/4 of an inch by 4 inches long. None of it was braces or structuarl in nature. A 3 inch pre molded 45 degree angle hose flatten and fit through the opening. I ground and smoothed all of the edges on the small amount of metal that I cut. Then, put door edge guards on the exposed edges to be safe. My final goal was to install a snorkel assembly on top of the cover and connect it to the duct work. This would raise the water line up above the windshield, preventing water lock of the engine.
Observations learned:
1.) The H3 aftermarket ARB snorkel runs out of the fender and along side the pillar for a reason, cleaner lines of sight and less of a blind spot.
2.) Making the factory air intake cover function as a water tight snorkel is actually very easy to do. Cutting a small piece of metal out provides a 45 degree path to the underside of the cover. It also provides the cleanest lines of sight while raising the water line ten inches and moves the water entry point away from the nose. The nose of course is the lowerst point of entry and wash over when entering the water. The factory air cover is also rain proof.
3.) There is just not enough room to create any type of snorkel on an H3 without some type of cutting. Whether it be the fender for the ARB, the entire bracing like on the H1 cap or a strip of metal for the air intake cover with the snorkel attachment. Truth is removing the fender to install ducting and or to cut is really the correct way to do this. I proceeded as if removing the fender is not an option.
Build sheet:
1 - aluminum intake tubing 3" OD x 24 $14.27
1 - silicone 45 degree elbow 3" ID $31.18
1 - silicone 90 degree elbow 3" ID $32.19
5 - stainless worm gear clamp 3.5" ID $1.50 @ 7.50
1 - stainless worm gear clamp 4" ID $2.99 (pack of 2)
1 - solid 90 degree 3" OD $12.99
1 - intermediate coupler 4" to 3" $16.99
1 - tube of sealer/gasket maker $5.99
Total $107.11
Here is as close to the final assembly as I have. The difference is that the flat spot in the up tubing in now flatter and the hose clamps are spun around so the tighten points are on the rear edge instead of the back and they face in. I'll try to explain on another picture:

The factory air intake cover already has vent holes and channeling built into the underside that will provide airflow if a snorkel is not attached:

The factory air intake cover only clips on. Open the hood and lift up on the front edge of the cover. This will pop the front two clips. Apply a small amount of pressure to the pillar trim away from the rear edge of the cover and pull up on the rear of the cover. This will release the back two clips. Be careful not to pull so hard as to hit the cover on the hood edge and scratch your paint:

Remover the inner wheel well by removing all of the push clips:

This is a close up of one of the clips:

This is the only spot were there is a possible difference between trucks. What you see here is the larger air filter box inlet hose of the AirDoc's system. If you do not have an AirDoc's intake installed on your truck, your inlet will be hard plastic and smaller.

This shot is between the fender and firewall. It shows the pocket that the H1 style snorkel turns into and then a large hole above it is drilled. For this set up, we will not be using this hole at all:

This is the main piece that we will be cutting out for this install. By removing it we will open up a channel directly between the fender and the firewall:

Here is a different view of the same piece. It is directly below the air intake cover once it is removed. It is slightly off center of the top opening:

In hindsight, I'm not sure this step was needed, but I believe it did make the process of pulling the hose through the opening easier. When I was done the install, the hose was not tight in that corner and I had to fill the gap back in with sealer to make it water tight. If I were to do it again, I think I would have tried to pull the hose through without cutting here:

Although you can't see it here, I just turned the cutter on end and removed the inner strip of metal:

This is all that I removed. The small piece is what I removed from the top. You should not have to remove it:

Here is what it looks like before I smoothed out the edges. Notice that you can see the front wheel off to the right. It is a stright path once you get past the first, short 45 degrees:

I used touch up paint on any exposed edges. Notice the side 45 degree opening is now the same size as the top opening.

Touch up paint around the top opening, which you should not have to worry about:

I ran a small piece if door edge guard over the cut edge to provide a protected edge. It also had an added benefit of making the hose slide in easier:

Another view, but note how clear the opening is:

Door edge around the top opening:

This is the start of the build process. If you look close at the tape it shows 9 inches total. This is wrong. It is 8 inches total. I would take the extra inch off the bottom of the top 45 degree hose. I took it off the 90 degree and it forced the 90 to point down a little. Save the pieces you cut off, as they become your couplers for the front end of the straight pipe to the hard 90 and the other is to the air inlet if you don't have an AirDoc's setup and you are running the stock hard inlet:

I bought a longer 24 inch stright pipe. 19 inches is all that was need for the straight pipe install. This allowed me to cut a 3 1/2 inch piece off of the end to use as a coupler between the two bent hoses:

My first goal when I started this process was at the very least to move the air intake point away from the nose of the truck and in the process raises it up about 10 inches by putting it under the factory air intake cover. My second goal was to get it out from under the truck without cutting anything if at all possible. I designed the ducts to work and fit in the channels between the fender and fire wall. I did have to cut a strip of metal about 3/4 of an inch by 4 inches long. None of it was braces or structuarl in nature. A 3 inch pre molded 45 degree angle hose flatten and fit through the opening. I ground and smoothed all of the edges on the small amount of metal that I cut. Then, put door edge guards on the exposed edges to be safe. My final goal was to install a snorkel assembly on top of the cover and connect it to the duct work. This would raise the water line up above the windshield, preventing water lock of the engine.
Observations learned:
1.) The H3 aftermarket ARB snorkel runs out of the fender and along side the pillar for a reason, cleaner lines of sight and less of a blind spot.
2.) Making the factory air intake cover function as a water tight snorkel is actually very easy to do. Cutting a small piece of metal out provides a 45 degree path to the underside of the cover. It also provides the cleanest lines of sight while raising the water line ten inches and moves the water entry point away from the nose. The nose of course is the lowerst point of entry and wash over when entering the water. The factory air cover is also rain proof.
3.) There is just not enough room to create any type of snorkel on an H3 without some type of cutting. Whether it be the fender for the ARB, the entire bracing like on the H1 cap or a strip of metal for the air intake cover with the snorkel attachment. Truth is removing the fender to install ducting and or to cut is really the correct way to do this. I proceeded as if removing the fender is not an option.
Build sheet:
1 - aluminum intake tubing 3" OD x 24 $14.27
1 - silicone 45 degree elbow 3" ID $31.18
1 - silicone 90 degree elbow 3" ID $32.19
5 - stainless worm gear clamp 3.5" ID $1.50 @ 7.50
1 - stainless worm gear clamp 4" ID $2.99 (pack of 2)
1 - solid 90 degree 3" OD $12.99
1 - intermediate coupler 4" to 3" $16.99
1 - tube of sealer/gasket maker $5.99
Total $107.11
Here is as close to the final assembly as I have. The difference is that the flat spot in the up tubing in now flatter and the hose clamps are spun around so the tighten points are on the rear edge instead of the back and they face in. I'll try to explain on another picture:
The factory air intake cover already has vent holes and channeling built into the underside that will provide airflow if a snorkel is not attached:
The factory air intake cover only clips on. Open the hood and lift up on the front edge of the cover. This will pop the front two clips. Apply a small amount of pressure to the pillar trim away from the rear edge of the cover and pull up on the rear of the cover. This will release the back two clips. Be careful not to pull so hard as to hit the cover on the hood edge and scratch your paint:
Remover the inner wheel well by removing all of the push clips:
This is a close up of one of the clips:
This is the only spot were there is a possible difference between trucks. What you see here is the larger air filter box inlet hose of the AirDoc's system. If you do not have an AirDoc's intake installed on your truck, your inlet will be hard plastic and smaller.
This shot is between the fender and firewall. It shows the pocket that the H1 style snorkel turns into and then a large hole above it is drilled. For this set up, we will not be using this hole at all:
This is the main piece that we will be cutting out for this install. By removing it we will open up a channel directly between the fender and the firewall:
Here is a different view of the same piece. It is directly below the air intake cover once it is removed. It is slightly off center of the top opening:
In hindsight, I'm not sure this step was needed, but I believe it did make the process of pulling the hose through the opening easier. When I was done the install, the hose was not tight in that corner and I had to fill the gap back in with sealer to make it water tight. If I were to do it again, I think I would have tried to pull the hose through without cutting here:
Although you can't see it here, I just turned the cutter on end and removed the inner strip of metal:
This is all that I removed. The small piece is what I removed from the top. You should not have to remove it:
Here is what it looks like before I smoothed out the edges. Notice that you can see the front wheel off to the right. It is a stright path once you get past the first, short 45 degrees:
I used touch up paint on any exposed edges. Notice the side 45 degree opening is now the same size as the top opening.
Touch up paint around the top opening, which you should not have to worry about:
I ran a small piece if door edge guard over the cut edge to provide a protected edge. It also had an added benefit of making the hose slide in easier:
Another view, but note how clear the opening is:
Door edge around the top opening:
This is the start of the build process. If you look close at the tape it shows 9 inches total. This is wrong. It is 8 inches total. I would take the extra inch off the bottom of the top 45 degree hose. I took it off the 90 degree and it forced the 90 to point down a little. Save the pieces you cut off, as they become your couplers for the front end of the straight pipe to the hard 90 and the other is to the air inlet if you don't have an AirDoc's setup and you are running the stock hard inlet:
I bought a longer 24 inch stright pipe. 19 inches is all that was need for the straight pipe install. This allowed me to cut a 3 1/2 inch piece off of the end to use as a coupler between the two bent hoses:
Last edited: