• Welcome to H4O! For a reduced ad experience, please login or register with the forum.

H3 Front diff crossmember bushing fix

alrock

El Diablo
Staff member
Messages
10,447
Location
Scottsdale
Inspired by Speedy and equipped by suspension.com, Bigunit, kd7irm and I tackled the task of replacing the bushing in my crossmember with the Energy Suspension bushings sold in a kit by suspension.com.

The OEM setup is a metal sleeve that is keyed to the diff with the sleeve sitting in vulcanized rubber so that the diff "floats" up and down in the rubber providing the mall-goer with reduced noise, vibration and hardness vs. a diff that is attached to a frame or subframe. The cushioning is provided by how the sleeve clings to the rubber; the OEM bushing provides indirect support to the diff as the sleeve does all of the work. Unfortunately that rubber is not designed for offroading and eventually splits leading to a diff that will then rock excessively and even clang against the crossmember. (I have now destroyed five crossmember bushings in 94,000 miles/4.5 years.) The Energy Suspension bushings are much firmer. Dwayne's guess is that the OEM is about 40 durometer and the ES one is 80-90.

I had a spare crossmember (original style with UCP tab on passenger side) sitting in my storage so we took it to the scorpion4x4.com shop and asked the owner, Dwayne to pop out the bushing for us so we could then assemble the kit as we've seen discussed in other threads.

Now, a guy that builds autonomous vehicles like this
Wrenching-111211-1-S.jpg
and kick-ass rides like this
Wrenching-111211-3-S.jpg
doesn't just pop the bushing and leave us to suffer on our own. Dwayne asked to see the kit and looked at the H3, the kit, the crossmember and how it would be put together.

First, he burned out the old bushing and blasted the OEM metal sleeve that was in the OEM bushing.
1112111208-L.jpg


The OEM bushing sits in a thin metal sleeve that is pressed into the crossmember. Here's the remnants.
Wrenching-111211-12-L.jpg


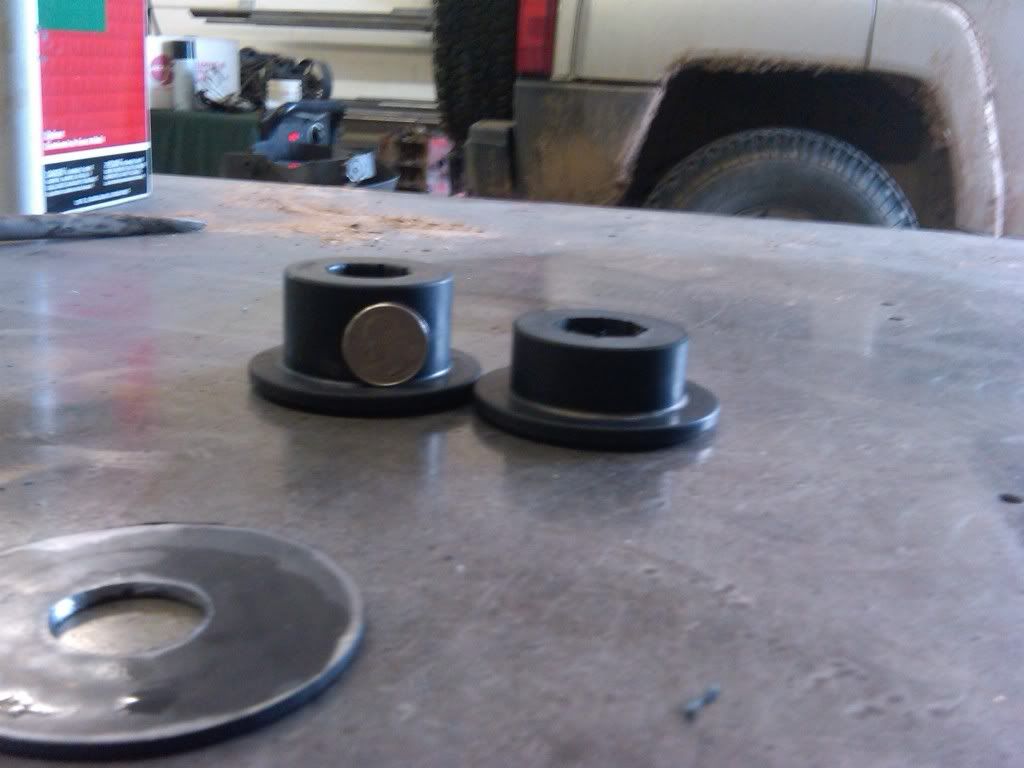
These were the parts we had. Note that in the original crossmember it has a full wall for the bushing and it extends fully from the top of the crossmember to the bottom. The OEM sleeve is to the upper right (after being blasted with glass bead); the Suspension.com bushings and sleeve are on either side of the crossmember. You can tell this is an original design crossmember by the tab for the UCP/skid plate in the lower right.
Wrenching-111211-11-L.jpg


Dwayne took some measurements of the crossmember, bushings, sleeve etc. and then revamped the entire plan. The new bushings and sleeve are too long. The OEM sleeve is too wide to fit in the ES bushings. Dwayne decided to take the keyed head off the OEM sleeve (it is pressed on), machine the new sleeve to accept the OEM keyed head and then he pressed them together.
Wrenching-111211-13-L.jpg


Dwayne ended up machining off 1/2" off of each bushing and 5/8" off the the new sleeve to get this to a secure, snug fit.
Wrenching-111211-22-L.jpg


Wrenching-111211-23-L.jpg


He realized and extra spacer would be beneficial at top as the diff sits about 3/8" above the crossmember so between the height of the ES bushing and the OEM keyed head he needed about an 1/8" spacer so naturally he created one that would match the outside diameter of the ES bushing. (He actually created two, including one that we could use on the bottom.) This one was designed to slide over the sleeve.
Wrenching-111211-18-L.jpg


Wrenching-111211-20-L.jpg


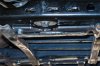
This was the final product
Wrenching-111211-25-L.jpg


We replaced the crossmember and used the OEM bolt and captive nut. The OEM bolt has a concave washer that in the OEM configuration sits open so that only the part of the washer rests against the OEM sleeve. The remainder of the washer flares away from the bushing. We decided to reverse that bushing in our install so that the pressure was on the ES bushing and not the sleeve so the bushing would do the work. I may change that decision as I'm concerned the concave washer will deform over time and we won't get the desired results.
 

alrock

El Diablo
Staff member
Messages
10,447
Location
Scottsdale
The crossmember that we removed from my truck was the newer design with the missing skid plate/UCP tab. The design of the crossmember is very different than the original one and the above kit (not to mention the Suspension.com kit) will NOT work without further modification.

First, my bushing was so broken (1 year old and it broke this October in Moab) that the sleeve came right out. The rubber and pressed in sleeve remain in the crossmember.

This is the top of the crossmember where the keyed head would sit. Note the missing rubber on the crossmember - the sleeve couldn't even sit squarely on the surface.
Wrenching-111211-30-L.jpg


Wrenching-111211-34-L.jpg


Here's the bottom side. Note that the inner wall does not go through from top to bottom. I haven't measured yet to see if the internals are the same depth but there's an obvious recess here.
Wrenching-111211-28-L.jpg


The flange of the ES bushing does NOT fit down in that hole as would be necessary.
Wrenching-111211-36-L.jpg


Wrenching-111211-37-L.jpg


Removal of the old crossmember and installation of the new one took about 20 minutes total, aside from hassling with my damaged UCP.

Right now this is a one-off fix though Dwayne believes this could and should be permanent. I may have him apply a similar fix to the two braces on either side of the front diff so we can get a similar bushing in there vs. vulcanized rubber. Dwayne can machine his own bushings from stock so this would be easy for him.
 

06 H3

a.k.a. "The Jackal"
Messages
9,352
Location
Meridian, ID
Wow! Great work guys! I did the Bebe/speedy fix after my bushing failed and blew my diff. I did not go as in depth as you did but this work is outstanding. Hopefully you never have issues with that diff bushing again

Sent from my DROIDX using Tapatalk
 

06 H3

a.k.a. "The Jackal"
Messages
9,352
Location
Meridian, ID
This makes me wonder about what long term effects that I may have with my bushing. I am sure its better then stock but yours seems closer to bulletproof. I like bulletproof :)

Sent from my DROIDX using Tapatalk
 

Hunner

Well-Known Member
Messages
2,334
Location
Arkansas
Don't be shootin at Hummers!
Great write up Alrock and good pictures. He gets that worked and could probably sell about 40 kits or more, ya know?
 

Bigunit

Hammer Down!
Staff member
Messages
6,558
Location
Arizona
After seeing the differences in length and sizes of the Suspension.com kit bushings & sleeves, the Suspension.com parts are too long for the original style crossmember & because the bushings are much harder than the OEM bushings, they can't compress together sufficiently to provide a close-to-OEM snug fit for the new bushings and, as a result, the front diff. As Alrock noted, this pic shows how much longer the Suspension.com sleeve is compared to the OEM sleeve & the OEM sleeve is too wide to fit in the Suspension.com bushings.

Seeing how he did this fix & how snug and close to OEM measurements he nailed it, Dwayne commented that the modified & harder Suspension.com bushings and sleeve should be a permanent fix because there is no play in this set-up. I hope that is the case & we will see!
Wrenching-111211-11-L.jpg


Thank you Dwayne for taking the time to figure this out for us.

Anyone have & is willing to sell me their used original style crossmember with a worn out bushing but still with the OEM sleeve? I'd be happy to take it off your hands.

IMHO, the new-style cross member bushing is smaller & weaker than even the original-stye bushing and will eventually wear out faster than the OEM original-style crossmemeber bushing.
 

Bigunit

Hammer Down!
Staff member
Messages
6,558
Location
Arizona
In essence the keys to the Alrock version of this fix (if you're going to use the Suspension.com kit) are:

1) taking the pressed-on keyed head off the OEM sleeve
2) machining the new Suspension.com sleeve to accept the OEM keyed head & pressing them together
3) cutting 5/8" off the new sleeve to match the length of the OEM sleeve and
4) machining 1/2" off of each of the 2 new bushings.

frontdiffbushings.jpg
 
Last edited:

Bigunit

Hammer Down!
Staff member
Messages
6,558
Location
Arizona
AZTraveler,
That will be the next project - I have another suspension.com kit & Alrock left the new style crossmember that we removed from his rig here with me. I'll be taking it to over to Dwayne to let him play with it.
 

06 H3

a.k.a. "The Jackal"
Messages
9,352
Location
Meridian, ID
Im a bit confused. What are some of the issues with the new style crossmember and just the Bebe fix without doing what you guys did. I have a new style crossmember but I may have to look into a fix for the rancho crossmember. Who knows if those have similar bushing products to the stock one

Sent from my DROIDX using Tapatalk
 

alrock

El Diablo
Staff member
Messages
10,447
Location
Scottsdale
The Energy Suspension bushings supplied by suspension.com do not fit in the new crossmember - the top flange is too wide. The bushing would have to be made a bit smaller to fit into that recess. Look at the last two pics of the second post.
 

AZtraveler

Active Member
Messages
33
Location
Arizona
Somewhat related is the missing UCP tab on the new crossmember. Evidently they changed the UCP design at some point so that it mounts directly to the crossmember. Easy fix is to weld a plate into old style UCP. I can upload photos if anyone is interested.
 

Bigunit

Hammer Down!
Staff member
Messages
6,558
Location
Arizona
Somewhat related is the missing UCP tab on the new crossmember. Evidently they changed the UCP design at some point so that it mounts directly to the crossmember. Easy fix is to weld a plate into old style UCP. I can upload photos if anyone is interested.

Yes, please & thank you.
 

AZtraveler

Active Member
Messages
33
Location
Arizona
Yes, please & thank you.

Here you go. We made a plate and welded it into the front UCP opening - then drilled in line with a threaded mounting hole in the diff crossmember. IMHO it's a better solution than the tab on old crossmembers. (In the interest of full disclosure I got the idea from another forum sometime back ;~))
 

Attachments

  • H3T-0179.jpg
    H3T-0179.jpg
    86.4 KB · Views: 6,934

Bigunit

Hammer Down!
Staff member
Messages
6,558
Location
Arizona
Here you go. We made a plate and welded it into the front UCP opening - then drilled in line with a threaded mounting hole in the diff crossmember. IMHO it's a better solution than the tab on old crossmembers.

That's a great, easy way to secure the original version UCP to the new version crossmember. A lot better and stronger than the tab on the original version crossmember. Thanks for the post.
 

Bigunit

Hammer Down!
Staff member
Messages
6,558
Location
Arizona
f5, don't you get a clunking sound from it not being secured and tightened down when hitting bumps or ruts in the road? If not, why not - did you clamp it down some other way - because that bolt on that tab was loose on mine and the "unknown clunk" was driving me nuts but went away after I tightened it.
 

f5moab

Mr. Beretta
Messages
1,986
Location
Hiding in a potato patch in Idaho
F, don't you get a clunking sound from it not being secured and tightened down when hitting bumps or ruts in the road? If not, why not - did you clamp it down some other way - because that bolt on that tab was loose on mine and the "unknown clunk" was driving me nuts but went away after I tightened it.

No clunking. All the tech did when he replaced it was to bolt the two skids together where the tab used to be. We even did Top of the World and that trail has quite a few ledges and if there was a way to get a clunk out of it, that would be a trail to do it on. And I'll add, I slammed down on that skid a few times with no problems.

Only clank I have is the rear left, and it has been there long before the cross member was replaced.
 

Bigunit

Hammer Down!
Staff member
Messages
6,558
Location
Arizona
UPDATE: "Monster Garage" Dwayne and I are working on a front diff crossmember (CM) w/a new & longer-lasting bushing solution. He currently has Alrock's "newer version" CM that he removed from his rig when he installed the "older version" CM with Dwayne's bushing fix detailed above and is working on a new CM bushing design that will be better than the OEM design.

With the "MG CM fix" forum members will be able to purchase a "rebuilt" front diff crossmember (both older & newer CM versions) with a new and longer-lasting bushng at over half the price of a new OEM newer version CM with you sending in your old worn-out CM core. We figured we need to get this project moving, as our H3s are getting older, more miles are piling up & warranties running out on our rigs. This will be a cheap, yet better than OEM, solution for a chronic H3 problem. This way, no one will have to spend hours trying to remove the old worn-out bushing - instead all you'll have to do is remove and replace the CM - a 20-30 minute DIY job at most.

If anyone has any worn-out CMs laying around (either version) & wants to send them in to us so that we can start buiding up an exchange inventory, send me a PM & we will work something out so that you get a deal on your replacement - which as we all know, is just a matter of a short-time.
 
Last edited:

06 H3

a.k.a. "The Jackal"
Messages
9,352
Location
Meridian, ID
Way to go! You guys took the initiative on a problem that GM and other aftermarket companies wouldnt help us with
 

Zach

Mall Crawler
Messages
4,812
Location
So Cal
If anyone has any worn-out CMs laying around (either version) & wants to send them in to us so that we can start buiding up an exchange inventory, send me a PM & we will work something out so that you get a deal on your replacement - which as we all know, is just a matter of a short-time.

I know I've got at least one here that you can have. It is the old version. I will hunt around, there maybe another one or two.
 
Last edited:

Bigunit

Hammer Down!
Staff member
Messages
6,558
Location
Arizona
Well, Monster Garage guy Dwayne (in his Scorpion), Alrock and I hit the trail yesterday - no major carnage BUT guess what part gave out on the T towards the end of our run - (HINT: second one that's gone out, this one lasted all of 8k miles, the original one gave out at about 24k miles!)? Any guesses?
 
Top