• Welcome to H4O! For a reduced ad experience, please login or register with the forum.

06 H3's Fabrication Corner.

06 H3

a.k.a. "The Jackal"
Messages
9,352
Location
Meridian, ID
Hey guys, Let the fabricating begin! Winter break is here and I will try and get as much fabrication practice in. I am still an inexperienced fabricator so I will come here for advice from the fabrication pros. (I hope scarsman, speedy, bebe and any other fabricator sees this! :))

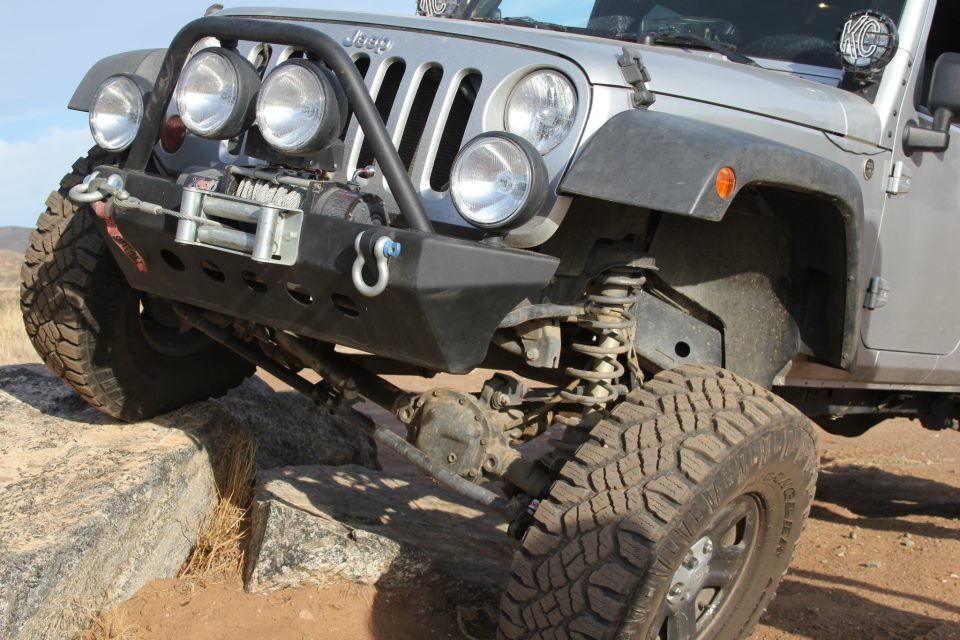
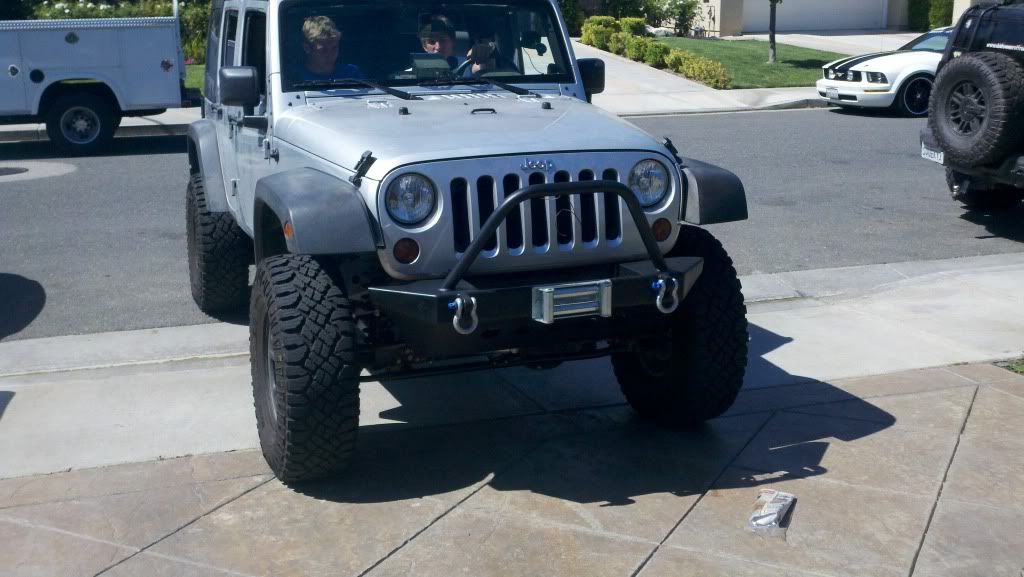
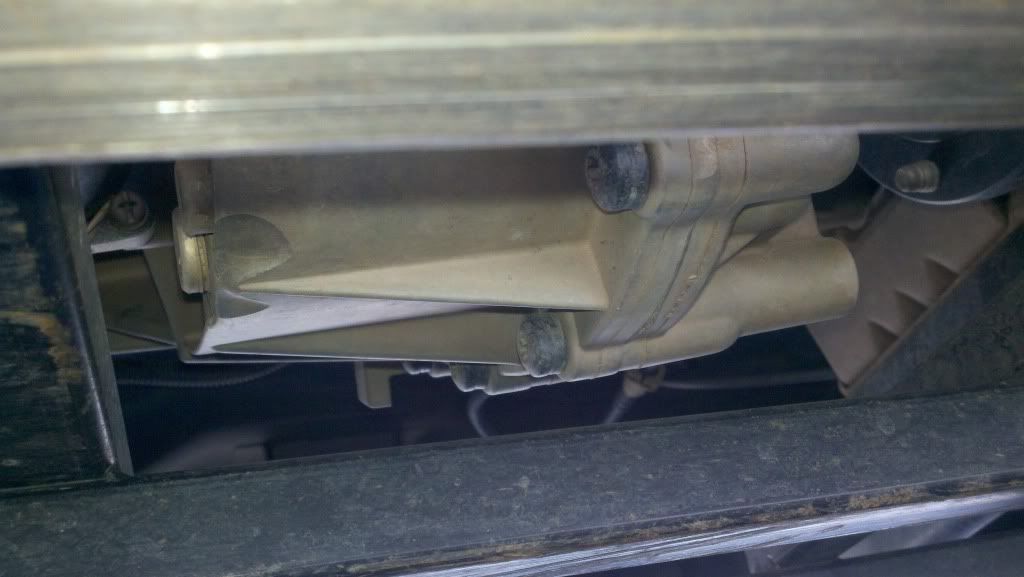
Let me start off with some of the projects I have done. The ones I have had help with were my brothers bumper and the grand cherokee diaster fix. Ones that I did completely on my own was the UCP reinforcement and the JK windshield light mounts. I have done some other stuff but its escaping me. I will post up all my fab project here.

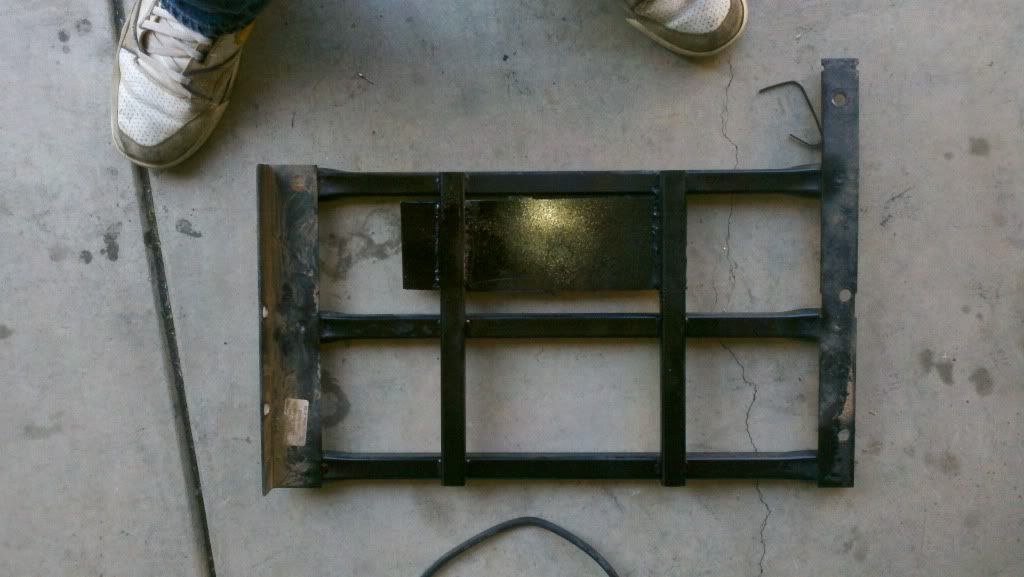
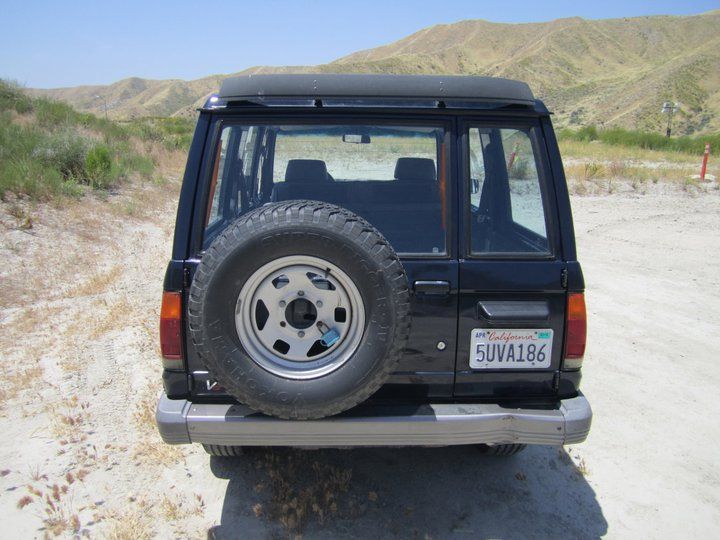
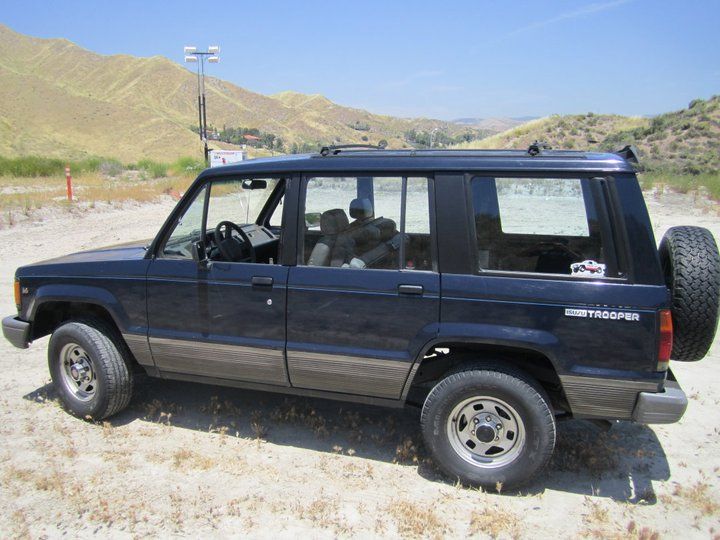
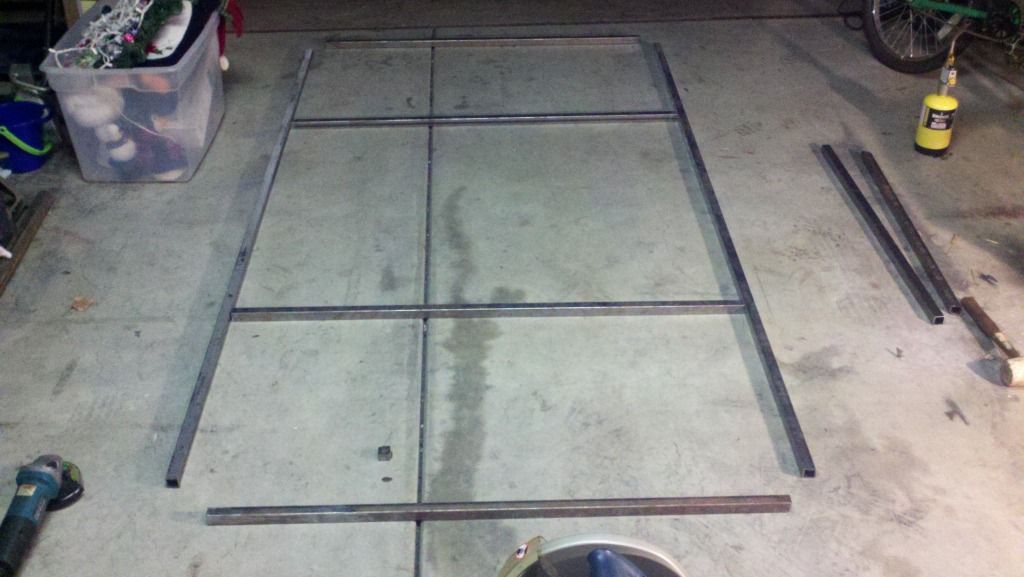
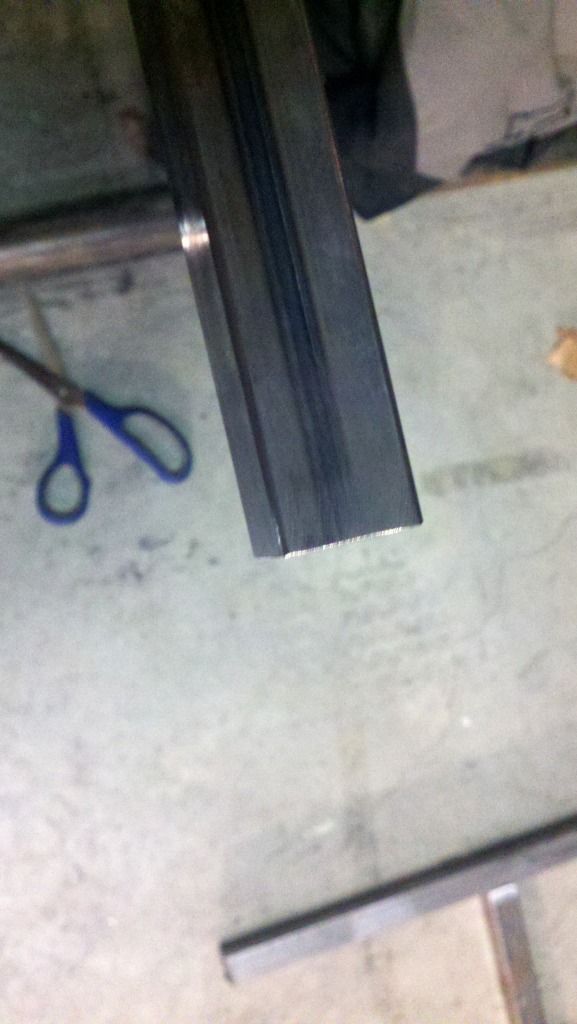
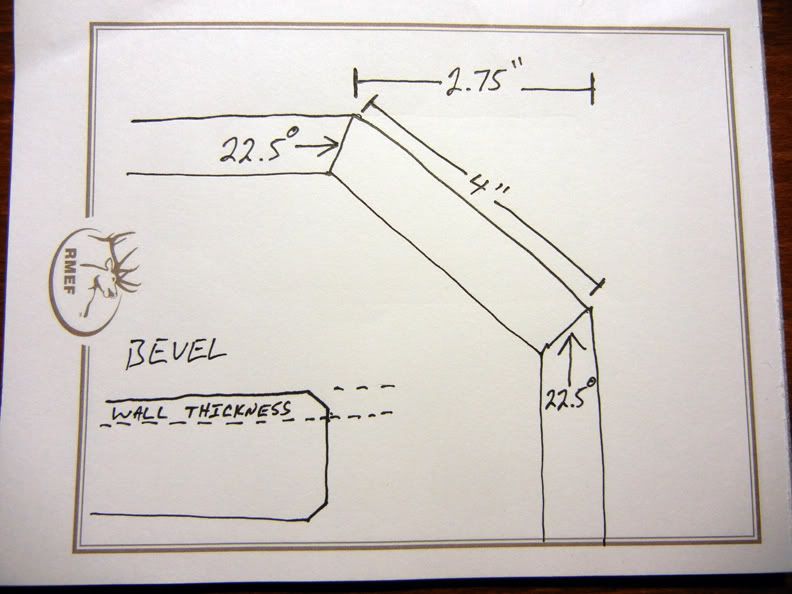
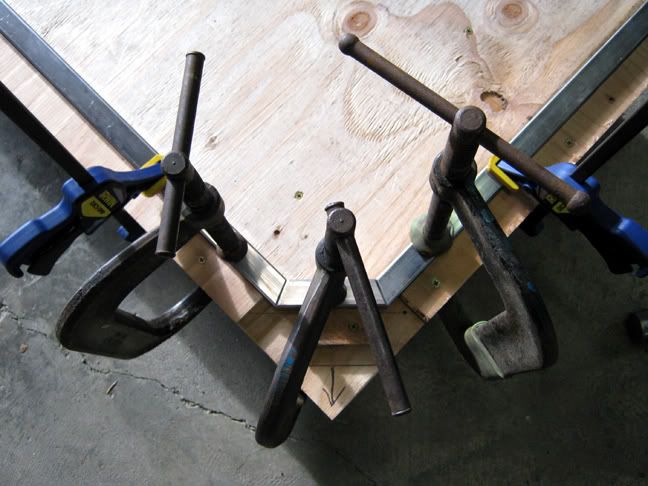
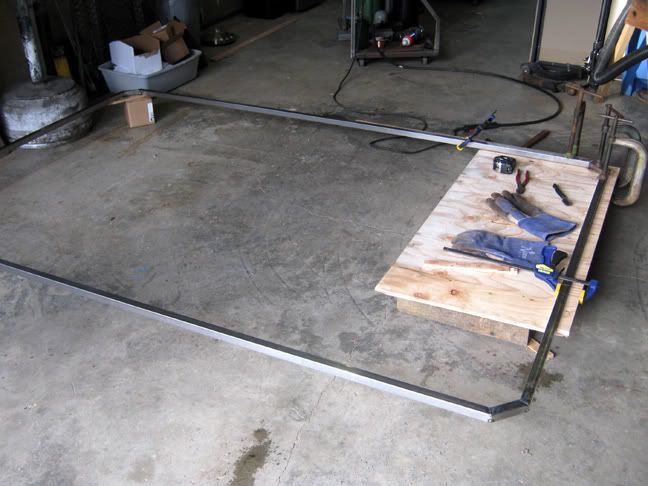
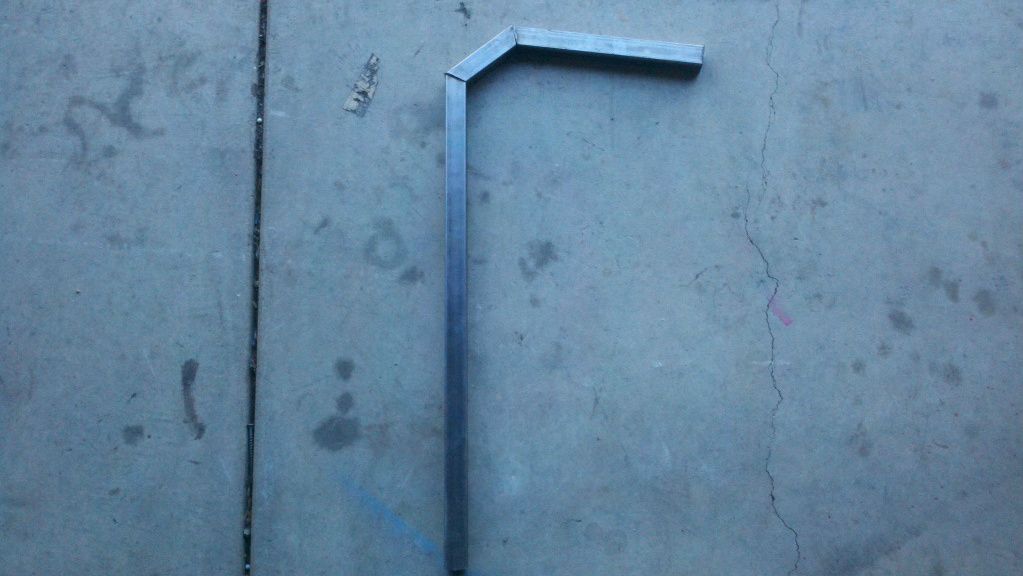
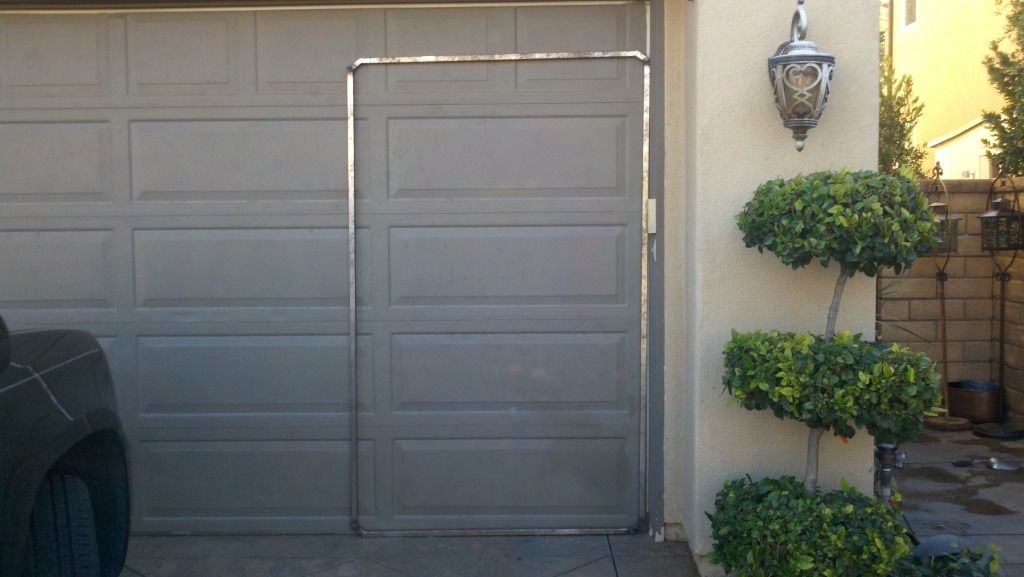
My most current project is the roof rack for a kids Isuzu trooper. I am trying to do this completely by myself, so instead of having people help me in person I would rather try and get advice here and figure it out on my own in person then have someone do some work for me. So far I have the measurements and welded together the bottom piece. It has warped a bit. I have tried to keep everything as straight as possible but I guess it didnt work out that way. Even though I am only getting paid through practice and experience I still dont want this to look like ****. I want to be proud of it, not ashamed. So before I continue on what can I do to get this piece nice and straight?

I have put this project aside during school so it needs to be cleaned up but if you notice the right side is a tad higher then the left. I checked the measurements and everything is the same...:huh:

2011-12-08_13-41-16_287.jpg
 

06 H3

a.k.a. "The Jackal"
Messages
9,352
Location
Meridian, ID
Ooo cant wait to see more!

Modified Smittybilt bumper. It was the flat one. My brother picked it up very cheap but a friend and I modified this together. He taught me a lot on this project. We recessed the winch, added the hoop bar, and welding in tabs for the lights. We have used the winch a lot and no issues

Finished product. He is swapping out the lights for an LED bar. and smaller lights on the outside of the hoop...If you do notice the wire on the upper right hand corner that is his PA system. It was before he wired it up properly...we didnt leave it unclean looking.

386449_2550518572944_1553271386_2733001_1020158397_n.jpg


These two were before we finished...
2011-06-23_15-35-05_746.jpg


2011-06-12_13-05-16_109.jpg


This is how it looked when it showed up to our door

http://offroad-review.com/new/index.php?page=253
 
Last edited:

06 H3

a.k.a. "The Jackal"
Messages
9,352
Location
Meridian, ID
These were two projects I did completely on my own. No help :)

Rocks have made there way through the UCP so I added a plate. This was the first one I did by myself. Flux core, before I had my CO2 tank.


Rocks have made there way through here...unlikely but it has happened. I added this


2011-06-24_12-51-26_843.jpg


2011-06-24_15-23-25_968.jpg
 

06 H3

a.k.a. "The Jackal"
Messages
9,352
Location
Meridian, ID
The other project I did on my own..Light tab mounts for my brothers jeep

Damn it cant find pictures...reserving this spot.
 

Hans3T

Lif"T"ed
Messages
3,035
Location
NC
:agree: I think there are multiple people who could use UCP for lifted trucks, Rancho and Tuff Country alike. :thumbs:
 

06 H3

a.k.a. "The Jackal"
Messages
9,352
Location
Meridian, ID
Thanks guys! I was thinking about the rack yesterday and decided to start over. That base for the rack was rushed and done months ago. Its time to start fresh. I want to keep it clean and simple. I dont want a big box though. Any thoughts or suggestions feel free, I will be restarting monday. I have plenty of metal in the garage and will be chopping this one up for smaller pieces I will need. I decided to go with square tubing because the older isuzu troopers are boxy and feel it would be weird if I started rounding it out. Here is a picture of the trooper. Nothing crazy but he has now added tires and rims, I must admit these things are decent. He doesnt go on any of the tougher trails I do but for the local stuff it does just fine.

254312_219204748108940_100000582500463_793759_1113453_n.jpg


253061_219204718108943_100000582500463_793758_3225108_n.jpg


251519_219204684775613_100000582500463_793756_4711311_n.jpg
 

AbsntMnded

Well-Known Member
Messages
132
Location
Pennsylvania
Good luck! I'm picking up a craigslist arc welder next week, so I'll be tuning in for your progress. I've never welded, but plan on FINALLY getting my Hunner front skids on after a little practice.
 

Scarsman

Sponsor
Messages
1,561
Location
Monroe, WA
Be careful! It is an addictive hobby.

A suggestion for dealing with warping on your frame, Just tack it together at first, both your upper and lower perimeter frames. Then tack them together with your upright posts. Then tack in your cross pieces for the floor. Once you have the main structure all tacked together statr welding the joints. Weld a couple on one side, then weld a couple on the other side. Don't get in a hurry, so it doesn't get too hot.

By tacking the main structure all together before fully welding the joints, it will be much more rigin and resist warping. Just don't forget any joints!
 

06 H3

a.k.a. "The Jackal"
Messages
9,352
Location
Meridian, ID
Started the rack today! We pulled the trailer and buggy out to make some space in the garage and got to work...

I need advice on the corners. Trying to decide what to do there. I made the long pieces and some support crossmembers first so I can tack everything in and make sure it wont warp. Right now nothing is tacked, I am waiting for more metal so I can get more crossmembers in and also get the ends in place too.

2011-12-12_18-37-53_201.jpg
 

Scarsman

Sponsor
Messages
1,561
Location
Monroe, WA
I made a corner jig out of a piece of plywood and some blocks. If you look in my build thread it is one of the first pictures. Pretty simple. I used that for the first perimeter frame, and then just layed the second one on top of it and clamped the pieces to it. Hope that makes sense?

For the corners, I found that the look I liked was having the corner piece 4" long on the long side. Cut them at 22.5 degree angles, and cut your sides at 22.5 degrees. Don't forget to bevel the joints so you get good penetration on your welds. If you don't, then when you grind it smooth you are grinding all the weld off and you will have very weak joints.

If you are using 1" tubing here is how to calculate your overall measurments:

The angled corner will take up 2.75" of distance. That is for each corner, so 5.5" is the effect they will have on overall measurments. So, if you want your rack to be 84" in total length, then subtract 84"- 5.5"=78.5". Cut your side frame pieces to 78.5".

I hope that makes sense. If you have any questions, let me know.

Looks good so far. Good on you for bevelling the edges. One suggestion, I would bevel them a little more than what it looks like in the picture. Using a grinder bevel them at about a 45" angle so it goes about half way through the material. That way once you grind it smooth, you will still have good deep penetration.


I'll edit this to add a quick sketch. Maybe it will help make it easier to understand.

DSCN1945.jpg


Here is the jig I made:

IMG_0002.jpg


IMG_0003.jpg
 
Last edited:

06 H3

a.k.a. "The Jackal"
Messages
9,352
Location
Meridian, ID
I made a corner jig out of a piece of plywood and some blocks. If you look in my build thread it is one of the first pictures. Pretty simple. I used that for the first perimeter frame, and then just layed the second one on top of it and clamped the pieces to it. Hope that makes sense?

For the corners, I found that the look I liked was having the corner piece 4" long on the long side. Cut them at 22.5 degree angles, and cut your sides at 22.5 degrees. Don't forget to bevel the joints so you get good penetration on your welds. If you don't, then when you grind it smooth you are grinding all the weld off and you will have very weak joints.

If you are using 1" tubing here is how to calculate your overall measurments:

The angled corner will take up 2.75" of distance. That is for each corner, so 5.5" is the effect they will have on overall measurments. So, if you want your rack to be 84" in total length, then subtract 84"- 5.5"=78.5". Cut your side frame pieces to 78.5".

I hope that makes sense. If you have any questions, let me know.

Looks good so far. Good on you for bevelling the edges. One suggestion, I would bevel them a little more than what it looks like in the picture. Using a grinder bevel them at about a 45" angle so it goes about half way through the material. That way once you grind it smooth, you will still have good deep penetration.


I'll edit this to add a quick sketch. Maybe it will help make it easier to understand.

DSCN1945.jpg


Here is the jig I made:

IMG_0002.jpg


IMG_0003.jpg

Makes perfect sense! Thanks for doing all that math. I really love that angled look will probably go with something like that. How much more should I bevel I dont want to over do it.

Another question I had was how long was your rack? Mine will probably be much shorter seeing a trooper is alot smaller then an H2 but was just curious the dimensions of the rack compared to the roof
You are starting to get mad skills Chris.:thumbs:

Thanks Scooter! Hopefully you will see a finished product in person if you stop by during the rancho lift install
 

Scarsman

Sponsor
Messages
1,561
Location
Monroe, WA
Keep the bevel angle at about 45 degrees, (doesn't have to be exact) and make it so the bottom edge of the bevel goes half way or a tad more through the thickness of your material.

My rack is 8' 1" long, and I think it was 5' 2" wide. I don't remember my roof dimensions. If you look at my rack pics you can kind of see how much inset I have.
 

06 H3

a.k.a. "The Jackal"
Messages
9,352
Location
Meridian, ID
Scarsman thanks for all your advice on this! I had some extra tubing laying around and deciding to replicate your idea. One issue...I didnt replicate it :gaah:

I made sure that each cut was 22.5 degrees and lined em up. They werent straight. DAMNIT! Any suggestions?

2011-12-14_13-30-17_225.jpg
 

Scarsman

Sponsor
Messages
1,561
Location
Monroe, WA
What are you cutting them with? I have a power metal bandsaw, and can make fairly precision cuts with it. If you are doing it with a grinder and cutoff wheel, they are not very precise. I would cut your parts a tad long, and then you can use a grinder to carefully fine tune them to the right angle and length. It is a pain, and takes time, but if you don't have a decent saw where you can clamp your parts down and make straight accurate cuts, it is the only way. When you are using multiple angles accuracy is very important.

Don't lose heart! You'll get it!

Oh! For grinding, get some good flap discs. They are much better than composite wheels. This is what they are: http://www.csunitec.com/sanding_polishing_grinding_finishing/flapdiscs.html

Any welding store will have them.
 
Top