• Welcome to H4O! For a reduced ad experience, please login or register with the forum.

A K5 Cummins Conversion: The saga continues...

MaxPF

AGNTSA
Messages
1,394
Location
The dark side of the globe
This is my new new build thread, since the old one ended up turning into a mess. This time we will start from the beginning...

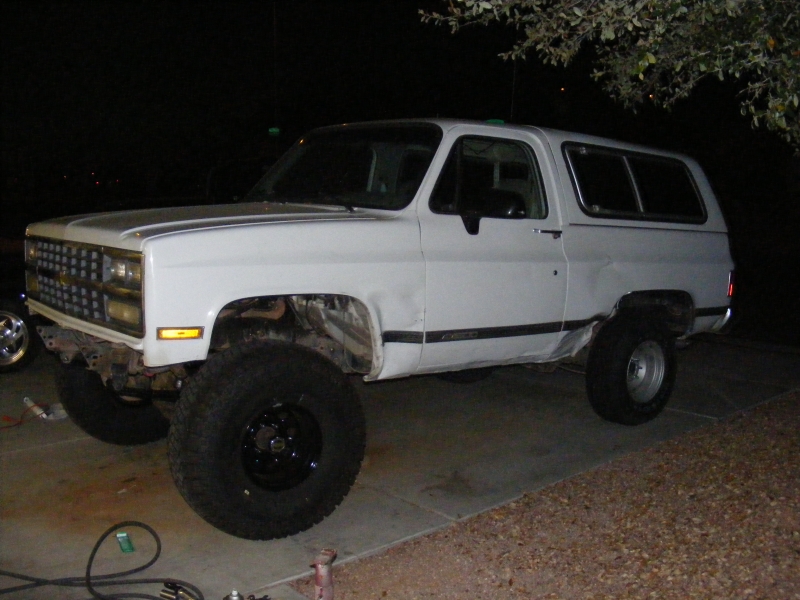
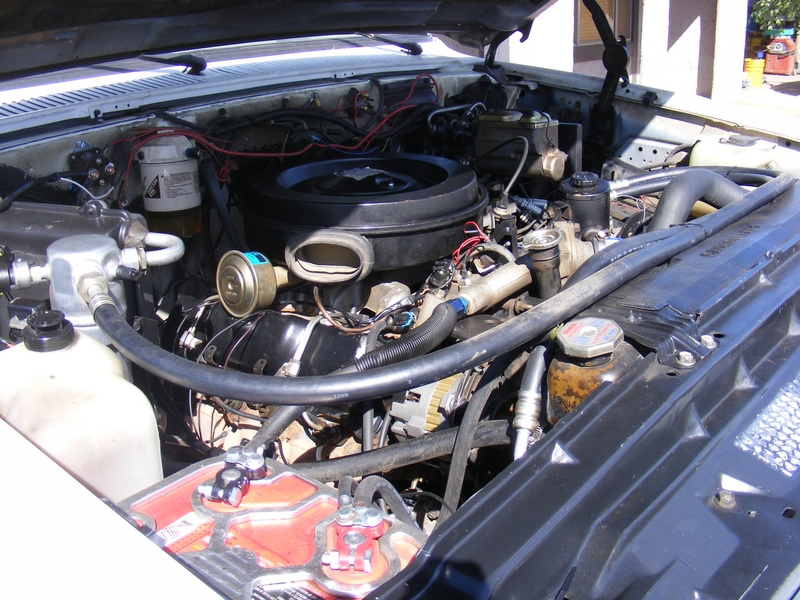
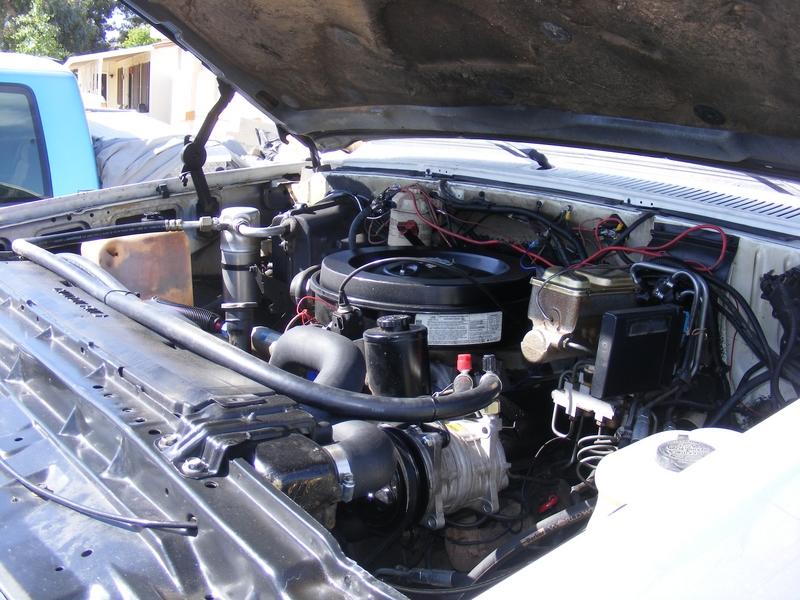
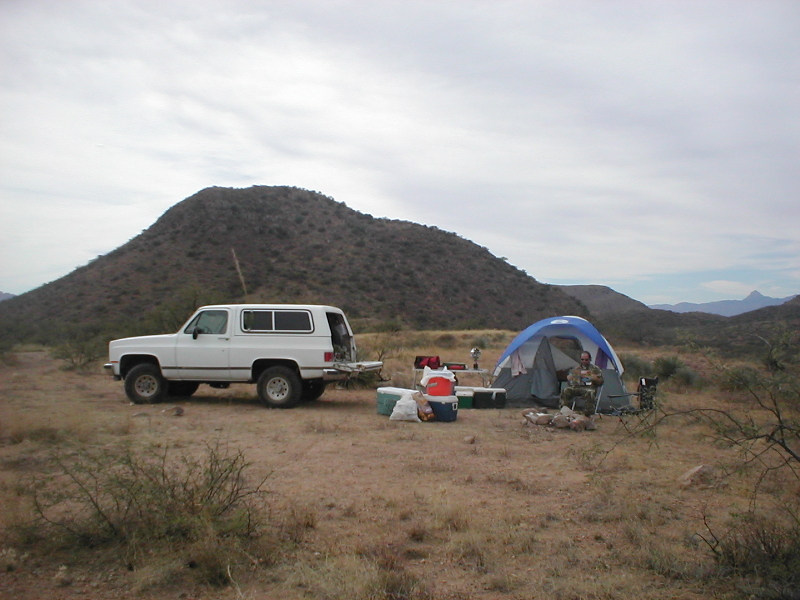
Way back in 2006 I acquired a white 1991 K5 Blazer with a TBI 350 and a blown-up 700R4 automatic.. Actually, by this time GM was calling it a V1500, which reflected the fact that it was an old body style vs the new body pickups that came out in 1988. The 4WD new body trucks got the "K" designation, so the old body 4WDs got the "V" designation. The "1500", then as now, denoted a 1/2 ton chassis. It was a Silverado package truck, which meant power-everything and alloy wheels. Here's what she looked like back in the day:

r-PC160035.JPG


r-PC160034.JPG


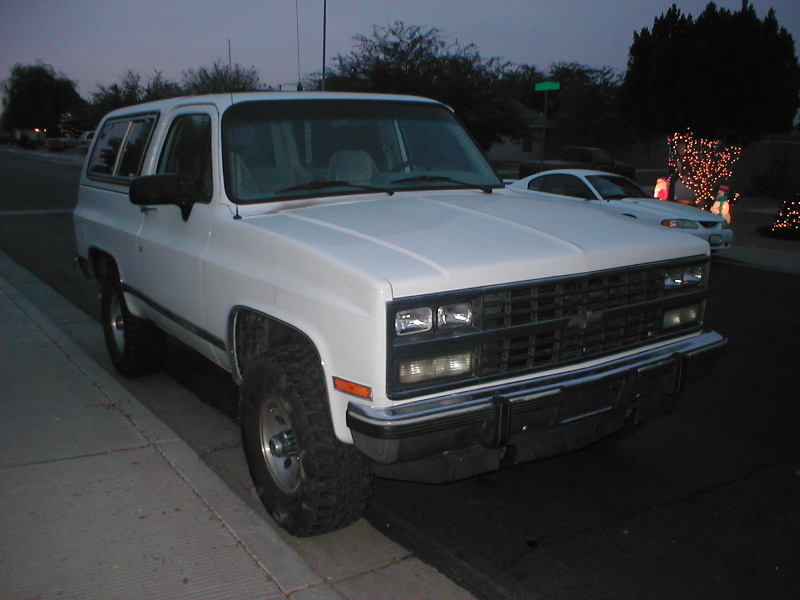
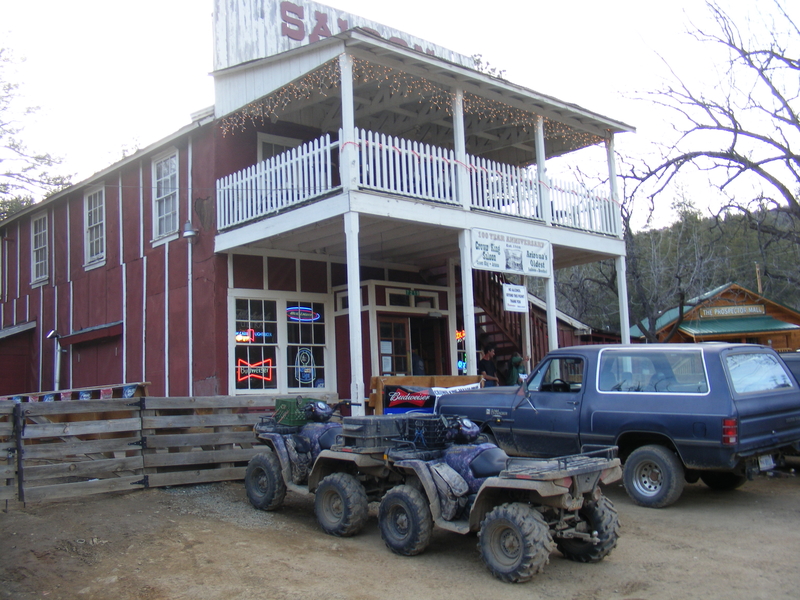
As you can see, it was clean and straight. With a rebuilt trans it ran good as well, and it became my hunting and camping rig:

PB130040-r.JPG


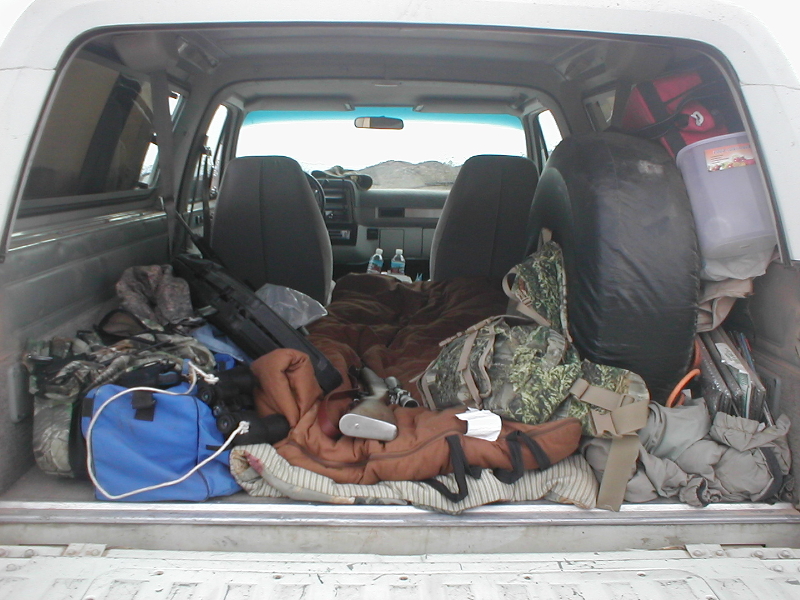
5-star hunting accommodations:

PB130058-r.JPG


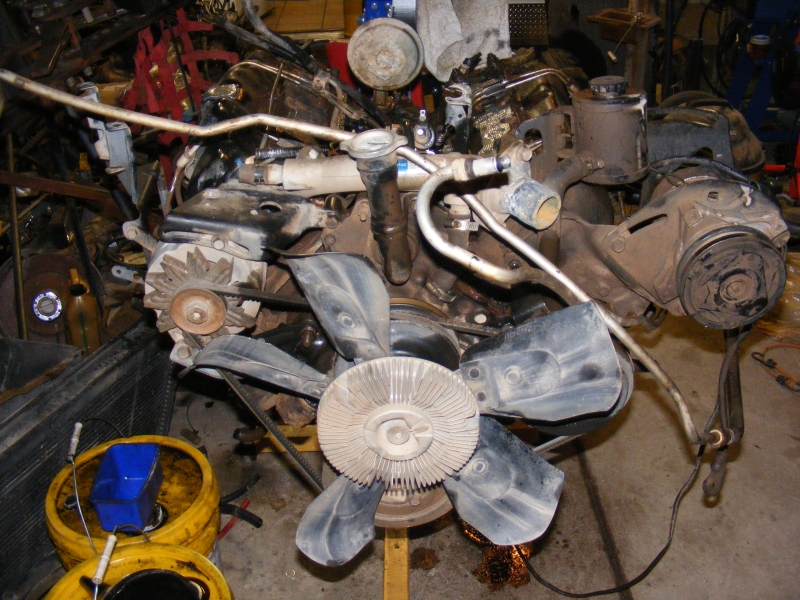
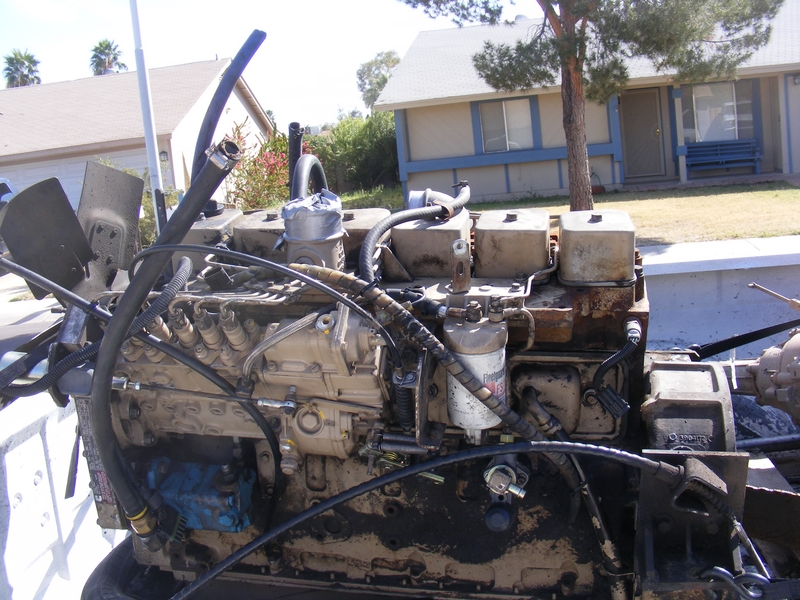
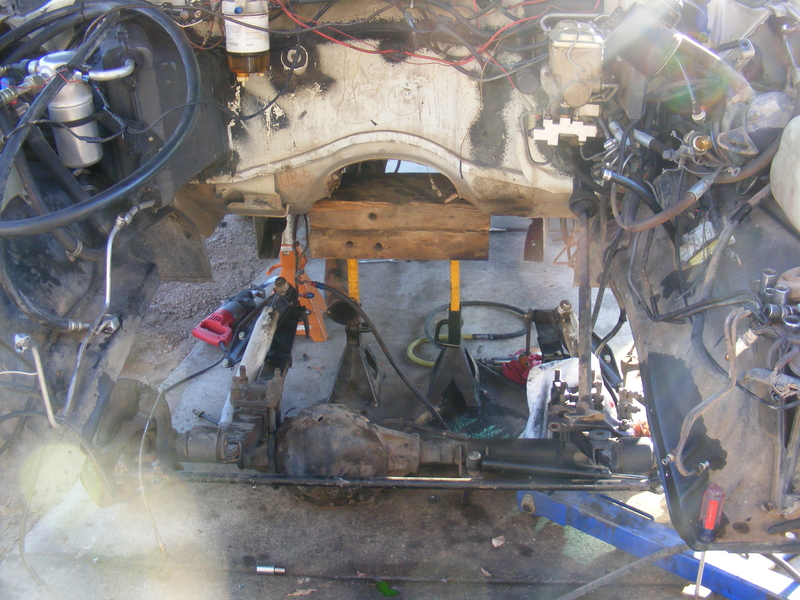
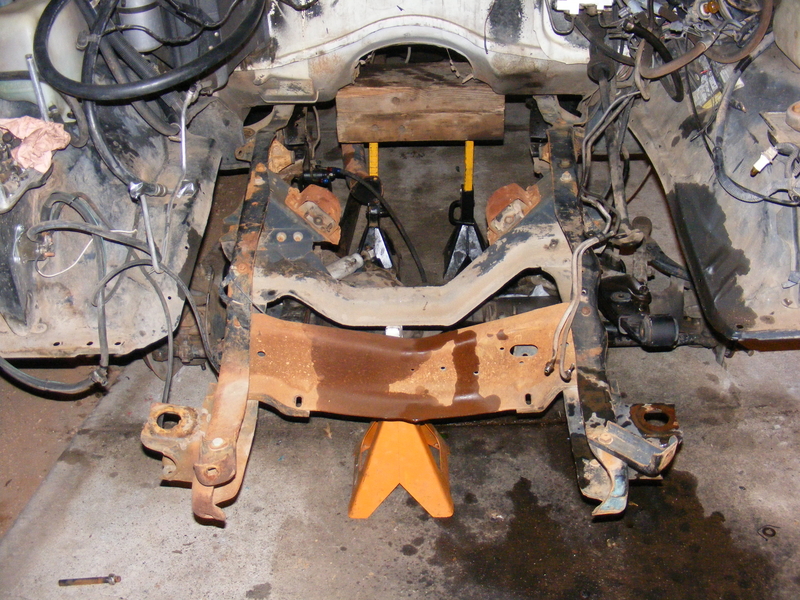
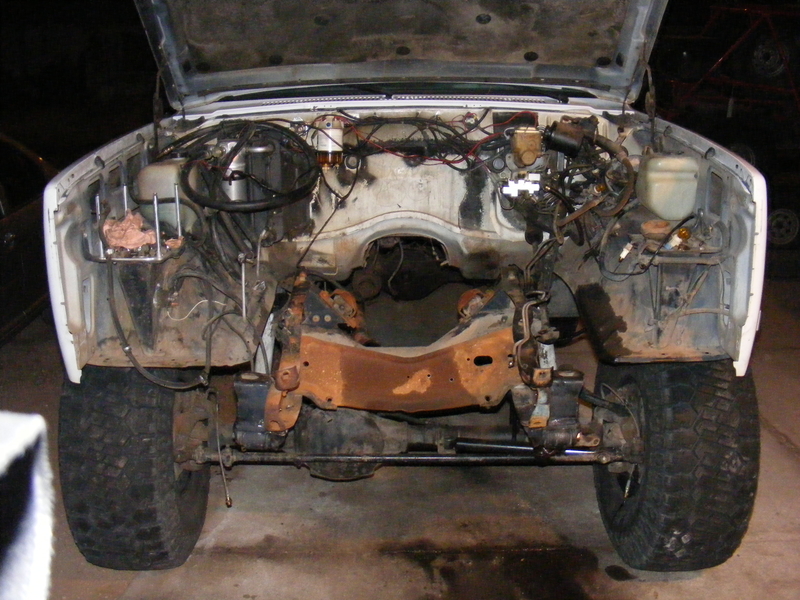
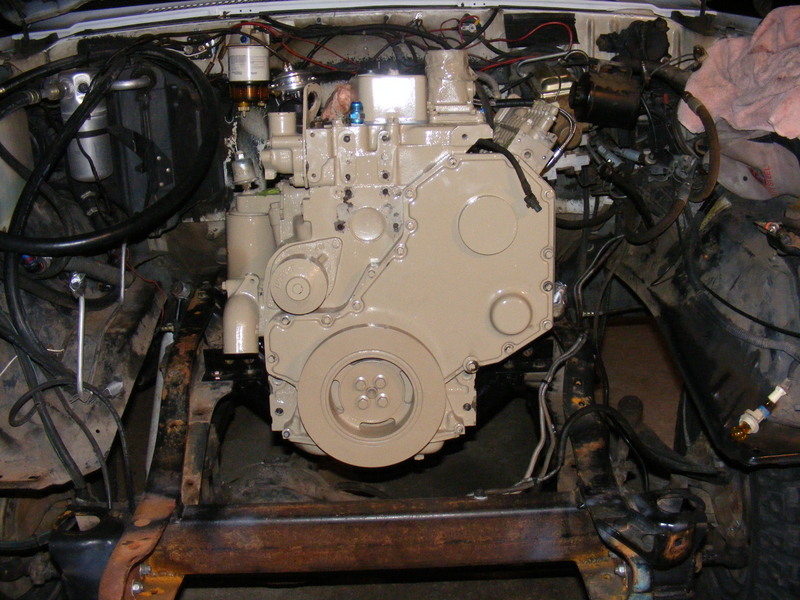
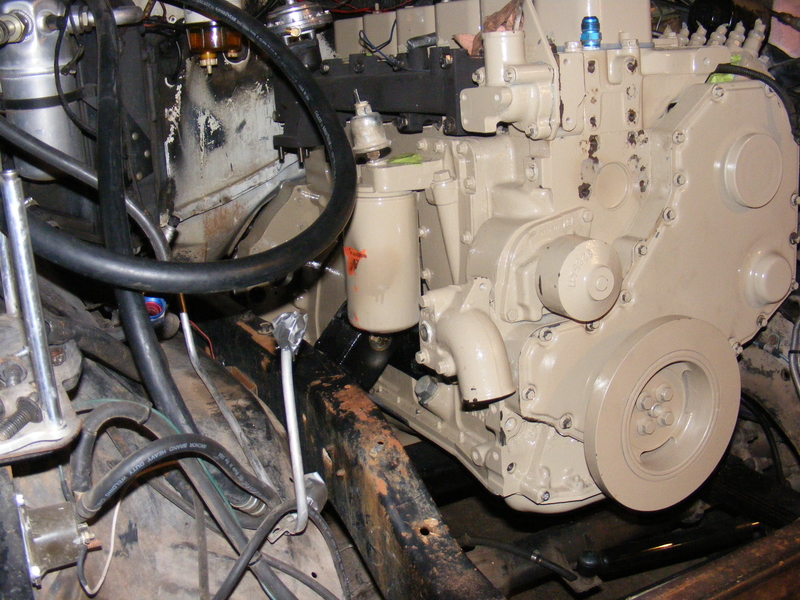
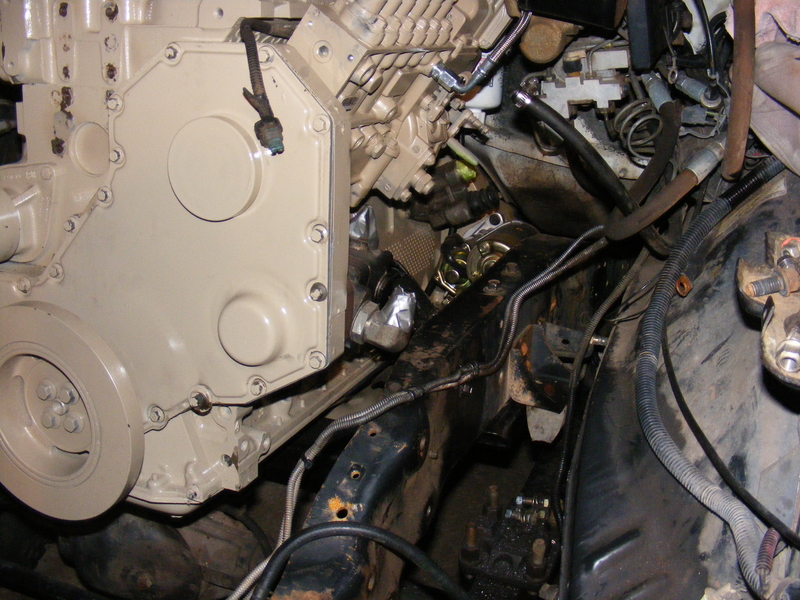
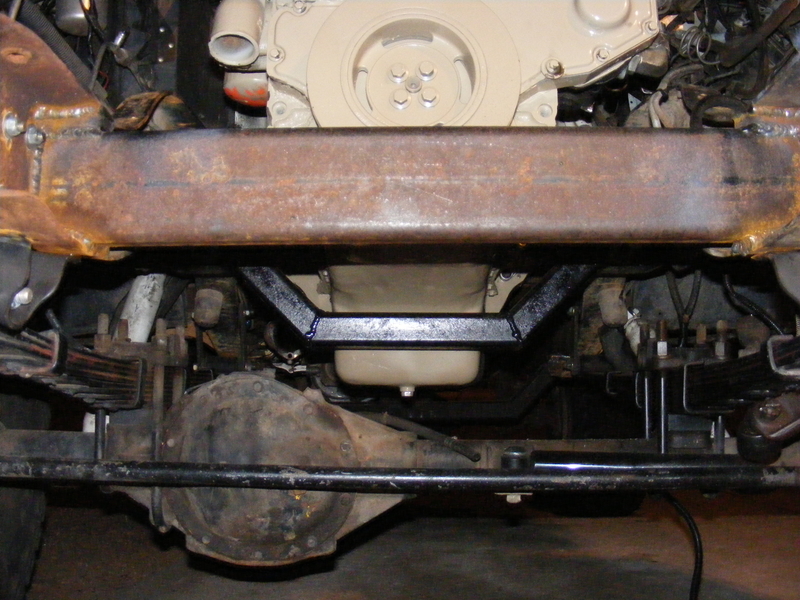
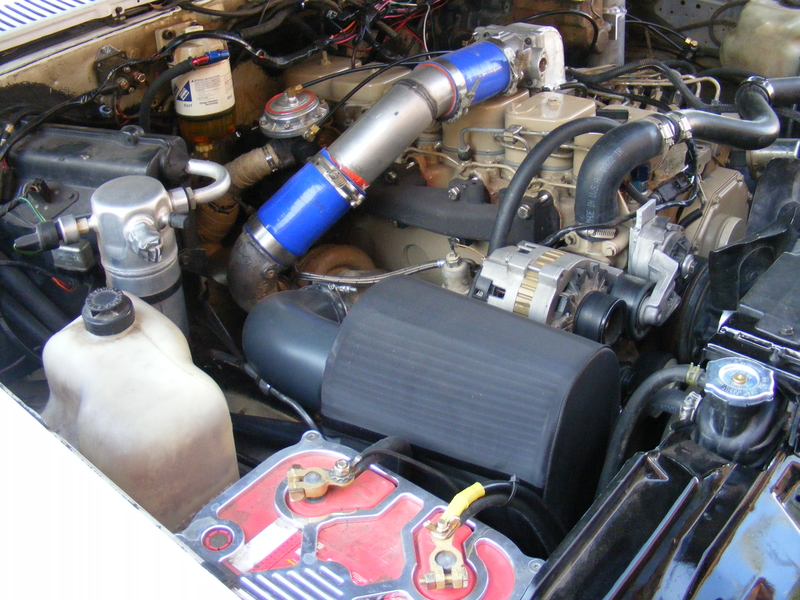
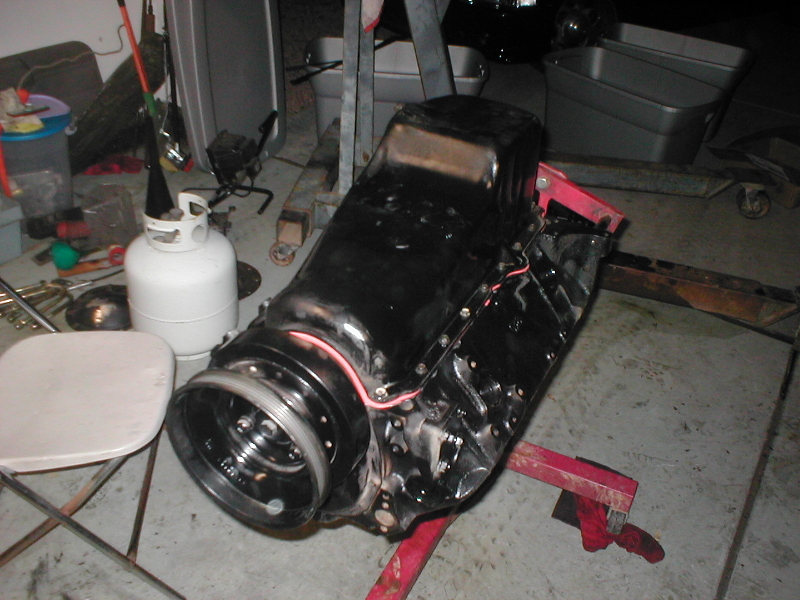
Then, one day it decided to spring a waterfall out of the drivers side head gasket :roll: With a truck I find it's easier to pull the engine to replace head gaskets, so that's what I did:

P1060001-r.JPG


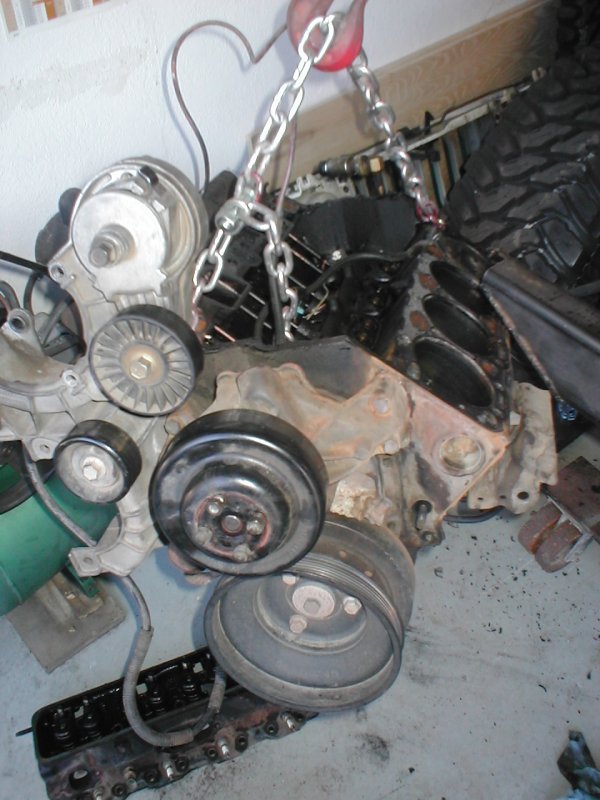
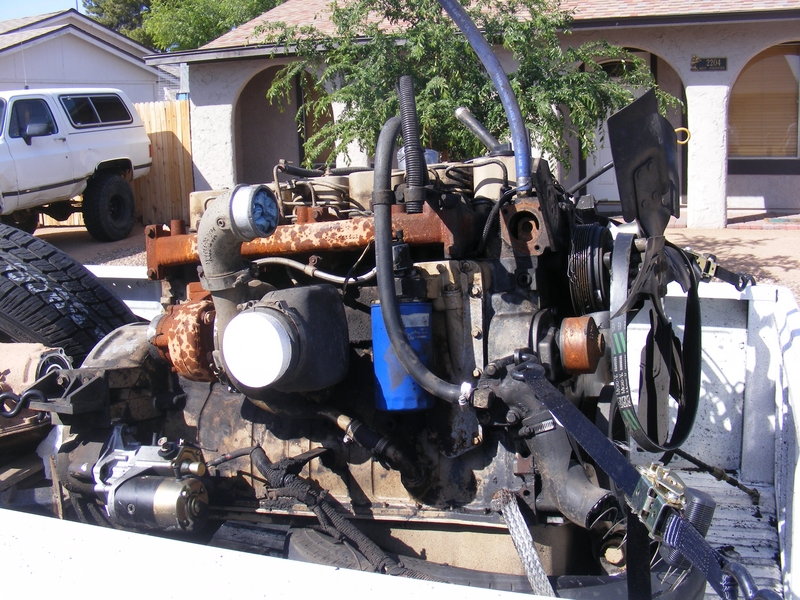
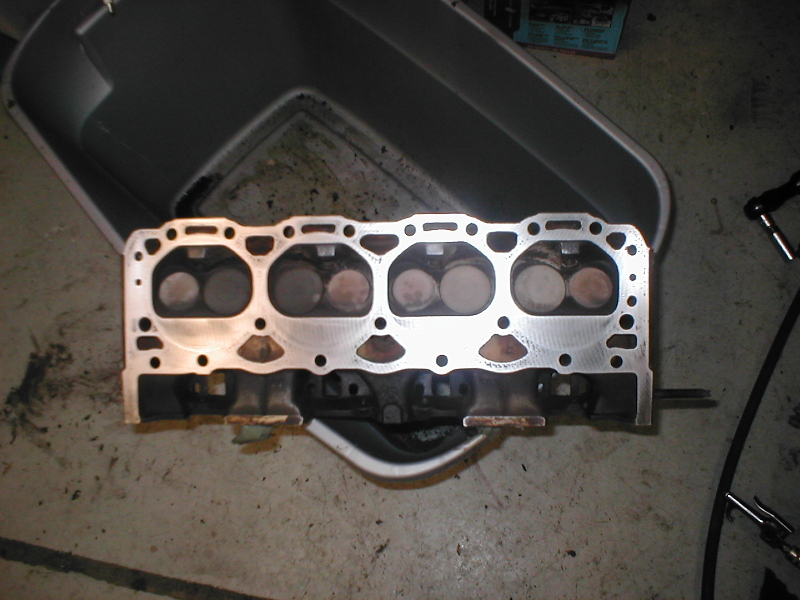
Pics with the heads removed:

P1060003-r.JPG


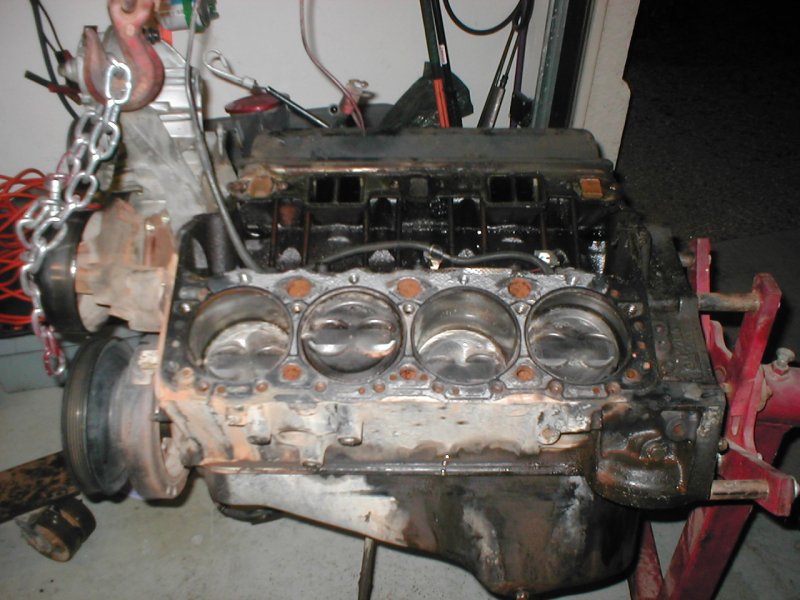
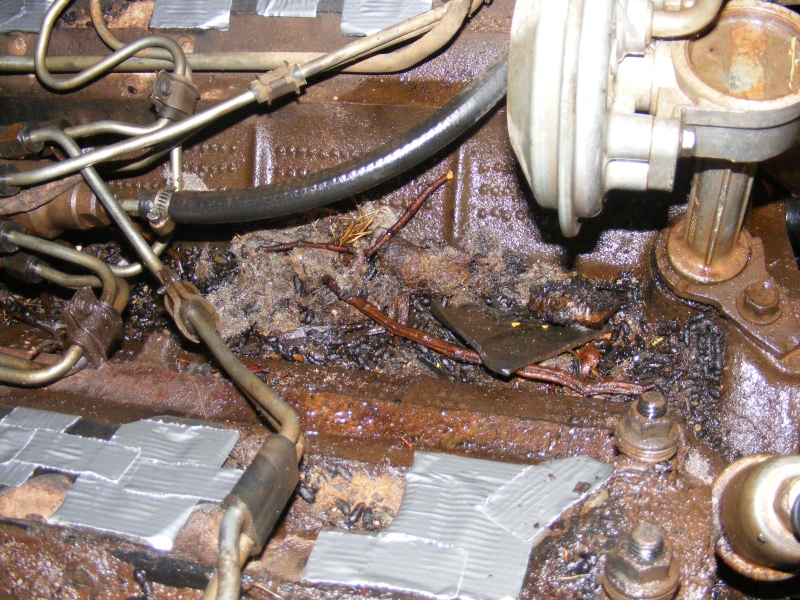
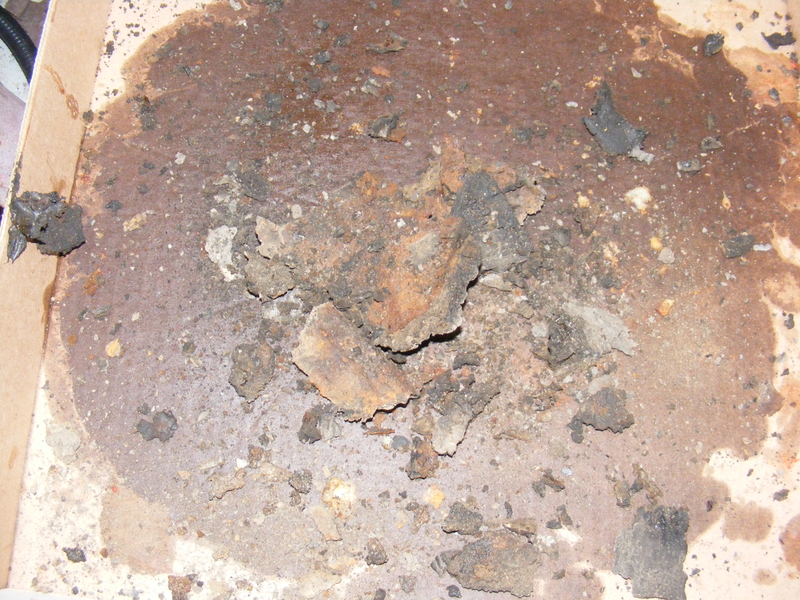
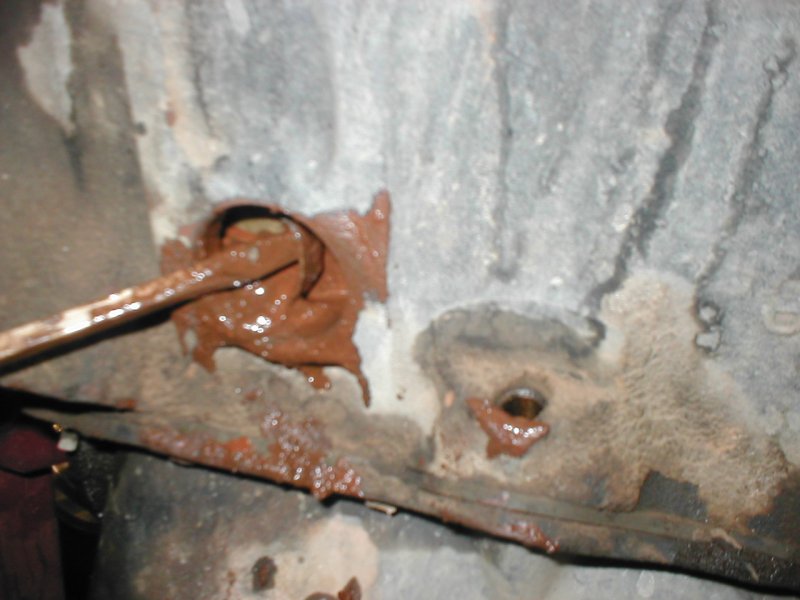
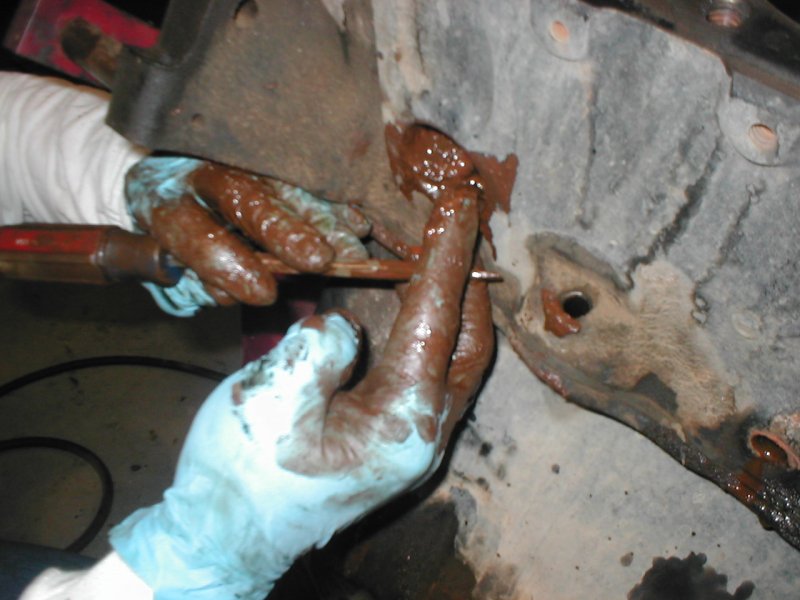
Doesn't look to bad, eh? Well, take a closer peek at the coolant passages, Apparently, the PO didn't believe in cooling system maintenance. When I removed a freeze plug, this is what I saw:

P1060005-r.JPG


P1060004-r.JPG


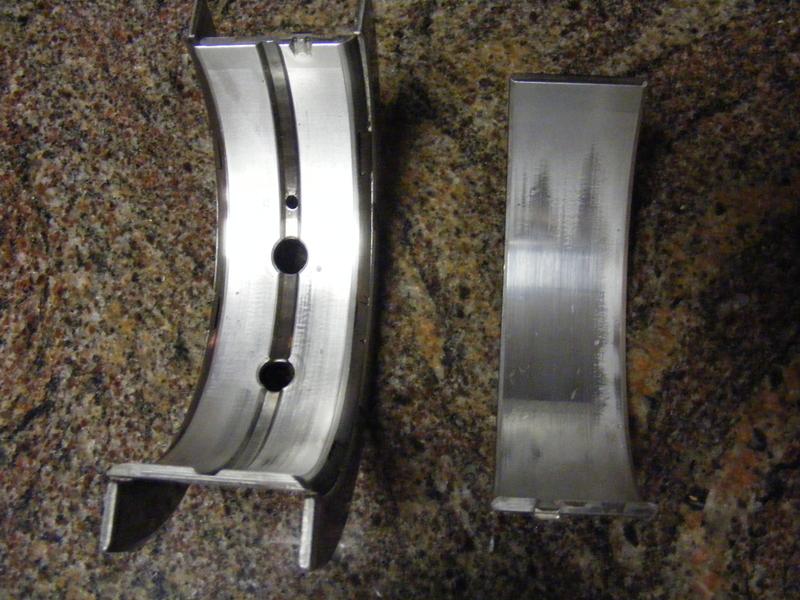
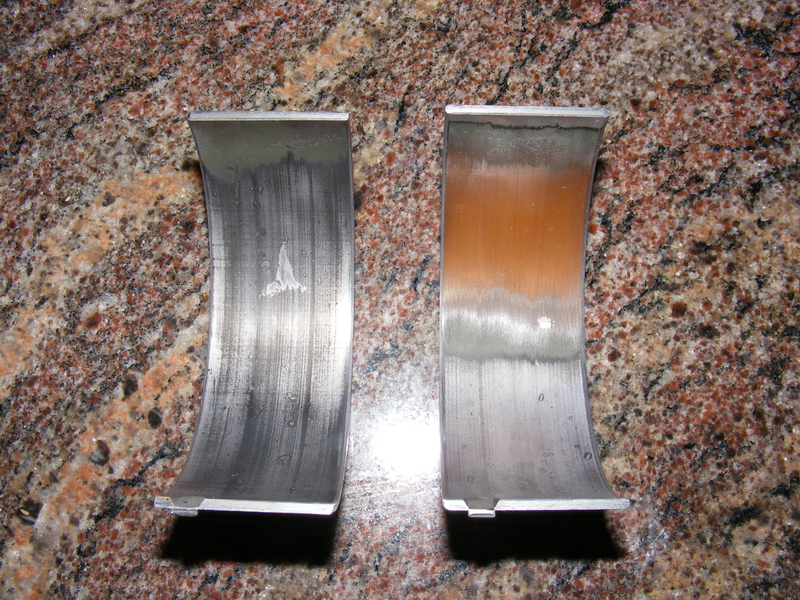
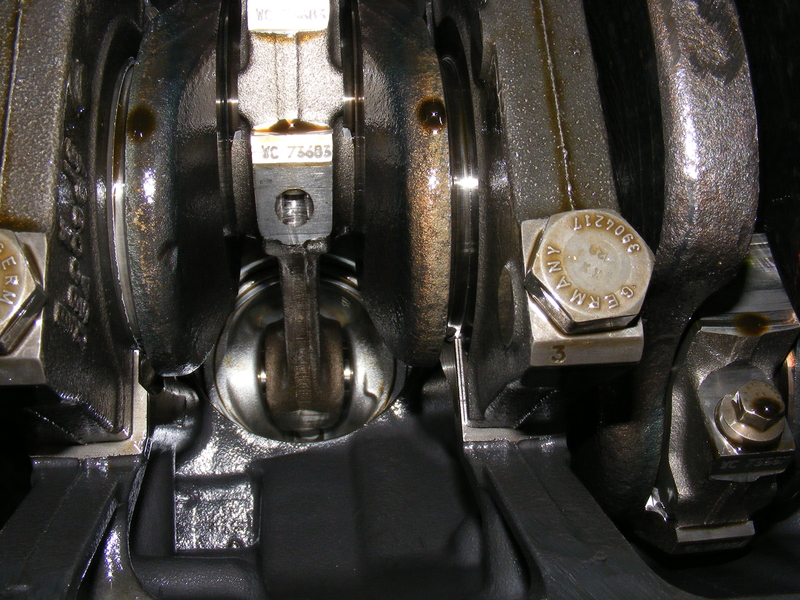
Yuck! It didn't help that this happened right after new years in January of '07 and it was miserably cold and windy :roll: Since the oil pan leaked a bit I decided to pull it off and take a peek in there as well. It got worse:

P1060006-r.JPG


P1060007-r.JPG


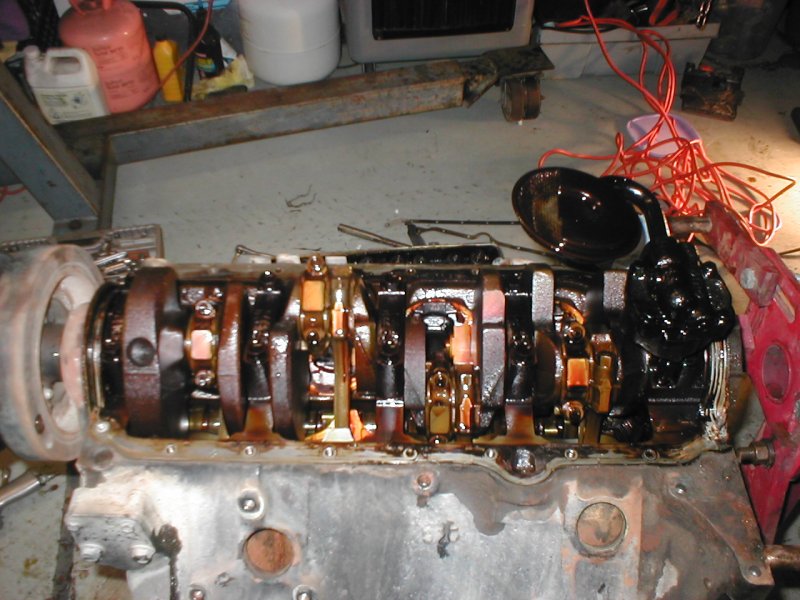
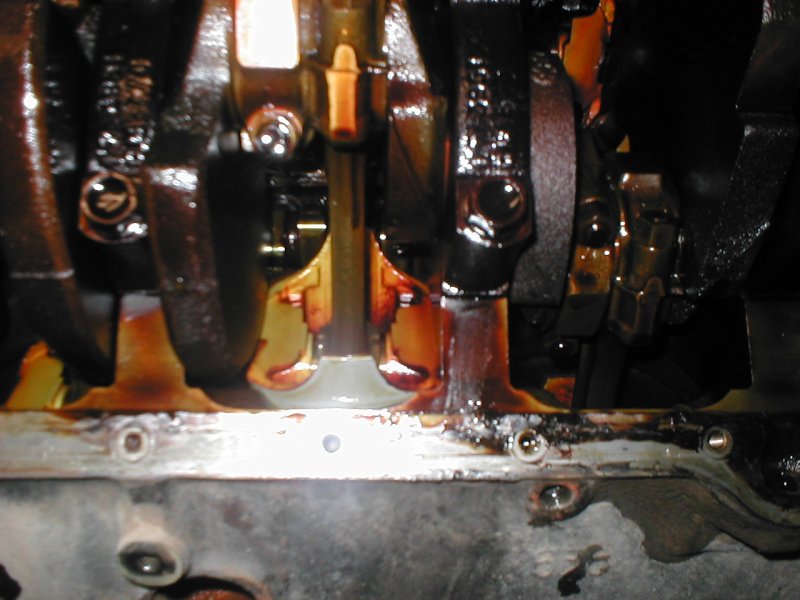
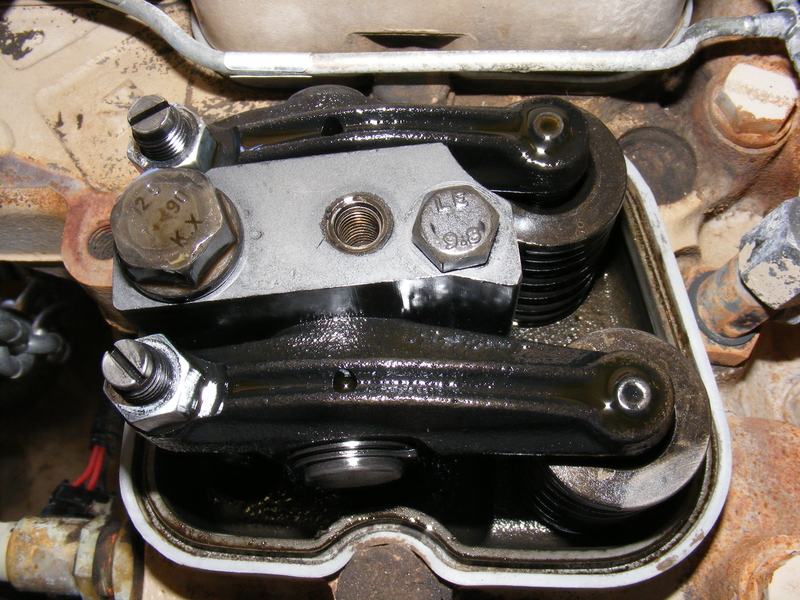
It seems routine oil changes were also neglected. All that reddish-brown stuff is some kind of varnish-like residue. It was thick and hard (phrasing! :giggle:) and I have never seen anything like it. That said, the engine had good oil pressure, ran good, didn't burn oil, and passed emissions, so I put it back together. I flushed the block, installed new freeze plugs, and put the pan back on with a new gasket:

P1070003-r.JPG


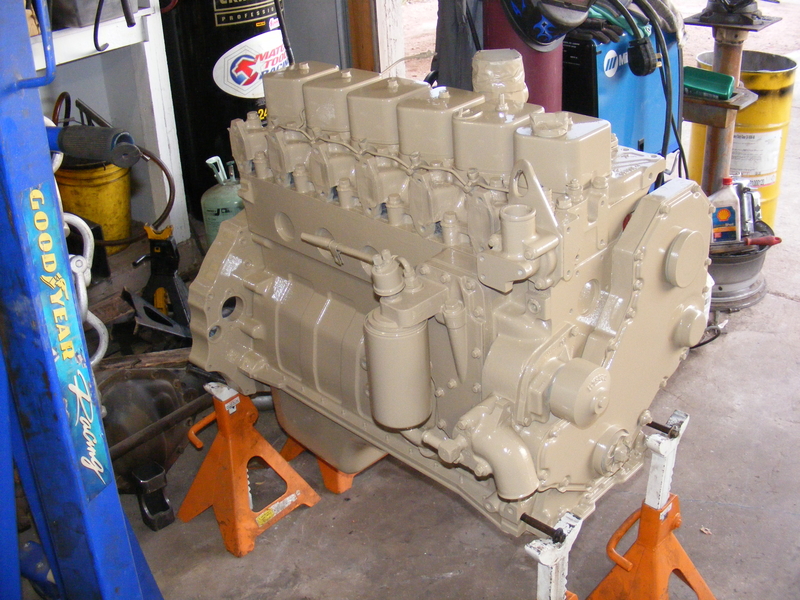
Likewise, I cleaned and re-assembled the heads and put them back on with new head gaskets:

P1070006-r.JPG


P1090014-r.JPG


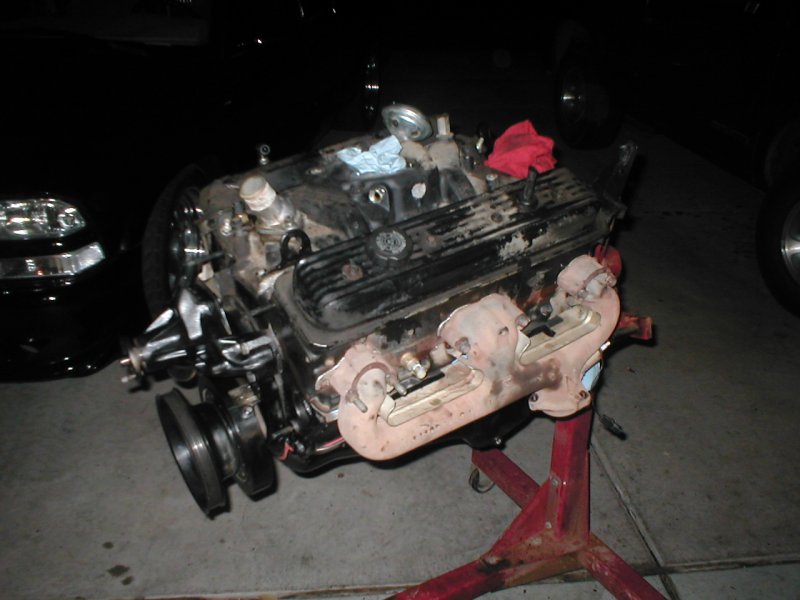
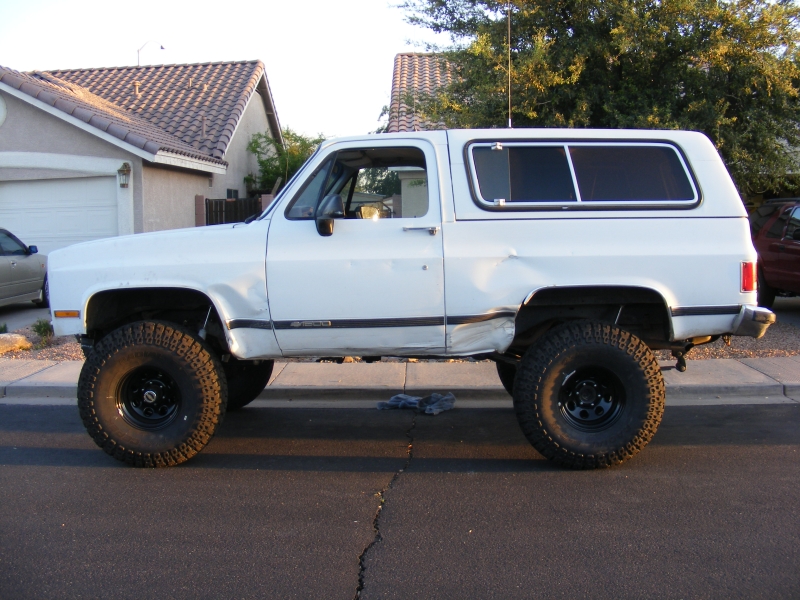
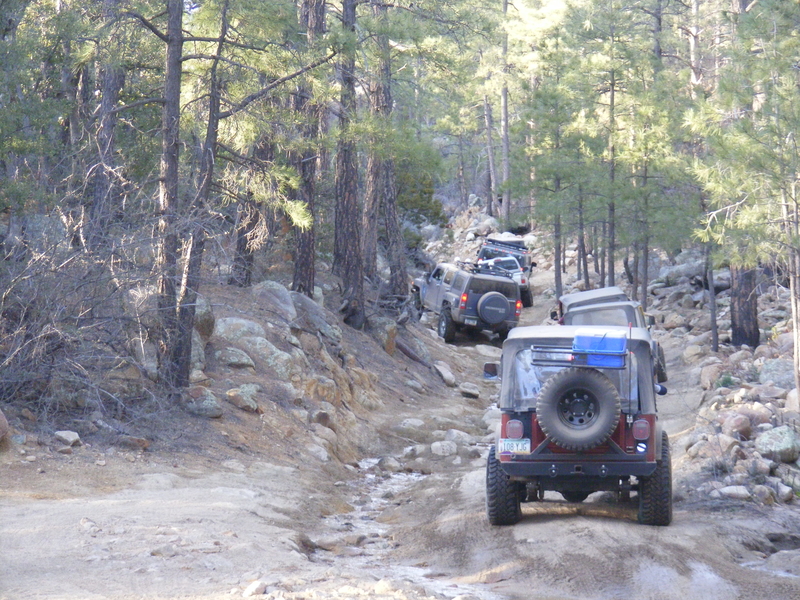
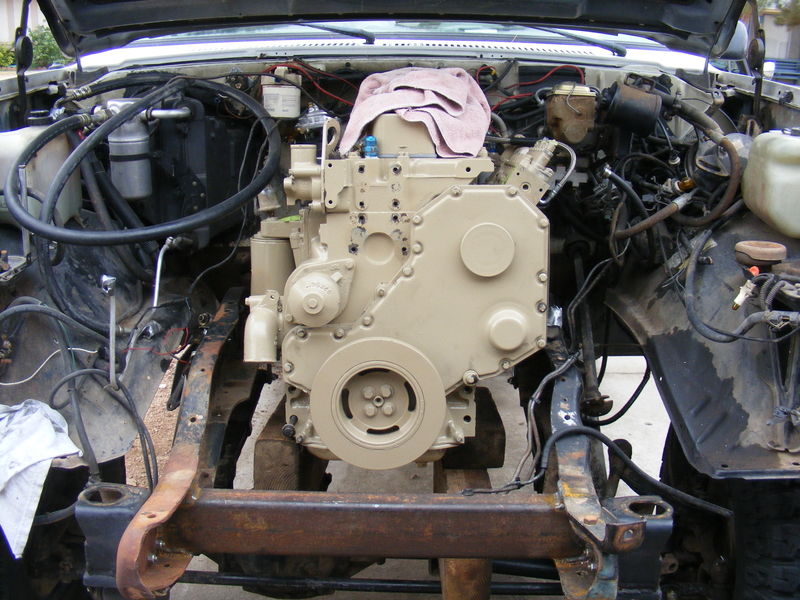
I put the motor back in the truck and it ran great. I proceeded to wheel it, and at some point incurred some body damage :shame:

PC230062-r.JPG


PC230108-r.JPG


PC230111-r.JPG


PC230112-r.JPG


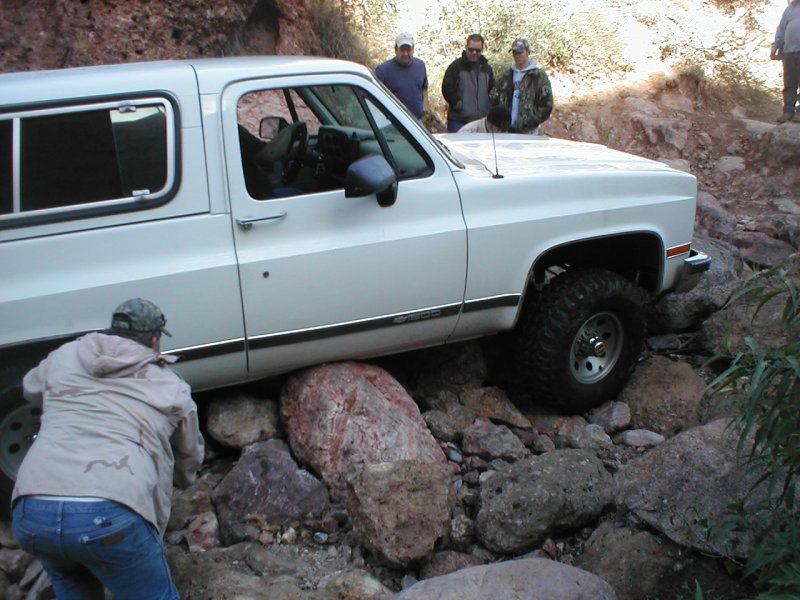
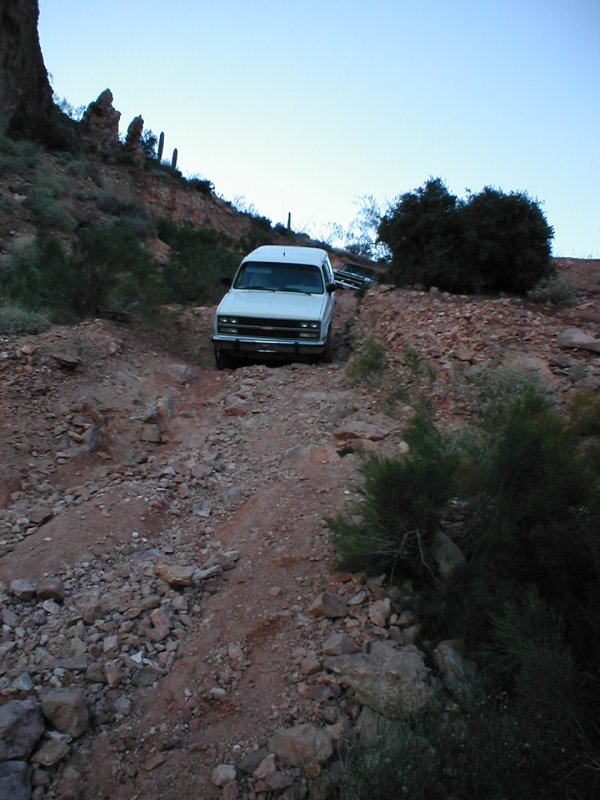
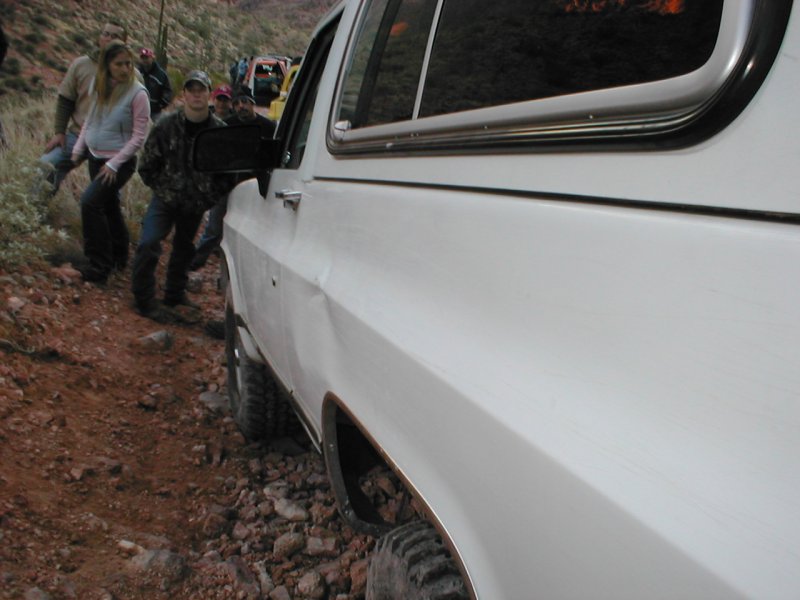
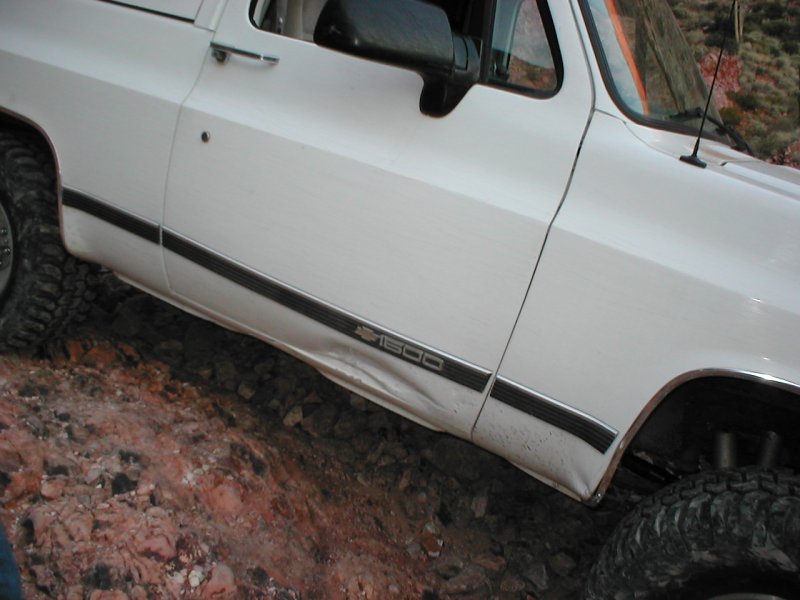
Now that I am faced with fixing the accumulated body damage I wish I had never taken the truck out on those trails without a lift. Live and learn, and boy did I learn!

To be continued...
 
Last edited:

SuperBuickGuy

Well-Known Member
Messages
3,403
Location
Woodinville, WA
a 75 K5 was my first, true 4x4 - and it was on 44s, in 1985, on half-ton axles and a detroit locker in the rear.... of course now, upon reading any 4x4 magazine, I realize that rig was impossible... good thing we didn't know that.

so what is going on with this saga? one post and out?

:)
 

MaxPF

AGNTSA
Messages
1,394
Location
The dark side of the globe
Full on HAZMAT tyvek suit and double latex gloves to check that freeze plug. I like it!

LOL, actually the white sleeves are a white sweat shirt. That was Todd (crawler) cleaning out the goo. I think he was wearing single extra-thick nitrile gloves, but it's been long enough now that I don't remember. It was NASTY stuff though! Took lots of garden hose action to get that crud out of there. I think that is why the oil formed a varnish-like substance in the crankcase - the sludge prevented coolant from removing heat from the lower block area, so the oil would get real hot. Just a theory, but it sounds good.

That was a clean truck.


Yes it was :sigh: Fortunately I have replacement sheet metal, so it will be again.

a 75 K5 was my first, true 4x4 - and it was on 44s, in 1985, on half-ton axles and a detroit locker in the rear.... of course now, upon reading any 4x4 magazine, I realize that rig was impossible... good thing we didn't know that.

so what is going on with this saga? one post and out?

:)

It's a long saga. I have to sort and upload pics as I tell it. Eventually I will get to the Cummins swapping part, don't worry :corn:
 

scoreh3

Well-Known Member
Messages
1,024
Location
SoCal
I loved my K5 ... 400 motor w/oil & trans coolers , 4in lift, with a 33 gal tank . That thing went up everything .
 

MaxPF

AGNTSA
Messages
1,394
Location
The dark side of the globe
I kinda skipped past an intermediate step: my first axle swap in the Blazer. This happened in October 2006. I wanted to eventually run 37" tires and I figured the 10 bolt rear wouldn't appreciate it too much. I found a 6 lug 9.5" 14 bolt for a reasonable price, stripped it completely apart, and got it ready to swap:

PA170024-r.JPG


After re-gearing, new bearings, and paint it got swapped in:

PA200059-r.JPG


PA200065-r.JPG


Now, I know what you're thinking: Big f**kin' deal, right? As far as the axle itself you'd be right as it's nothing special. However, this swap marked the beginning of The Slippery Slope :shifty:

Sometime around mid-January of 07 I found a pair of 10b E-Lockers for sale on Ebay for a smokin' price
deal.gif
Since I got such a good deal on them (one for my truck, one for Todd's Jeep) I figured why not get some traction aids for the 14b with the savings. Todd, who also decided to run a 6-lug 14b in his Jeep, agreed. A few days later a pair of these arrived:

P1110001-r.JPG


P1110003-r.JPG


A couple months later I added comms gear in the form of an Icom 2720H dual band ham transceiver and a Rat Shack TRC-485 CB radio along with a Larsen dual band antenna for the ham rig and a Wilson 1000 for the CB:

P3020050-r.JPG


P3020051-r.JPG


With newfound traction and comms I was able to tackle harder trails, and more body damage ensued :( i really, REALLY needed bigger tires, and to fit them I needed a lift.....
 

MaxPF

AGNTSA
Messages
1,394
Location
The dark side of the globe
Most guys increase tire size progressively: 33's to 35's to 37's and so on. I started with 32's when I bought the truck, and put 33's on it shortly thereafter. 33's are the biggest a Blazer will take without a lift. Like many others, I decided at some point I needed to go bigger. I ended up buying 37" Dick Cepek Radial FC-II's and mounting them on 15" Black Soft-8 steelies. Now, thesde tires wouldn't fit on my truck without a lift, but I already had a plan.

I scored a set of 2-1/2" lift Rancho prerunner springs from another wheeler.

DSCF0287-r.JPG


2-1/2" wasn't quite tall enough, so I built a pair of 1 inch "zero-rates"

DSCF0288-r.JPG


In order to avoid cutting the rear part of my fenders I moved the axle forward about 2 inches. Here's the result, with the then-new Cepeks mounted up:

DSCF0307-r.JPG


To lift the rear I used a shackle flip. A popular easy flip was the "Echobit" flip, which was a bracket that converted the stock tension shackle setup to a compression shackle setup. It required no cutting or removal of stock brackets and gave about 6 inches of lift. Since old Blazers usually suffer from saggy butt syndrome the extra bit of rear lift is welcome. I built my own Echobit-type brackets:

DSCF0331-r.JPG


And the final result:

DSCF0332-r.JPG


With big tires and wheeling I eventually ended up with the dreaded frame cracks around the steering box bolt holes. I welded the cracks up and welded some thick washers around the holes to hopefully prevent a recurrence:

DSCF0348-r.JPG
 
Last edited:

MaxPF

AGNTSA
Messages
1,394
Location
The dark side of the globe
One thing everyone discovers about a lift and big tires is the effect it has on fuel mileage. Now, K5s aren't exactly the most aerodynamic design ever created, and in stock form I got 13-14MPG. With the lift and 37's I was getting consistent 11MPG tanks :eek

From 1982-on, K5's were available with 6.2L diesels. They aren't powerhouses, but they are known for getting great fuel mileage. I had been on the lookout for one when a stroke of luck hit. My roommate at the time found a 1991 1 ton 4WD Chevy truck that was being sold by a county flood control department. He wanted the truck for the Dana 60 front axle, but I was interested because it had a 6.2L diesel engine! The best part was the fact that, being a flood control vehicle in AZ, it never had many miles put on it; the truck only had 50,000 original miles! We made a trade: the 6.2L diesel for my TBI 350. Within a couple days the truck was minus a front axle and this:

DSCF2416-r.JPG


I had to pull the intake and do some cleanup. Mice had made a home in the valley, chewing through the supply hose to the injector pump and leaving all kinds of biohazard behind:

DSCF2424-r.JPG


I got it all cleaned up, put back together, bumped the timing up a bit, and swapped it into my truck. Small block to 6.2 swaps are super easy since the engine drops right in using the same motor mounts and the trans bolts right up. I also swapped in the bigger diesel radiator and shroud, hydroboost, second battery tray, diesel instrument cluster, a Racor 10 micron filter assembly, and a few other odds and ends. Here's the result:

r-DSCF2616.JPG


r-DSCF2618.JPG


Not long after the swap it went on it's first off-road adventure as a diesel-powered K5. I went on a run to Crown King with Alex (Alrock) and other members of the Hummer gang. We even had some Jeep guys along for the ride:

r-DSCF2566.JPG


The 6.2 ran great. This particular engine was the last year that the 6.2 was offered, and at 165HP it was the highest horsepower J code 6.2 made. 165HP may not sound like much, but thanks to the extra helping of torque vs the 350 it was pretty spry.

This run was done at the beginning of March 2009, and up near Crown King the elevation was high enough that there were still patches of snow on the ground:

r-DSCF2590.JPG


Around the time we hit the first traces of snow I snapped a couple pics of my gauges. The temp ran lower than the gas 350:

r-DSCF2577.JPG


The best gauge pic is this blurry pic of the fuel gauge. Note that this is with about 90 miles on the tank, and 30 or so at low speed off road:

r-DSCF2578.JPG


Gotta love the efficiency of a diesel engine!

We finally roll into the thriving metropolis of Crown King and stop in the local watering hole for a hot burger and a frosty beer:

r-DSCF2597.JPG


Well, that's it for now. Stay tuned for our next episode of "How Max ends up with a 12V Cummins in a K5 Blazer".
 
Last edited:

MaxPF

AGNTSA
Messages
1,394
Location
The dark side of the globe
When we last left our intrepid swapper he was enjoying a burger and beer in Crown King after enjoying the fuel-sipping economy of a 6.2L GM diesel. At that point, I should have simply been happy with the swap, cleaned up a few odds and ends (i.e. wiring), and started on some bodywork to fix the previous wheeling damage.

By this point my interests in wheeling and how I wanted to use my truck had changed dramatically. I was no longer interested in spending a day wheeling stupidly difficult terrain, only travelling a mile or three, damaging my truck, and not really going anywhere or doing anything. I preferred the type of wheeling I had just completed with Alrock and friends, more of the scenic exploration over moderate terrain. I also wanted it to remain a camping and hunting rig - a RELIABLE camping and hunting rig! For these uses the increased range and economy were very welcome, but at 165HP I had lost 35HP over the gas engine, and it was most noticeable on mountainous highways. I had already researched adding a turbo, and in fact had laid my hands on a Holset HY-35 as well as a set of 6.5 turbo exhaust manifolds. I was also concerned about the future reliability of the 4L60 trans, so I had obtained a late model, aluminum-top SM465 manual transmission, but the trans swap wouldn't happen until after the 6.2 was turbo'd and had the fuel turned up.

Three things happened that would change my plans for the 6.2. The first was this build. If you ever want to see a super-clean 12V Cummins swap, this is it. This made me think a Cummins swap into my Blazer would be uber-cool, but I figured it would be too expensive and so I didn't really consider it too seriously at the time.

The second thing was another friends decision to do a 12V swap into his 1991 square body crew cab Chevy to replace his gas-swilling 454. Now, normally a Cummins swap donor comes in the form of either a complete Dodge truck, or an engine pulled from a Dodge truck, and the price tags are usually north of two grand for a real high miler and three+ for something between 100k and 150k miles. Minimum. Often they are even more.Then we found a guy who scraps out medium duty delivery trucks and busses and had P-pumped Cummins engines that he had pulled. And he was asking only a grand for a good runner! We went down there, fired one up, and it purred like a very loud kitten. Good oil pressure, minimal blowby, immediate starting, everything you look for, Cash changed hands and my friend hauled his prize home..

Which brings me to the third thing: I had just got my tax return from Uncle Sam, and it was way more than enough for one of these MD engines. I already had the Cummins itch, and now I had money burning a hole in my pocket. With a complete lack of forethought or planning I piled into my friend's crew cab, headed down to the guys yard, listened to another engine run, and traded money for a half ton of Cummins:

r-DSCF2602.JPG


r-DSCF2604.JPG


The first thing you notice is that it is BIG. The second is that it is incredibly scuzzy. It took a whole day of degreaser, oven cleaner, pressure washer, and elbow grease to get it cleaned up. The oven cleaner, pressure washer, and elbow grease also blew off much of the paint, so I had to paint it. I sprayed 5 Star Xtreme epoxy primer on first, since there was a fair bit of bare metal showing after the cleanup job. The paint used is Western's 3rd Dimension acrylic urethane in genuine Cummins beige (for future reference, the 3rd Dimension number for that color is DS-7366-A). I used 3rd dimension because I already had the reducer and hardener from another project, it's fairly durable, and it only costs $20 a pint.

r-DSCF3136.JPG


r-DSCF3144.JPG


Those who notice little details will see that the pic of the engine in the bed of the crew cab has a front sump and an SAE #2 flywheel housing, while the painted engine has a rear sump and a Dodge second-gen flywheel housing. The pan on a Cummins is reversible, but the oil pickup isn't. Getting a rear sump pickup required a trip to the local Freightshaker parts joint and trading the counter guy a sizeable wad of cash for the pickup I needed. The flywheel housing came from a guy on 4BT swaps and was much more reasonably priced. I also installed a new pan gasket and replaced the rear main seal, but that wouldn't be the last of the repairs needed before the engine could be installed.

When I had the pan off to rotate it and swap the pickup I decided to check the main and rod bearings. The mains were in excellent shape.

r-DSCF2928.JPG


The rod bearings, not so much...

r-DSCF2917.JPG


You can see the bearing material is completely worn off in one area of the top bearing half, exposing the copper layer beneath, while a strange mark is eroded into the other half (looks like a three pointed star). I did some research and found that the exposed copper is likely due to lugging the engine excessively, while the strange mark is cavitation erosion. The cavitation erosion is apparently common on Cummins rod bearings after enough hours are on the engine and don't seem to do any harm since that portion of the bearing is lightly loaded.. The lugging damage is not normal, and shows why people who repeat the myth "diesels like to be lugged" are folks you probably don't want to listen to for advice :roll: Anyway, the crank surfaces were fine so I replaced the rod bearings with gen-u-ine Cummins replacements.

The next item that needed attention was the turbo. It had lost it's thrust bearing causing the compressor wheel to get cozy with the compressor housing. That required another significant outlay of cash, this time to the local turbo parts shop:

r-DSCF3153.JPG


r-DSCF3182.JPG


As my wallet gets bled dry I keep telling myself "This is fun!" :giggle:

Well, it's late and I'm falling asleep so I will leave the saga at a cliffhanger. Stay tuned for the next episode called "Ramen noodles and Cummins mods"...
 
Last edited:

MaxPF

AGNTSA
Messages
1,394
Location
The dark side of the globe
In the last installment I was talking about mods and repairs to get the engine ready for the swap. I forgot to show pics of the inside of the crankcase and rocker boxes. I don't know how many miles this engine had on it, but it definitely had it's oil changed at proper intervals. In fact, it was likely changed more often than needed judging by the level of cleanliness:

r-DSCF2912.JPG


r-DSCF2913.JPG


Of course, while I had the valve covers off I went ahead and adjusted the valves.

I also bumped the timing from 12.3° to 15°. This requires removal of the injector lines and #1 delivery valve holder from the injector pump. Removal of the timing cover isn't necessary, but it definitely made the job easier:

r-DSCF3151.JPG


I won't go into details, but suffice it to say that plunger lift (indicated with the dial indicator) correlates to a certain amount of timing advance. It's a pretty simple procedure really. By advancing the timing I gained power AND economy. A win-win.

In my previous post where I showed a pic of a turbo rebuild kit there were also steel braided teflon AN hoses and a bag of fittings. The fuel, turbo oil, and IP oil feed lines were pretty beat, and stock Cummins replacements were ridiculously high priced, so I replaced them with lines I had built. This required converting the fuel and turbo oil feed fittings to AN, and even then it was still substantially cheaper than buying just the hoses from Cummins. Here's the IP fuel feed line in place, along with a new fuel filter:

r-DSCF3155.JPG


I also installed the IP oil feed line (the small -3 line in the pic with the turbo parts). Oil lubrication, as opposed to fuel lubrication, is one of the reasons the P7100 pump has the reputation for being as tough as an Army boot.

Way back when, I had a V6 Camaro that I turbocharged. Before I sold that car I reverted it back to stock, and I sold off most of the parts. However, I still had the wastegate and the variable pressure regulator valve used to control it. I decided it would be cool to tie the turbo's internal wastegate shut and run the external gate. That way I could adjust the boost as needed, and the dual ported external gate would better compensate for altitude... in theory. It also would look cool, right? Right!

I picked a spot on the exhaust manifold between the two discharge plenums where I wanted to mount the wastegate and welded the mild steel flange in place with Eutectic 680 rod. I used a lot of preheat, welded 1" long stringer beads, and peened the welds with a needle scaler in order to prevent cracking. It must've worked, because it remains crack-free to this day. Next, I cut a 1-½" round hole with a hole saw. Then I used a drill to cut away the part connected to the center divider until the holesaw-cut part came free. I cleaned up the cuts a bit with a rotary file, drilled and tapped the 5/16" coarse thread holes for the wastegate mounting bolts. At that point I ended up with this:

r-DSCF3172.JPG


After milling the mounting flange flat I bolted the wastegate on with stainless steel bolts:

r-DSCF3165.JPG


r-DSCF3169.JPG


After painting and baking the manifold and bolting it to the engine with new stainless steel bolts (anti-siezed of course) it looks even better:

r-DSCF3186.JPG


While I was at it, I cleaned, painted, and baked the turbo cast iron parts since they looked like rusty pieces of you-know-what:

r-DSCF3183.JPG


In this first incarnation I had decided to use an SM465 4 speed manual with 3.42 gears in the axle to eliminate the need for overdrive. The common manual trans for a Cummins swap is the NV4500, but I didn't like the 4500 for numerous reasons (just wait till later in the saga - you're gonna laugh your asses off :eek:). The 465 has a big 1-1/2" input shaft available for it, and along with an NV4500 bellhousing and South Bend clutch it was an easy matter to get it to bolt up to the Cummins:

r-DSCF3116.JPG


r-DSCF3118.JPG


r-DSCF3120.JPG


r-DSCF3272.JPG


r-DSCF3301.JPG


r-DSCF3303.JPG


In that last pic you can see the turbo is assembled and mounted to the manifold. I had the turbo rotating assembly balance-checked at the turbo shop and it was perfect, so there were no show-stoppers. The last minor doo-dad I made for the turbo setup was an AN drain fitting for the block. The stock drain is simply a pressed in pipe, and I wanted to use -12 AN, so I turned down a -12AN male to male pipe, pressed a piece of 3/4" OF steel onto it, and ended up with a fitting that would press into the block and give me the -12AN drain port that I wanted:

r-DSCF3324.JPG


At this point the engine was ready to mount into the truck. Things like accessory mounts were still needed, but I wanted to put the engine in the truck before I designed the mounts.

Stay tuned for the next episode appropriately titled :hack::grind::weld:
 
Last edited:

MaxPF

AGNTSA
Messages
1,394
Location
The dark side of the globe
The next step in the swap was to remove the 6.2, trans, and transfer case and get the engine bay ready to accept the Cummins. Removal of the existing drivetrain was easy, but then I was at a crossroads. The existing frame had been cracked and repaired multiple times in the steering box area:

r-DSCF3191-1.JPG


r-DSCF3204.JPG


These cracks are pretty typical, particularly on the 1/2 ton frames. All of the force from the steering box is concentrated on the area under the four bolt spacers, and 1/2 ton frames are particularly thin. I had two options: repair the frame, or replace it. I chose option 3: replace the front frame section with this:

r-DSCF3207.JPG


That is a front frame section from a 1 ton square body truck. By replacing my existing front section with this, I get a crack-free frame that is nearly twice as thick as the 1/2 ton frame :cool: Now all that is needed is to :hack: the existing front section:

r-DSCF3209.JPG


Then :grind: the ends, put them together, get it aligned, and :weld: it up:

r-DSCF3216.JPG


As with the original frame I sat the front axle 2" forward, and within 48 hours of making the first cut it was sitting back on the tires:

r-DSCF3220.JPG


There were still a few mods to be made though. The existing crossmembers are in the wrong places, and they are flimsy and weak, so they needed to go. Before their removal I welded in a new front (i.e. under-core-support) crossmember made from a piece of 2x4x3/16" rectangular tube:

r-DSCF3247.JPG


After that I was free to air-chisel the heads off the rivets retaining both stock crossmembers and remove them, and finally do the first test fit of the Cummins in the engine bay:

r-DSCF3308.JPG


Fortunately for me, my roommate had some big pieces of rectangular wood that were perfect for supporting the engine atop the front axle :) There was plenty of clearance between the engine and the frame and axle:

r-DSCF3310.JPG


At this time the main limitation to how low I could set the engine was interference between the power steering pump inlet fitting and the frame:

r-DSCF3312.JPG


I could of rotated the pump and changed the fitting to set the engine lower, and in fact I considered it. You will see later in the saga why it's a good thing I didn't!

At this point the major issue was that the bellhousing bolts were touching the tunnel:

r-DSCF3316.JPG


My truck still had the stock 19-year-old body mounts, which had probably crushed around 1/2 inch. New ones would give clearance, but I figured a bit extra would be nice. With that in mind I ordered a new set of urethane body bushings and a one inch body lift kit from Off Road Design. This gave a comfortable amount of clearance everywhere and allowed me to flatten the front-rear engine angle a bit more.

I also :hack: a large hole for the transmission shift tower. I would fab a cover for it, and the extra room made trans R&R much easier.

r-DSCF3318.JPG


r-DSCF3320.JPG


Otherwise, the amount of setback was good:

r-DSCF3314.JPG


Next episode: Motor mounts n' things.
 
Last edited:

MaxPF

AGNTSA
Messages
1,394
Location
The dark side of the globe
Since much of what I am about to show was done hurriedly and got changed later on I will quickly go through it. First, the engine is no longer sitting on wood:

r-DSCF3327.JPG


r-DSCF3328.JPG


r-DSCF3330.JPG


And has a crossmember:

r-DSCF3333.JPG


For those who say "I can't see the motor mounts very well", that's probably a good thing. I was welding it with my roommate's Miller 180, and it is in desperate need of a new wire conduit/hose assembly. The wire keeps hanging up and feeding in stuttering, jerking fits, making it just about impossible to get anything resembling a clean, decent looking weld
frown2.gif
Anyway, they are nothing special. Pretty much similar to ORD's motor mounts for the SBC/BBC, but made to fit the Cummins. They are also much beefier than the ORD mounts to deal with the weight and torque of the Cummins. The bushings used are 1-5/8" OD with a 3/4" sleeve in the middle and a 9/16" bolt holding everything together.

Some underside pics:

r-DSCF3334.JPG


r-DSCF3336.JPG


r-DSCF3338.JPG


The trans crossmember is the same one I used with the 6.2. Somewhere in here I got good used 3.42 gears and re-geared the axles. 3.42s were necessary to get the road RPM reasonable with a non-OD transmission.

I initially had done a turbo oil drain, decided I didn't like it, and made a new one:

r-DSCF3398.JPG


r-DSCF3400.JPG


Drain is connected using -12AN steel-braided hose:

r-DSCF3402.JPG


Exhaust downpipe:

r-DSCF3408.JPG


Installed:

r-DSCF3412.JPG


And accessory brackets:

r-DSCF3416.JPG


r-DSCF3420.JPG


Here it is mostly put together:

r-DSCF3434.JPG


r-DSCF3435.JPG


r-DSCF3437.JPG


r-DSCF3439.JPG


r-DSCF3441.JPG


I drove this setup for over a year and found what was good, bad, and ugly. It had adequate, but not spectacular, power. It was still stock, which is rated at 160HP and 400LB-ft of torque. It ran cool, even in the middle of the AZ summer. The engine fan, which was driven by an electromagnetic clutch, was only needed when the AC was on. Speaking of AC, it didn't work very well for a number of reasons. First off, the "134A" condenser was a serpentine type, which sucks. Second, I used the 6.2 fan, and it just didn't seem to pull enough air through the cooling stack.

The gearing left a bit to be desired. With the stock governor the engine would run out of RPM, require a shift, and the next gear would pit you on the low side of the torque peak. This was only a problem in the mountains. Combined with EGT issues after I slid the stock fuel plate forward (a common issue when doing that mod) I would sometimes end up stuck in third gear doing 45MPH on 6 and 7% grades. If I hit the hill doing 70+ I could stay in 4th, but often traffic conspired to slow me down, and once RPMS dropped below 1600 in 4th EGT's would skyrocket if I tried to accelerate. I would have to shift into thrid and stay there until the hill was crested. That sucked really, really, REALLY bad. The fix is either different gearing, 3k or 4k governor springs, a proper fuel plate and pump tuning, intercooler, or a combination of those. We will see which one(s) I choose :huh:

The stock push-pull steering left a lot to be desired, but replacing it with crossover steering was already planned. What wasn't planned was replacing ball joints :roll: It seems the extra weight combined with 37" tires is a recipe for frequent ball joint replacement. Since frequently replacing ball joints brings the suck, a permanent fix was needed.

LEaks, leaks, LEAKS!!!! Every friggin thing on this swap leaked!. The t-case leaked, the trans leaked (due to the wrong sealer being used - never use Ultra Grey, it sucks), the power steering leaked (worn sector shaft bearing causing a leaky seal, thanks to big tires and push-pull steering), but worst of all the engine leaked. BAD!!!! It started out clean, and a year later it looked like it did when I brought it home :( The final straw was when the head gasket started leaking oil out one side and coolant out the other. Nothing beats the joy of replacing a head gasket on a Cummins :roll:

Finally, there was fuel economy. In the city it was quite good: 18mpg tanks were easy when I stayed below 60mph, even with in-town stop-and-go driving. On the highway the engine was operating WAY above it's most efficient RPM due to gearing. When I planned the setup I wanted to run 3.23 years, but they proved impossible to find, so I settled for 3.42's. At 65mph I could do 17ish, but at 80MPH I would drop down to 14mpg. Better gearing would improve mpgs at all speeds, but especially highway MPG. Diesel efficiency drops rapidly at higher RPMs, so keeping it as close as possible to the torque peak during highway cruise is necessary to get the kind of mileage the engine is capable of. Something would have to be done! :huh:
 

SuperBuickGuy

Well-Known Member
Messages
3,403
Location
Woodinville, WA
so at this point, you would have been miles ahead simply putting a turbo on the 6.2? ouch.
I put a turbo on the 6.2 diesel truck I just sold - it really was the right thing to do. I went gas on prior diesel truck, so after I'd turbo'd the last truck I had the :loser: moment. All that money and time swapping (not to mention the fuel economy loss)... d'oh doesn't even begin to cover what I felt.
 

MaxPF

AGNTSA
Messages
1,394
Location
The dark side of the globe
so at this point, you would have been miles ahead simply putting a turbo on the 6.2? ouch.
I put a turbo on the 6.2 diesel truck I just sold - it really was the right thing to do. I went gas on prior diesel truck, so after I'd turbo'd the last truck I had the :loser: moment. All that money and time swapping (not to mention the fuel economy loss)... d'oh doesn't even begin to cover what I felt.

I would have been ahead to a point. The stock DB2 pump on a 6.2 is maxed out at a bit over 200HP, as is the basic structure of the engine itself. The Cummins, OTOH, has far more potential, as does the P7100 pump. While I'm not a power junke, 300HP would be very nice to have, and a 6.2 won't do reliably make that kind of power. But yeah, I was disappointed with the swap...
 

SuperBuickGuy

Well-Known Member
Messages
3,403
Location
Woodinville, WA
I hate how 'reality' tv says "we only have an hour to finish this car then deliver it" if that were true - the car wouldn't be delivered because on something with thousands of critical parts; stuff ALWAYS goes wrong... I don't care if you are a renown builder or your garage is in open air... I asked the question because to most who read this they don't ever see the disappointment just the payoff - and then sell their project because they are disappointed with the first result... I like what you said, though, that while you were disappointed you remembered the reasons for the build then went on to fix the problems
 

MaxPF

AGNTSA
Messages
1,394
Location
The dark side of the globe
I hate how 'reality' tv says "we only have an hour to finish this car then deliver it" if that were true - the car wouldn't be delivered because on something with thousands of critical parts; stuff ALWAYS goes wrong... I don't care if you are a renown builder or your garage is in open air... I asked the question because to most who read this they don't ever see the disappointment just the payoff - and then sell their project because they are disappointed with the first result... I like what you said, though, that while you were disappointed you remembered the reasons for the build then went on to fix the problems

Yup Every build by everyone I have known has had bugs. Or, in cases like mine, they try certain things and figure out it doesn't quite work they way they want. Such is the joy of DIY :no: I will admit that there were times I felt like ripping the whole thing out and doing a 6.0 gas swap like everyone else. Then I remembered the $#!t mileage I got with the gas engine. As it is, I got so disgusted with it that the rebuild took far, FAR longer than it should have. There was a span of two years where I hardly touched it. It had a thick coating of dust and cobwebs growing on it, the whole deal. It's been said that most projects that take more than a year to complete never get finished. Not sure who said it, or if it's one of those "sayings" that's BS, but it was very nearly the case with my truck...
 

MaxPF

AGNTSA
Messages
1,394
Location
The dark side of the globe
OK, so I drove the truck around for a year and a half or so (not sure exactly) before I decided something needed to be done. By this time I had gone back and forth several times on swapping an Allison 6 speed slushbox in it. The Ally would fix the gearing issue, but it would also alleviate the need to use a clutch. At this point my old ankle injury from my Army days had made walking with a cane necessary. My truck was sitting, partially disassembled, and I was driving a Ford (gasp!) with an automatic. As I mentioned in my above post. I was quite disgusted with the overall dissatisfaction of my swap, and the truck ended up sitting for quite a long time while I messed around with drivetrain parts or simply ignored it altogether.

Let me jet back a bit here: before the ankle became a real issue, I was shopping around for a Dana 60 front to replace my sad, overloaded 10b. One day, a fellow wheeler posts up that he has a first gen Dodge Cummins rolling chassis (no engine, trans, or body) with 3.07-geared Dana 61 front and Dana 70 rear. This would absolutely fix my gearing issue, and the price was right, so I jumped on 'em! It wasn't long after I dragged the pair of axles home that my anke issues started up, and got worse and worse. Somewhere in there I decided to go the Ally route, which means I no longer needed 3.07 gears. The Allison 6 speed has two overdrives: .71 (fifth gear) and .61 (sixth gear), so ideally gears in the 4.10-4.56 range would fit the bill, depending on tire size. This left me with two options: either sell the pair of axles and buy a D60 and 14b, or keep the oddball axles and re-gear the, if it's even possible.

I ended up choosing option #3. To begin with, nobody had ever bothered to attempt to re-gear the unique 3.07 D70U since regular D70's and 14BFF's are a dime a dozen, and I wasn't going to for that same reason. Besides, D70u's have wussy 32 spline axle shafts :roll: Also, re-gearing a 3.07 D70U or D61 is more than a simple gear swap: the pinion head on a 3.07 gear set is massive compared to lower (numerically higher) gears. Here's a 3.07 D61 pinion next to a 4.10 D60 pinion:

r-DSCF4173.JPG


The pinion is too large to fit in a regular D60 or D70 case, so Dana cast special housings with the pinion moved further away from the ring gear. These became the D61 and the special 3.07 D70U. So, what to do? Well, I would never find a Chevy or Dodge kingpin 60 for as cheap as I scored the kingpin 61 AND D70 rear, so it made sense to keep the D61 iand re-gear it, f possible. Also, Dodge kingpin 60''s and the otherwise identical Dodge D61 front actually have a track width that more closely matches the rear axle, and the perches only differ by 1/4" per side so they are very easy to fit into a square body Chevy in place of a Chevy front axle. Like the Chevy axles, they are right hand drop, have internal hub locks, nearly identical brakes, and non-neckdown 35 spline inner/30 spline outer shafts (slightly different lengths from the Chevy, due to the axle being a bit narrower). In other words, from the pumkin-out they are identical to the same year Dodge D60, including the desirable kingpin knuckles. So, there is nothing to be gained by replacing it with a Chevy (or Dodge) 60... if I can re-gear it.

A lot of people online said the D61 is junk because it can't be re-geared. I did some research, including talking to Carl Jantz (of SuperJeep fame) who does lots of cool axle upgrades (like fitting 10.5" D70 gears in a Dana 60!) and measurements of my own housing, and found that the pinion is offset 7/16" from a standard D60. Which means all I need (in theory) is a 7/16" ring gear spacer, some suitable bolts, and I'm set! With that plan in place, I sold the rear D70 to a guy on 4BT swaps, and got started rebuilding the D61.

I completely stripped the axle apart and cleaned it. Cleaning it was not particularly enjoyable; it required liberal use of a needle scaler to get all the crud off it:

r-DSCF4156.JPG


The crud came off in chunks:

r-DSCF4155.JPG


The upper kingpins themselves were hashed, so they needed replacement. If you ever have to remove them, forget about suggestions of using a long bar (likely to split the pin, at which point you're in for a real ball of laughs getting it out) or the smoke wrench (didn't work for me). Get your cutoff wheel and slit it a short distance above the C. After that, you can break it free with a regular breaker bar:

attachment.php


The equally fun part is torqueing the new ones. The spec is 600ft-lbs. Yes, SIX HUNDRED. I used a 3/4" drive Snap-On ratchet with a 7/8" socket, a 7/8" hex long lug nut, a 5 foot long bar with a nut welded on one end, and a 1/2" drive torque wrench with a socket that fits the welded-on-the-bar-nut. The total length of bar+torque wrench was 6 feet from kingpin to torque wrench handle, so by setting the torque wrench to 100ft-lbs, the bar multiplied it to 600ft-lbs at the kingpin. It ended up being a three-man job, but you don't want to skimp here: if the kingpin comes loose it will wallow out the threads in the C, ruining it.

I also cut off the cheesy Dodge shock mounts and welded on some proper ones.

r-DSCF4164.JPG


I figured while I was at it I might as well weld the tubes to the pig to prevent them from ever spinning. I used my trusty Eutectic 680 rod and needle scaler to weld and peen, weld and peen, weld and peen. I also added a bracket for a future panhard rod. Then, finally, paint!

r-DSCF4188.JPG


I cheated on the rest of the parts and had them sandblasted. After the axle, I was DONE with cleaning crusty crap! I did get remanned calipers though.

r-DSCF4192.JPG


r-DSCF4212.JPG


Remember when I said the Dodge and Chevy D60's have nearly identical brakes? Well, the non-Cummins Dodge 60's (or perhaps the pre-89, not sure, actually) have 1-¼" wide rotors, while the Chevy 60's and Dodge Cummins 60's and 61's have 1-½" wide rotors (same part number, in fact). Which means mine has 1-½" rotors. The calipers are identical except for the banjo bolt that retains the brake hose: The Chevy calipers are 10mm, while the Dodge is 7/16". Since I already had a pile of Chevy banjo bolts I went ahead and got Chevy remanned calipers:

r-DSCF4169.JPG


Yeah, they're big and they weigh a ton. So much for better fuel economy :giggle:

Also, remember when I mentioned that re-gearing would require a spacer? Yeah, I got a certain machinist [cough]crawler[/cough] to make me one. That+proper length ARP bolts+good used 4.10 R&P set = a regeared D61.

r-DSCF4214.JPG


A small amount of machining was required on the carrier so the spacer would clear:

r-DSCF4216.JPG


r-DSCF4224.JPG


I musta done something right, because the 4.10 D60 gears set up perfectly:

r-DSCF4228.JPG


All buttoned up, put together, and ready to go:

r-DSCF4265.JPG


But wait! I still need a rear axle with 8 lugs and 4.10 gears. Hmm.... guess we will have to wait and see what I end up with :huh:
 
Last edited:

SuperBuickGuy

Well-Known Member
Messages
3,403
Location
Woodinville, WA
I like Jim - he's just far enough from me to not be my regular gear-guy; but when it comes time to put a D50 carrier in my HP44 - I'll make the trip. Jim gets along with Pirate about as well as I do - though he has a lot more patience (and 100,000 reasons make watching his interaction with them enjoyable).
 

4speedfunk

Well-Known Member
Messages
4,212
Location
Tardville
Seems like a 2-series offset carrier would be a far better solution than a totally different pumpkin casting. I guess the Dana team knows best.
 

MaxPF

AGNTSA
Messages
1,394
Location
The dark side of the globe
I like Jim - he's just far enough from me to not be my regular gear-guy; but when it comes time to put a D50 carrier in my HP44 - I'll make the trip. Jim gets along with Pirate about as well as I do - though he has a lot more patience (and 100,000 reasons make watching his interaction with them enjoyable).

Who is Jim?

Seems like a 2-series offset carrier would be a far better solution than a totally different pumpkin casting. I guess the Dana team knows best.

It takes a lot more offset than any existing carrier would give, and you cannot offset a carrier enough and still have it fit in a D60 housing.
 
Top