• Welcome to H4O! For a reduced ad experience, please login or register with the forum.

FJ4overland

SuperBuickGuy

Well-Known Member
Messages
3,403
Location
Woodinville, WA
Some days....

So I drove it today to be sure I'd fixed all of the issues. That would be a big negatory. Now it pops the CEL on, puts the computer into limp-home mode (open loop), and throws a 44 code. A 44 code is the computer is getting a low voltage reading from the O2 sensor. That could be a bad O2 sensor - which is kind of unlikely because it seemed to be working fine before the whole wiring issue (and I realize that I may have fixed this too). Or the MAS is bad. Or a vacuum leak. Or the fuel pump is going bad. Or the regulator...

I'm thinking I'm going to take it to my mechanic friend tomorrow.... he needs to align it anyway... I really don't have the patience for this, which is kind of funny because he tells me that he likes working on my stuff because it rarely takes him more then an hour to fix it since I've done most of the leg work.....

but it has really cool radios in it :thumbs:
 

SuperBuickGuy

Well-Known Member
Messages
3,403
Location
Woodinville, WA
It was the O2 sensor, I found how to test, I tested another 02 sensor I had - it tested fine; I pulled the O2 sensor from the truck - it didn't read at all.
 

JPaul

Well-Known Member
Messages
2,401
Location
Way up north, UT
I've been finding that if you say something like "It couldn't possibly be this thing..." then it usually totally is that thing.

A variation on that is "This should be really simple to make work..."

Sent from my Nexus 7 using Tapatalk
 

SuperBuickGuy

Well-Known Member
Messages
3,403
Location
Woodinville, WA
My wife calls me an optimist because I always think it'll cost 3x more then I thought and twice as long. Usually she's right - it costs 5x more and takes 3x longer then I thought. That said, I was pretty close in my guess of cost and time on this one. That said, I made a comment when I started my 1950 Buick that come back in 2016 to see progress..... I pulled it out of the shed a couple weeks ago and put it right back. That was said in 2012. That particular one will make her a liar - I've more in the motor then I was going to spend on the entire car.
 

SuperBuickGuy

Well-Known Member
Messages
3,403
Location
Woodinville, WA
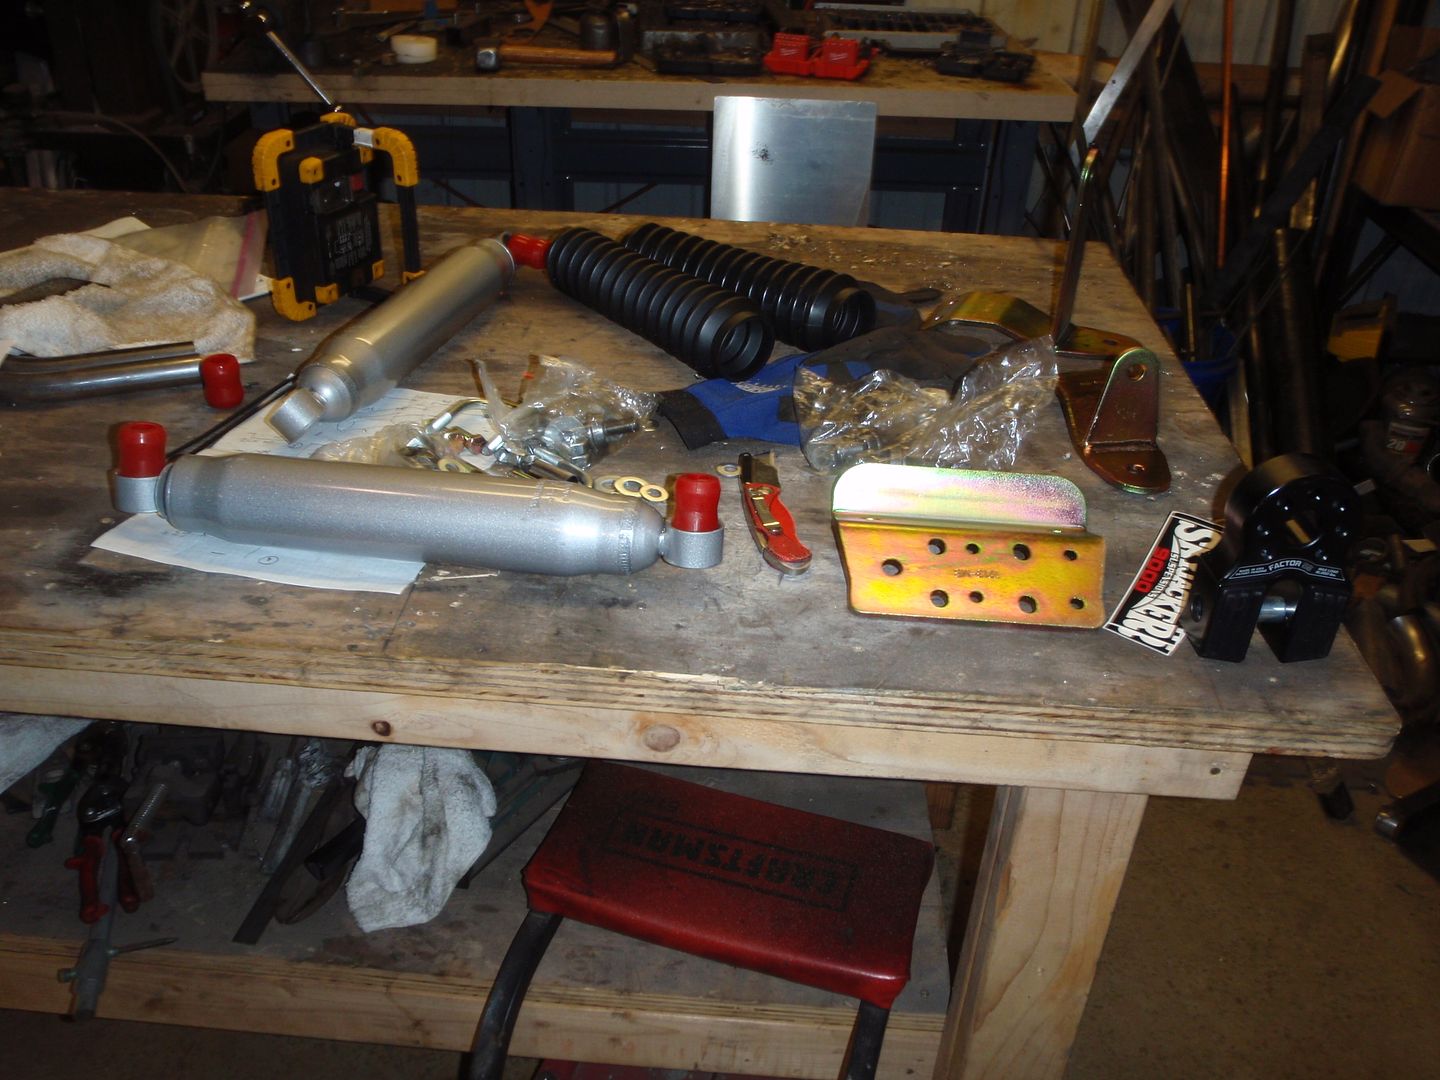
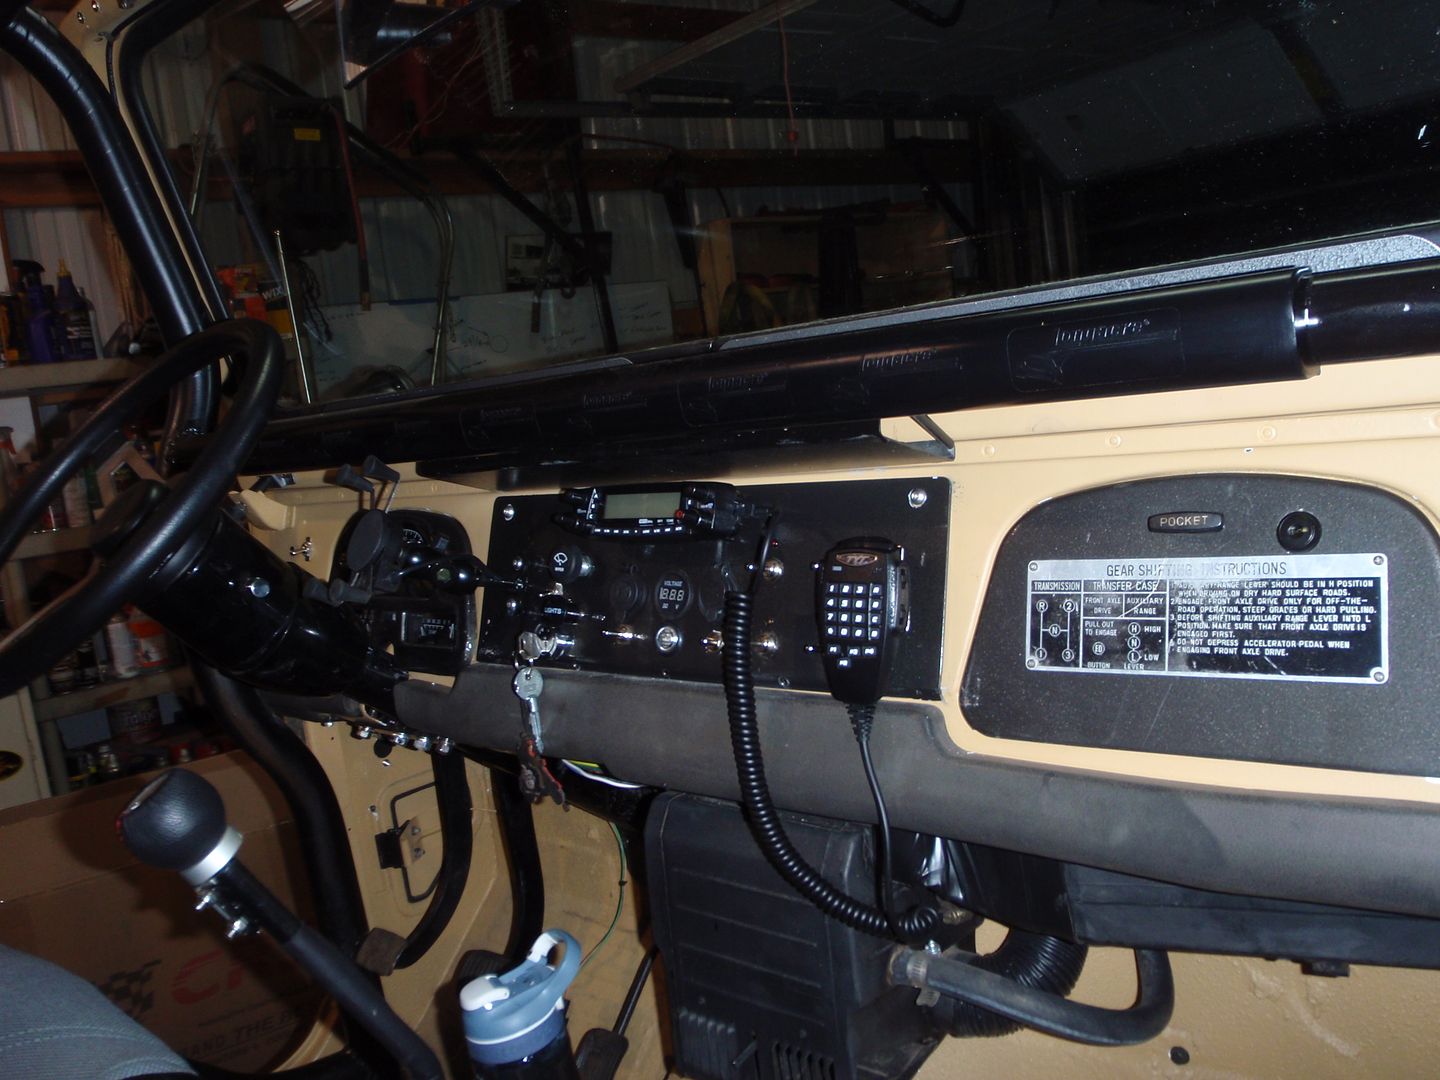
woohoo parts to install


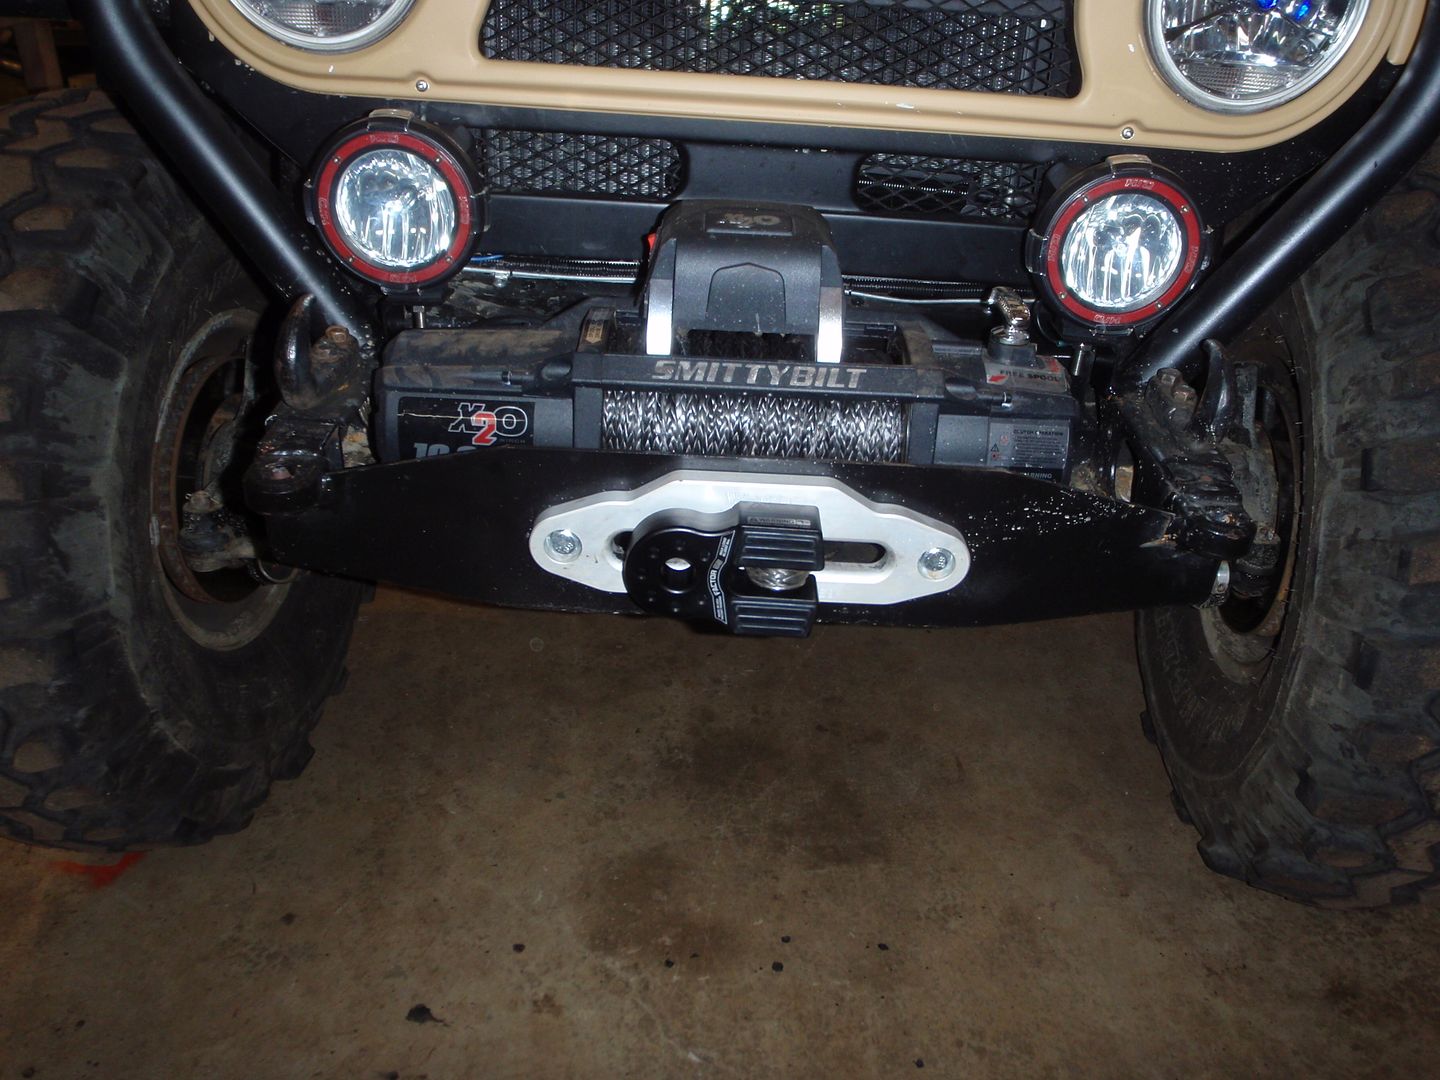
I don't like hooks because they can pop off and kill you.

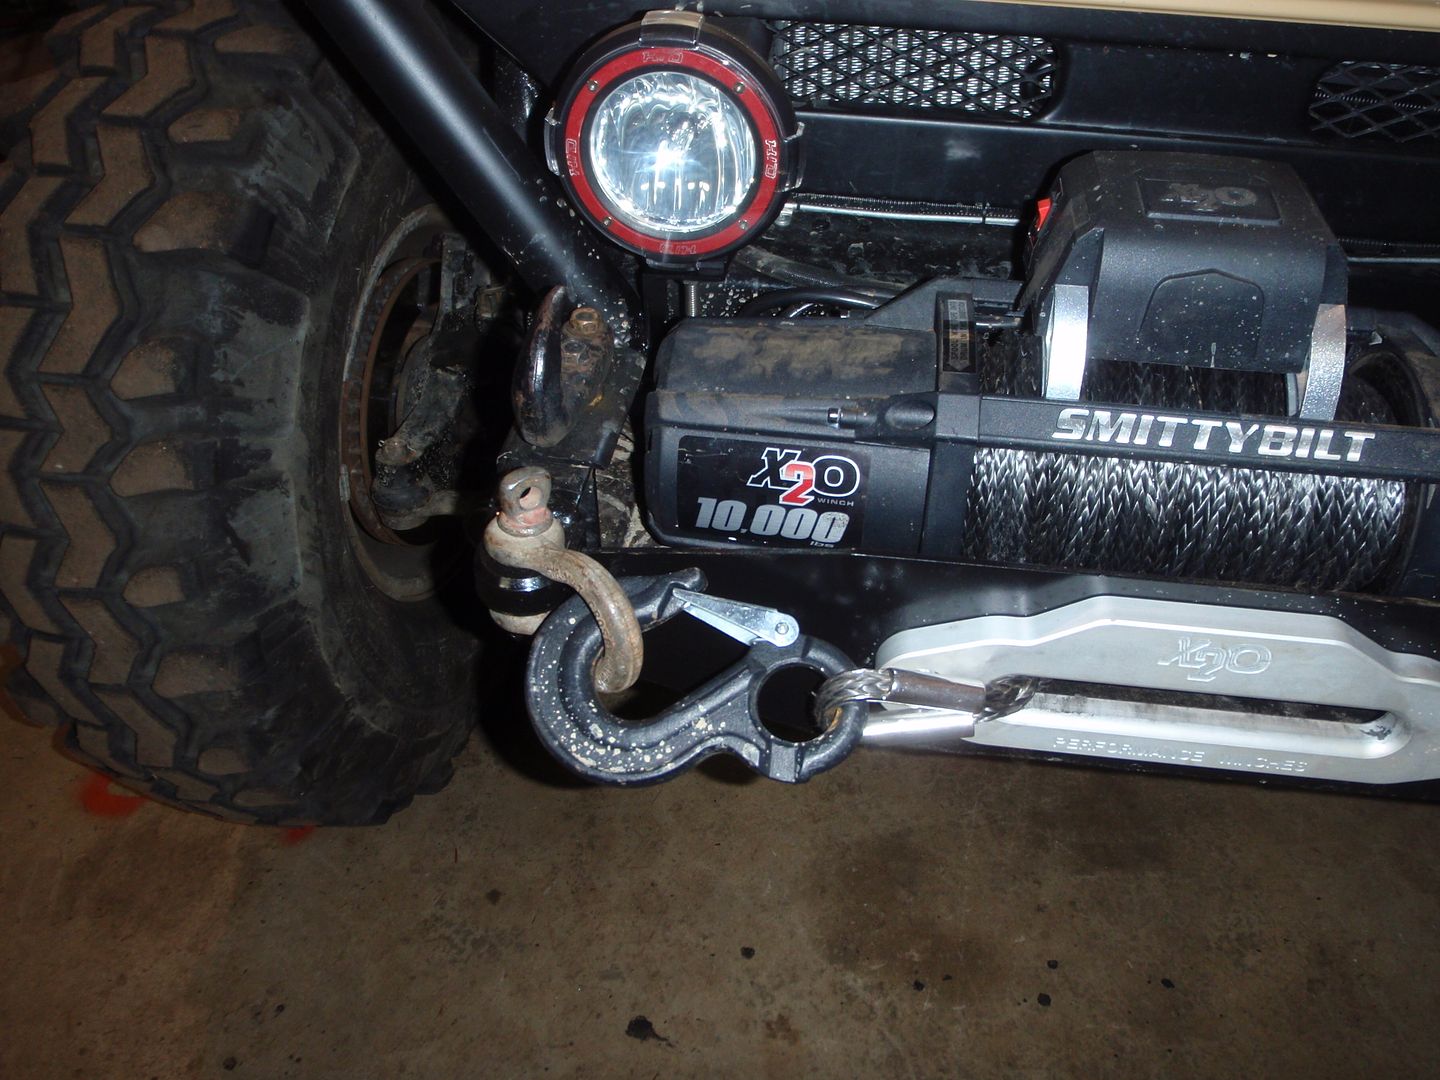
but I hated the idea of destroying a hook to get it off (why, smittybilt, why?)

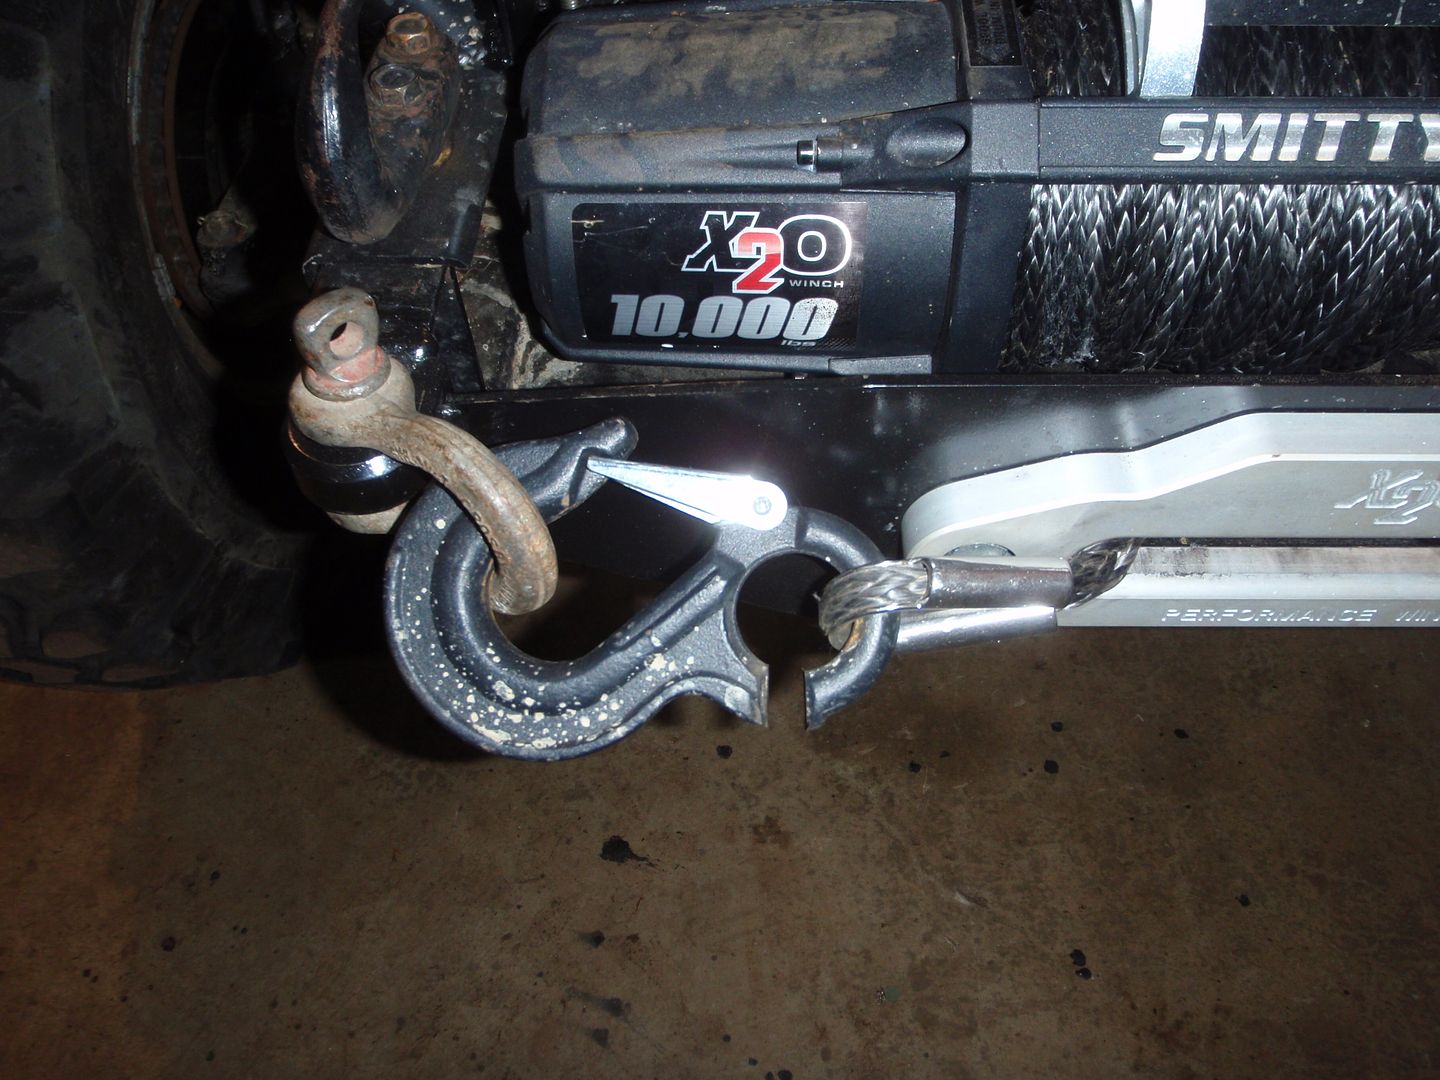
as you can see, I got over it

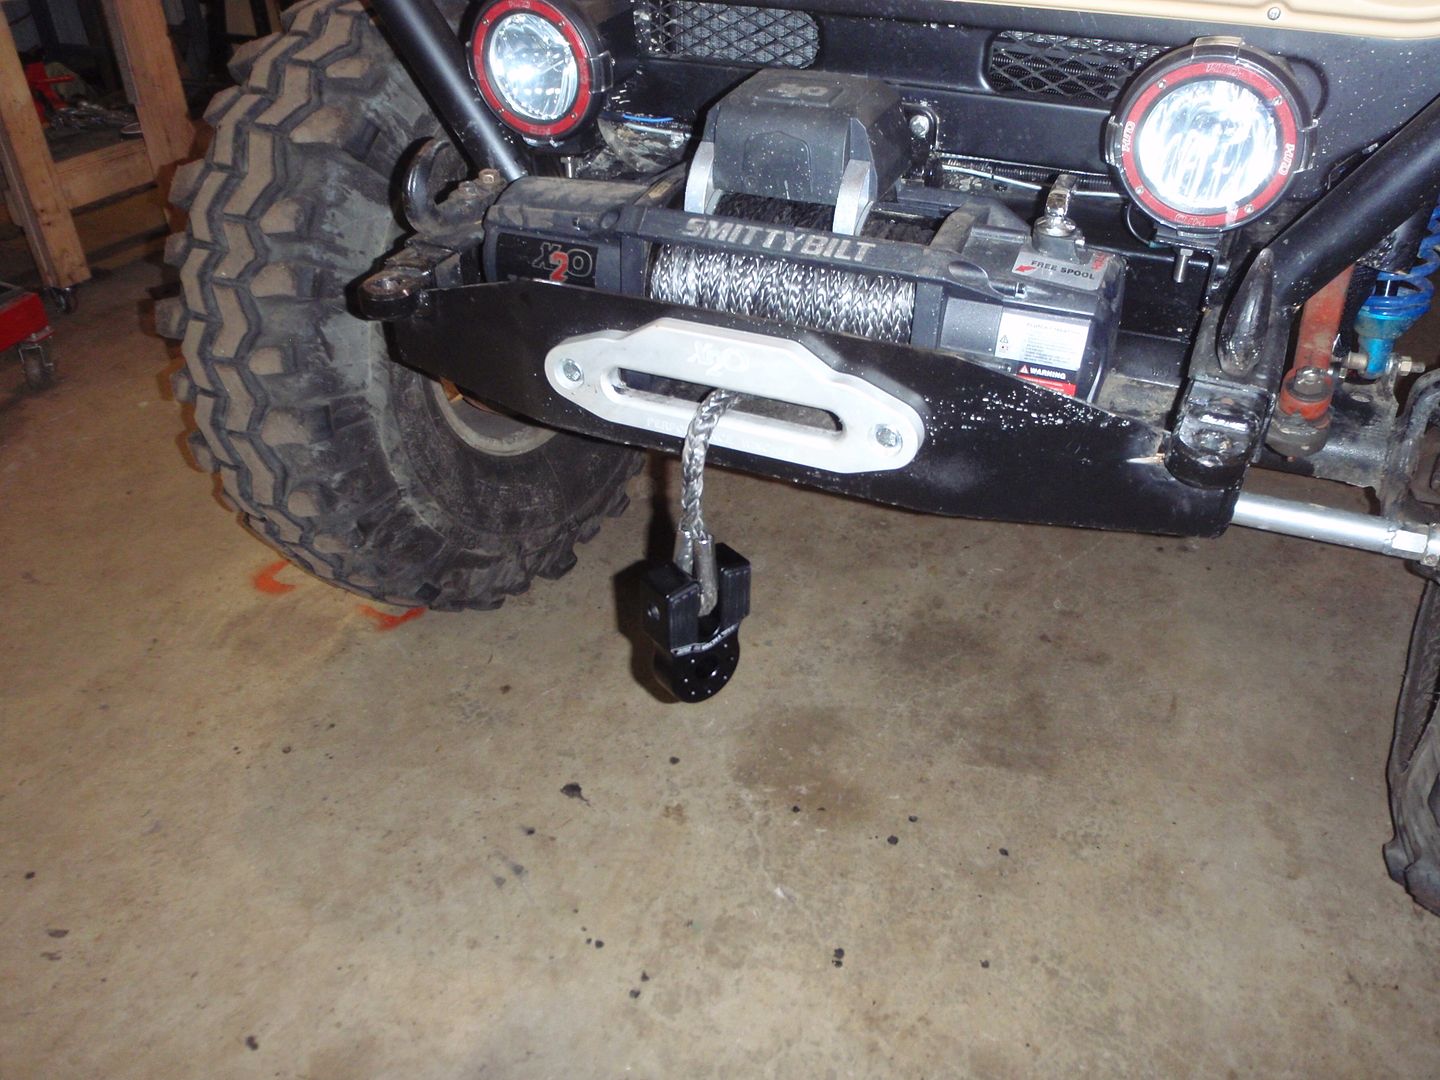
factor 55 builds an end that allows you to use shackles - thus you have a closed-loop-winching situation and it's much, much safer. Also, it allows you to run a license plate (stay tuned for how)


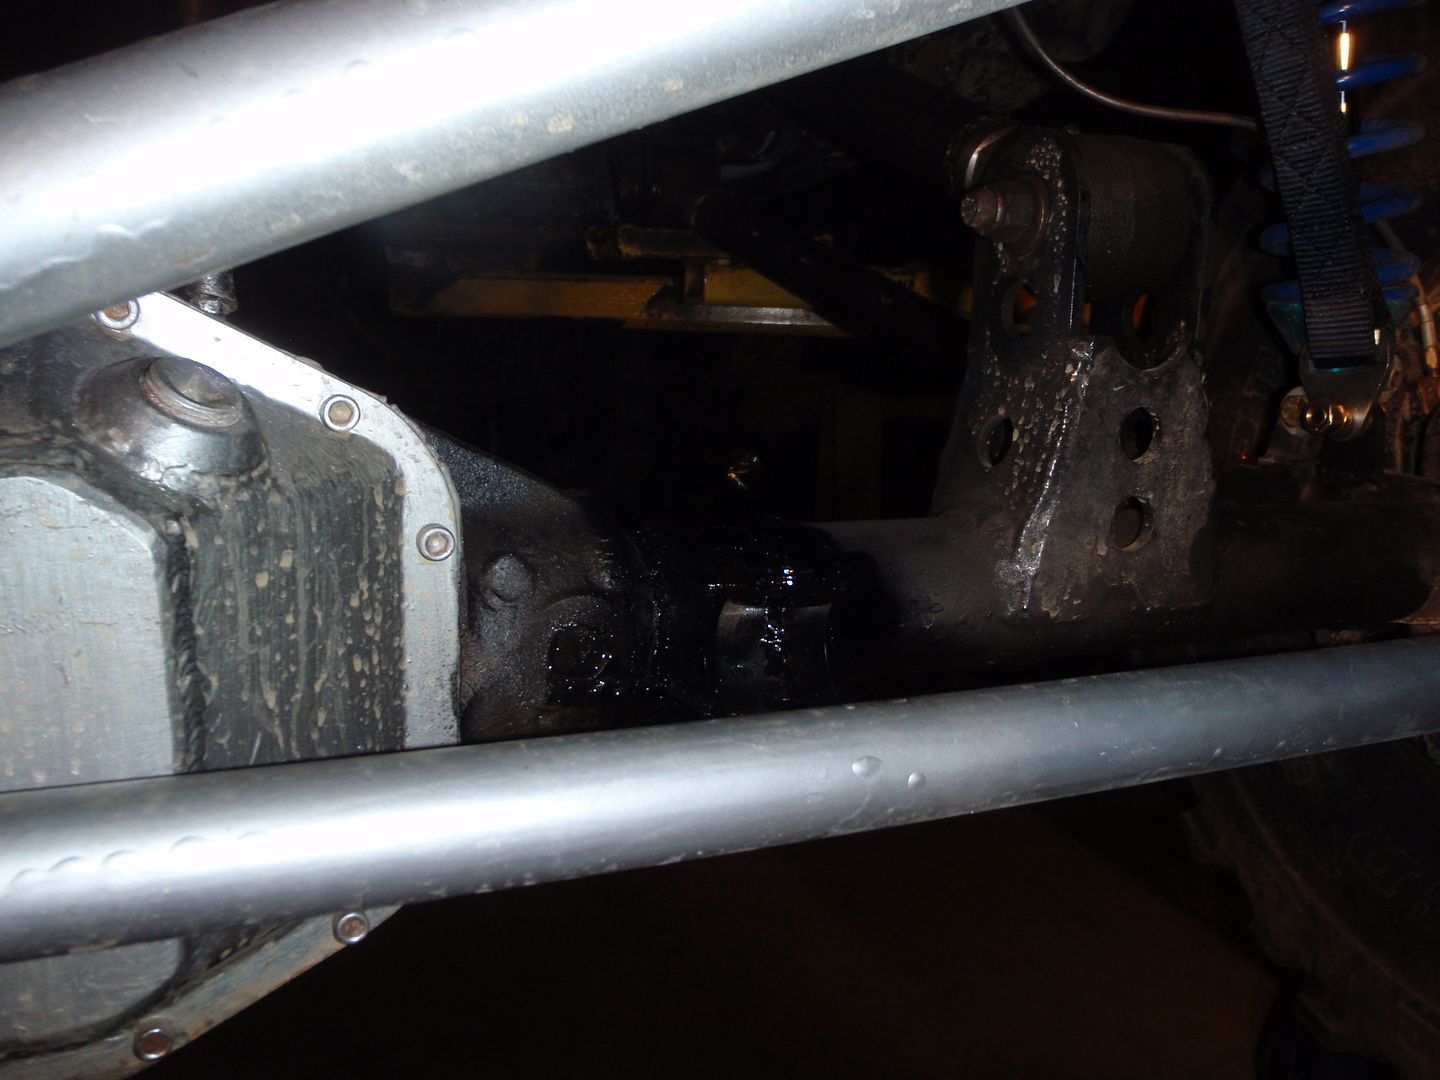
next a stabilizer. I knew I was going to put a stabilizer on it, but I didn't want to band-aid a problem so I drove for awhile without... that said, it does a neat death wobble when you hit a pothole or railroad tracks with one-tire-first.... so I'm fixing that

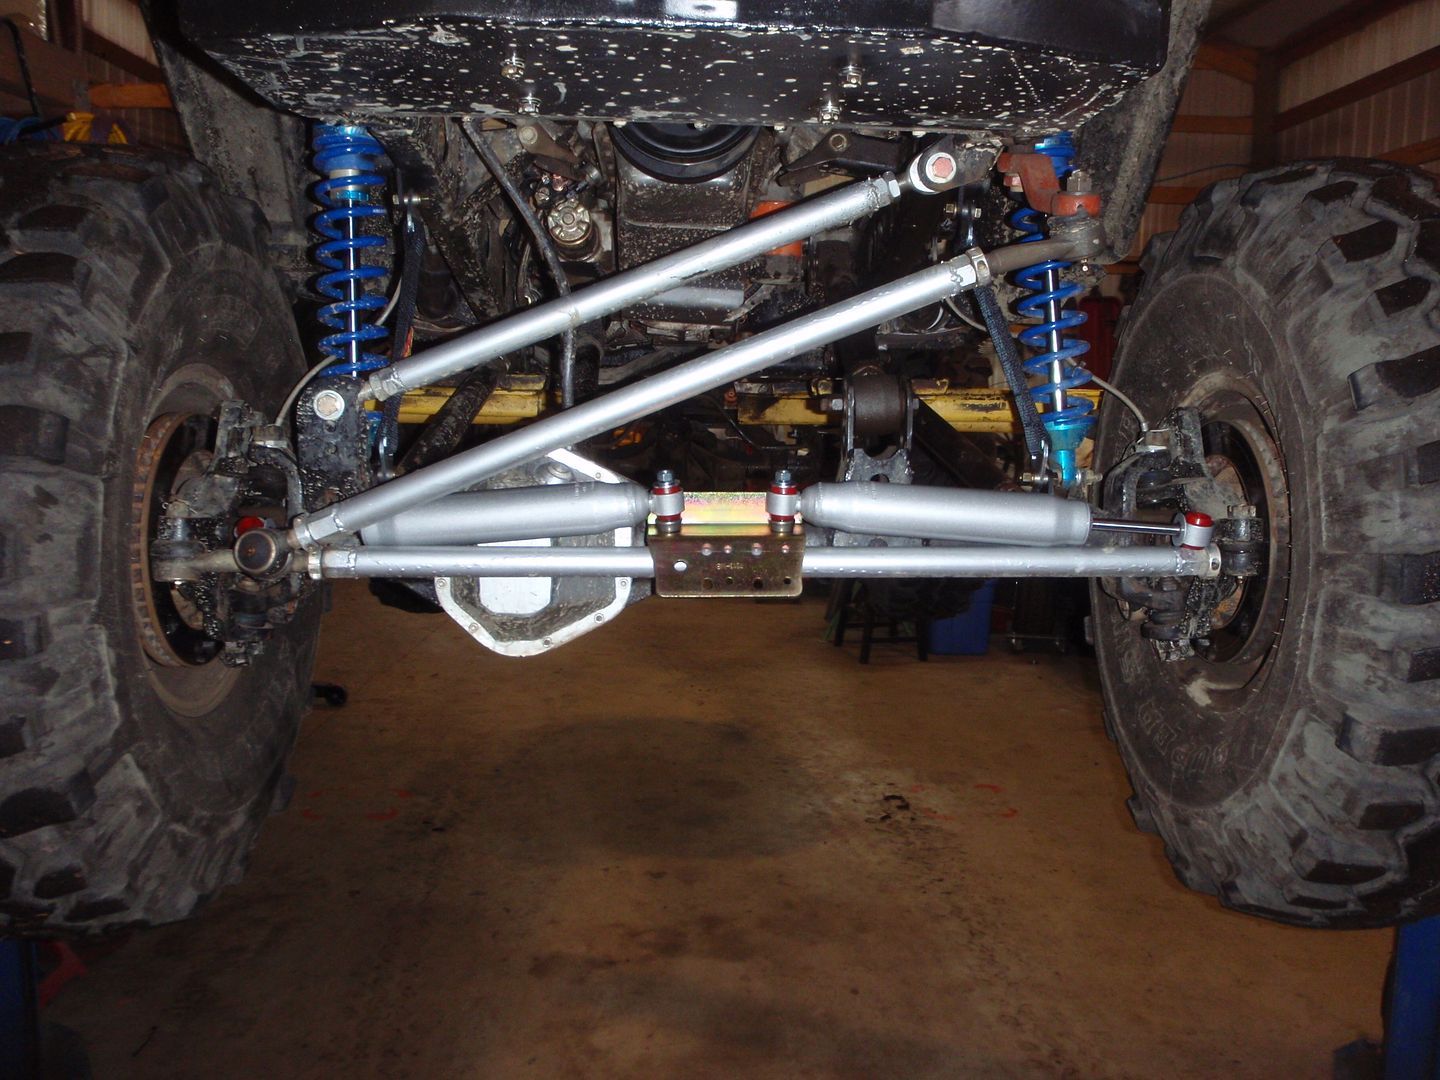
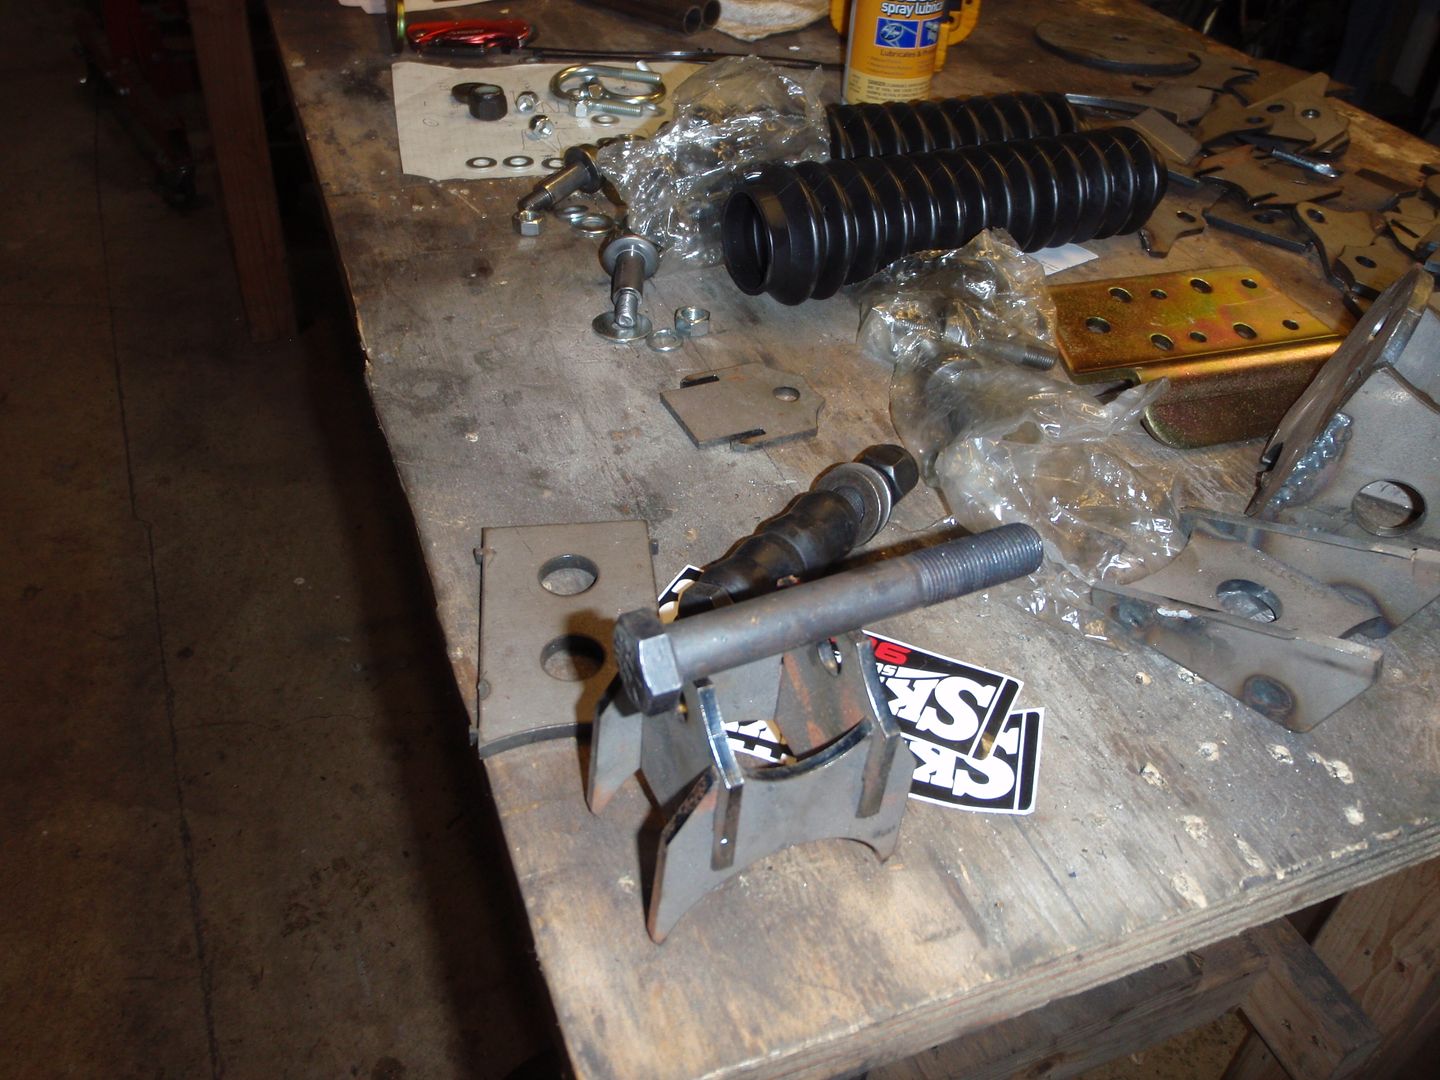
so I went through these ideas first


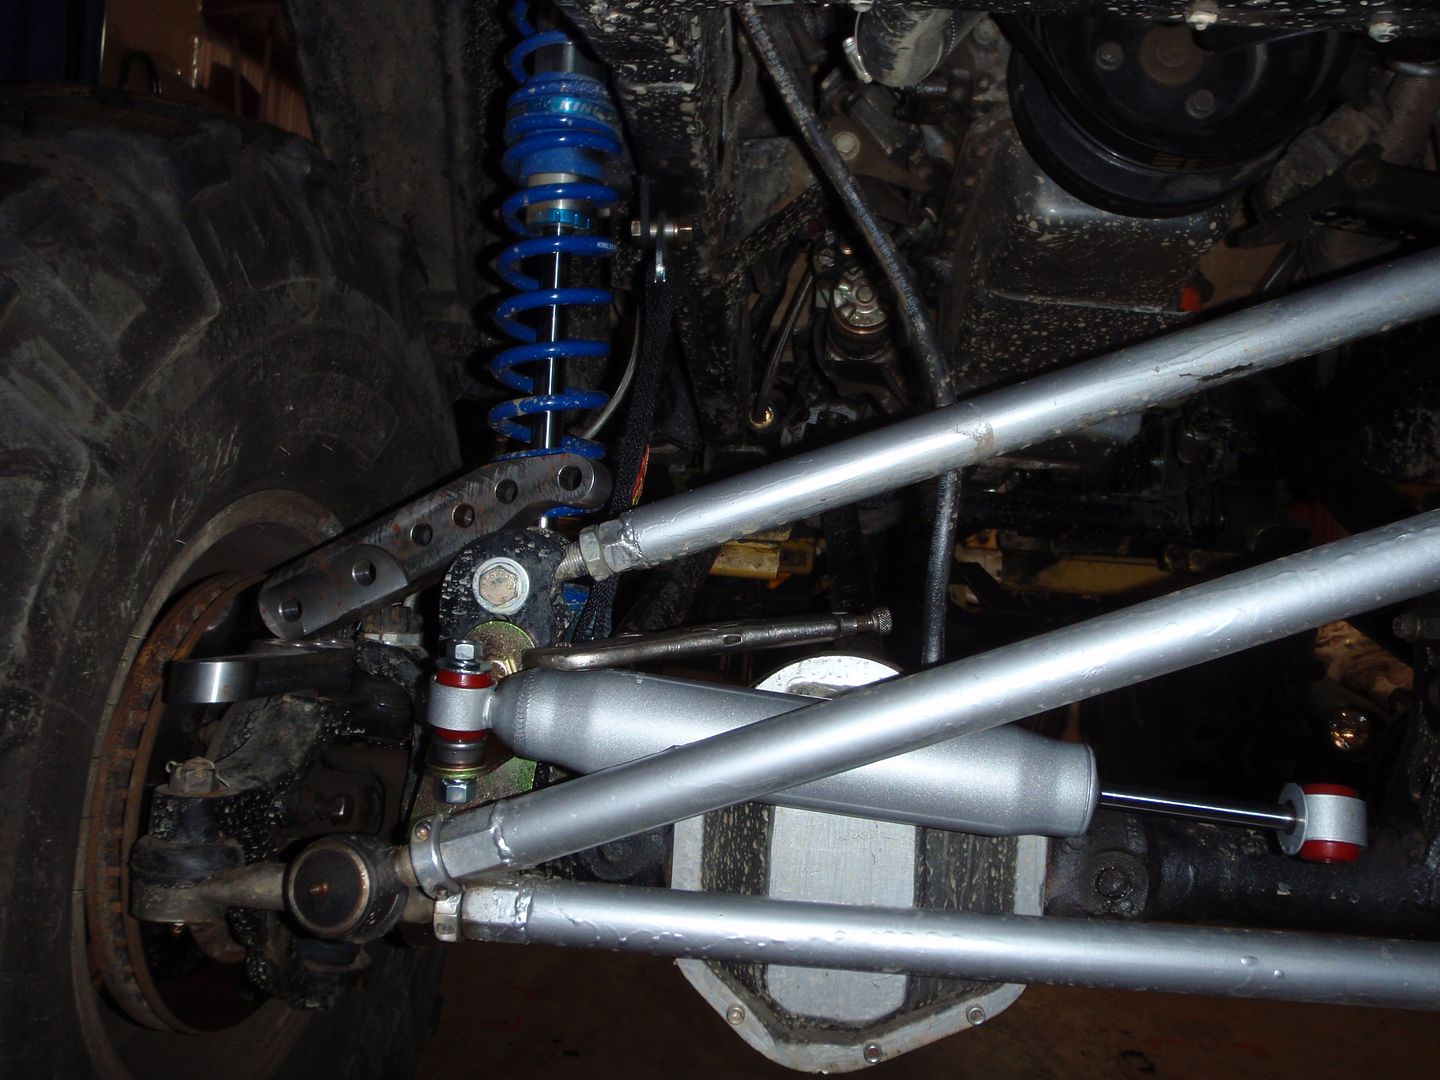
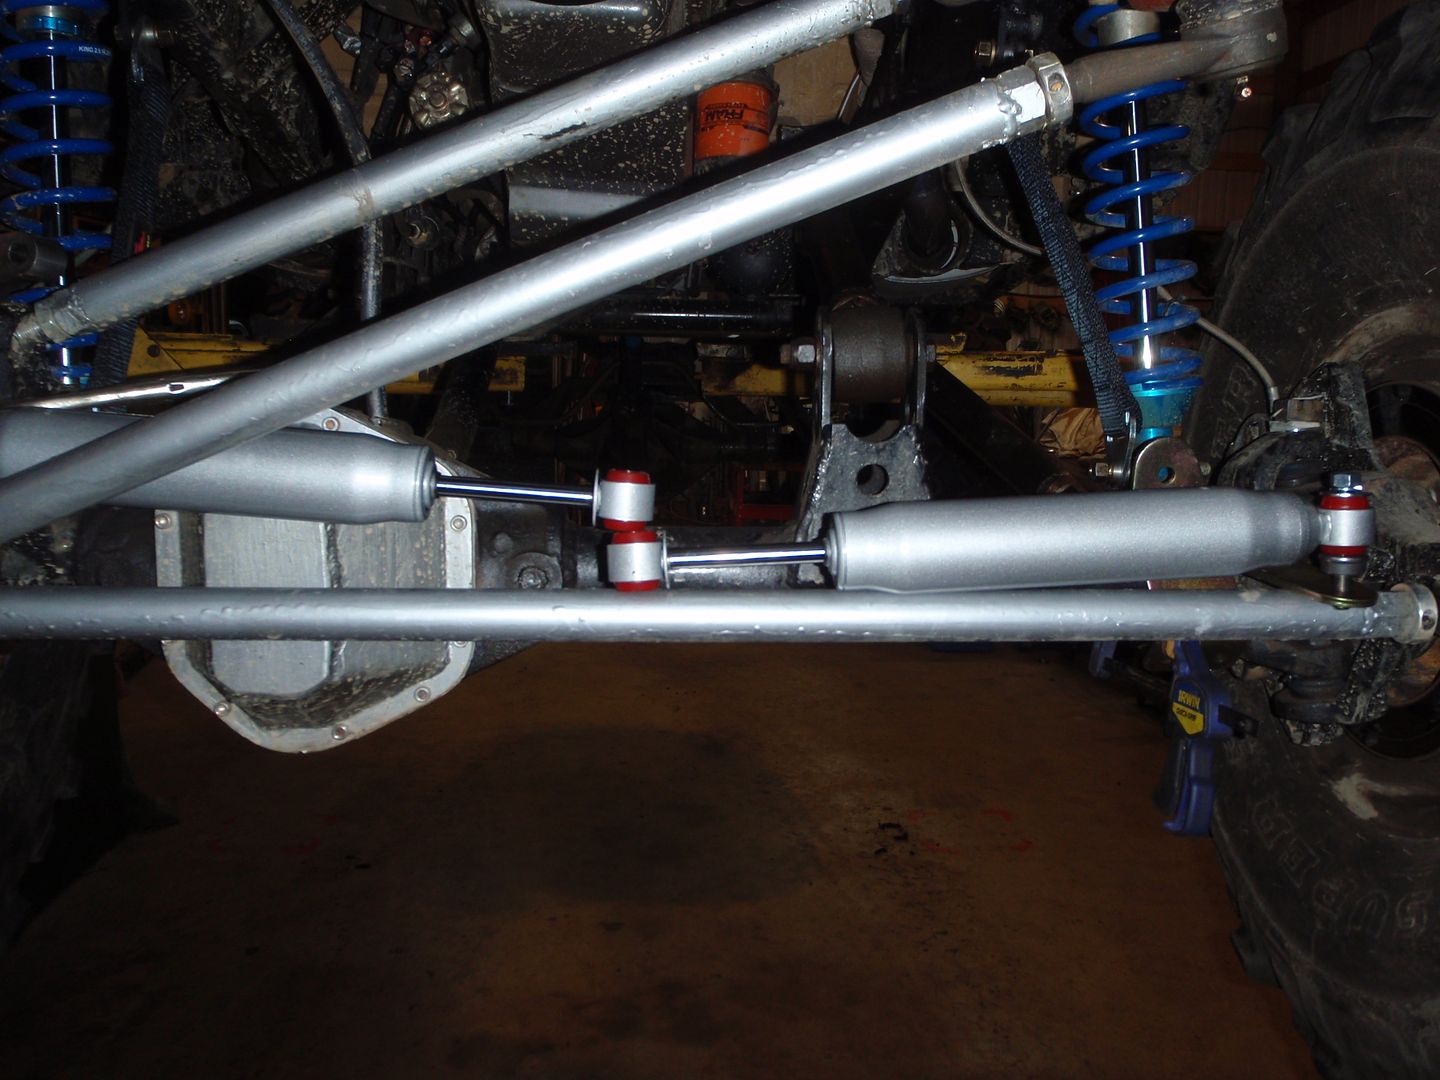
before I raided my parts box to create my own - funny, buying 2 stabilizers in a kit is cheaper then buying two stabilizers.
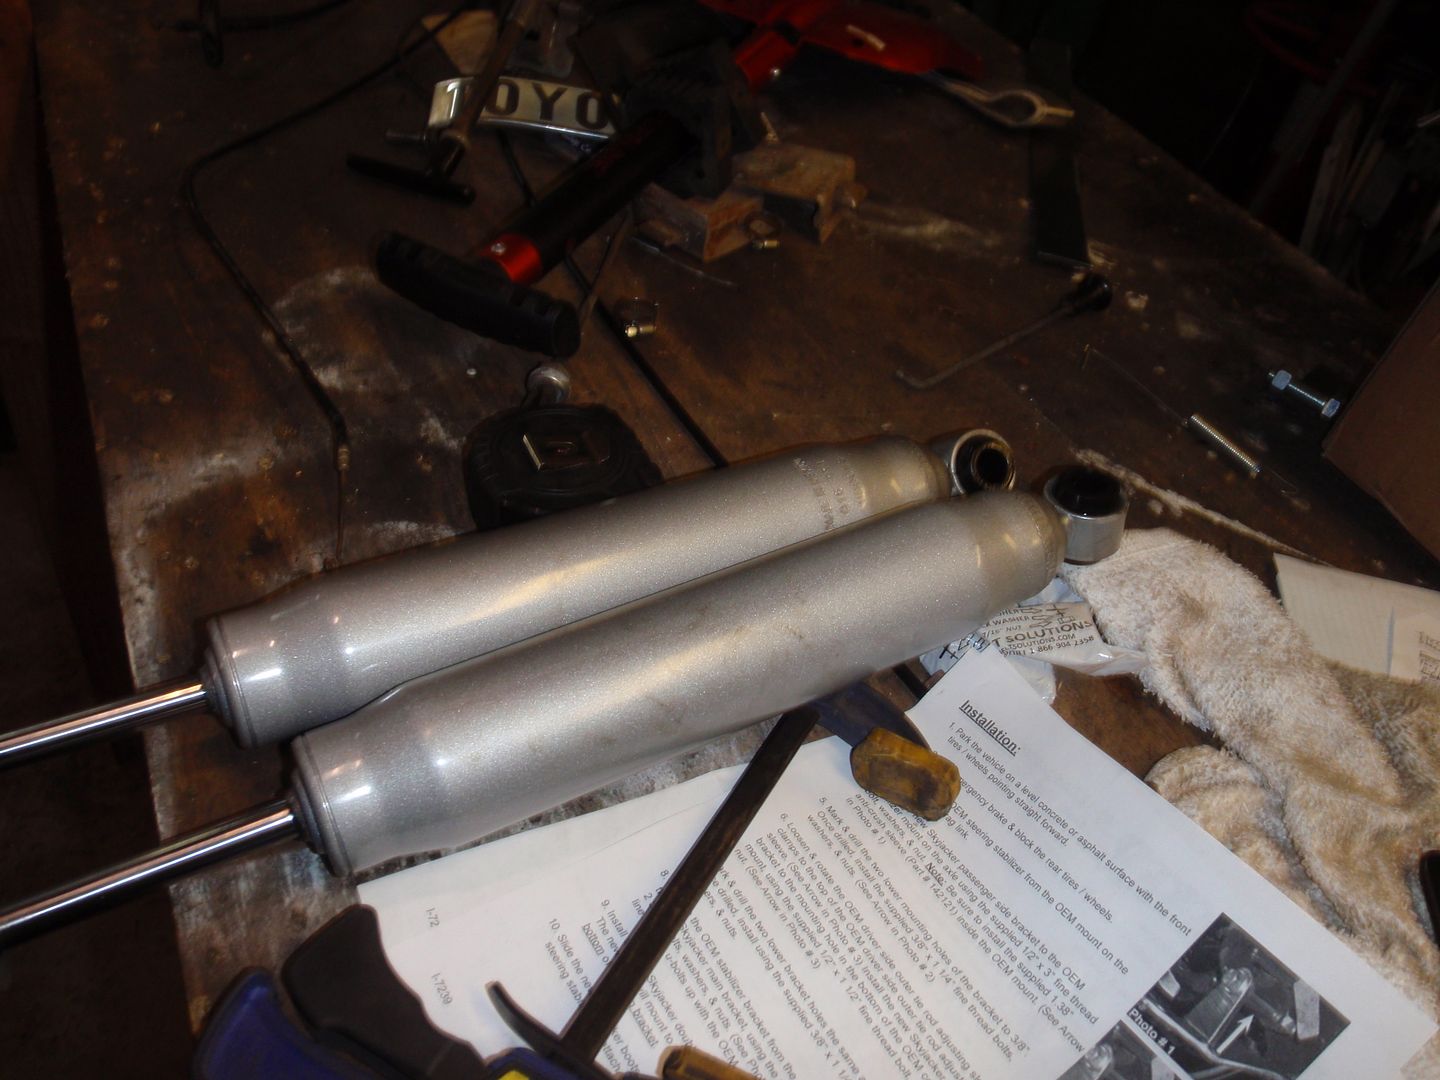

the parts


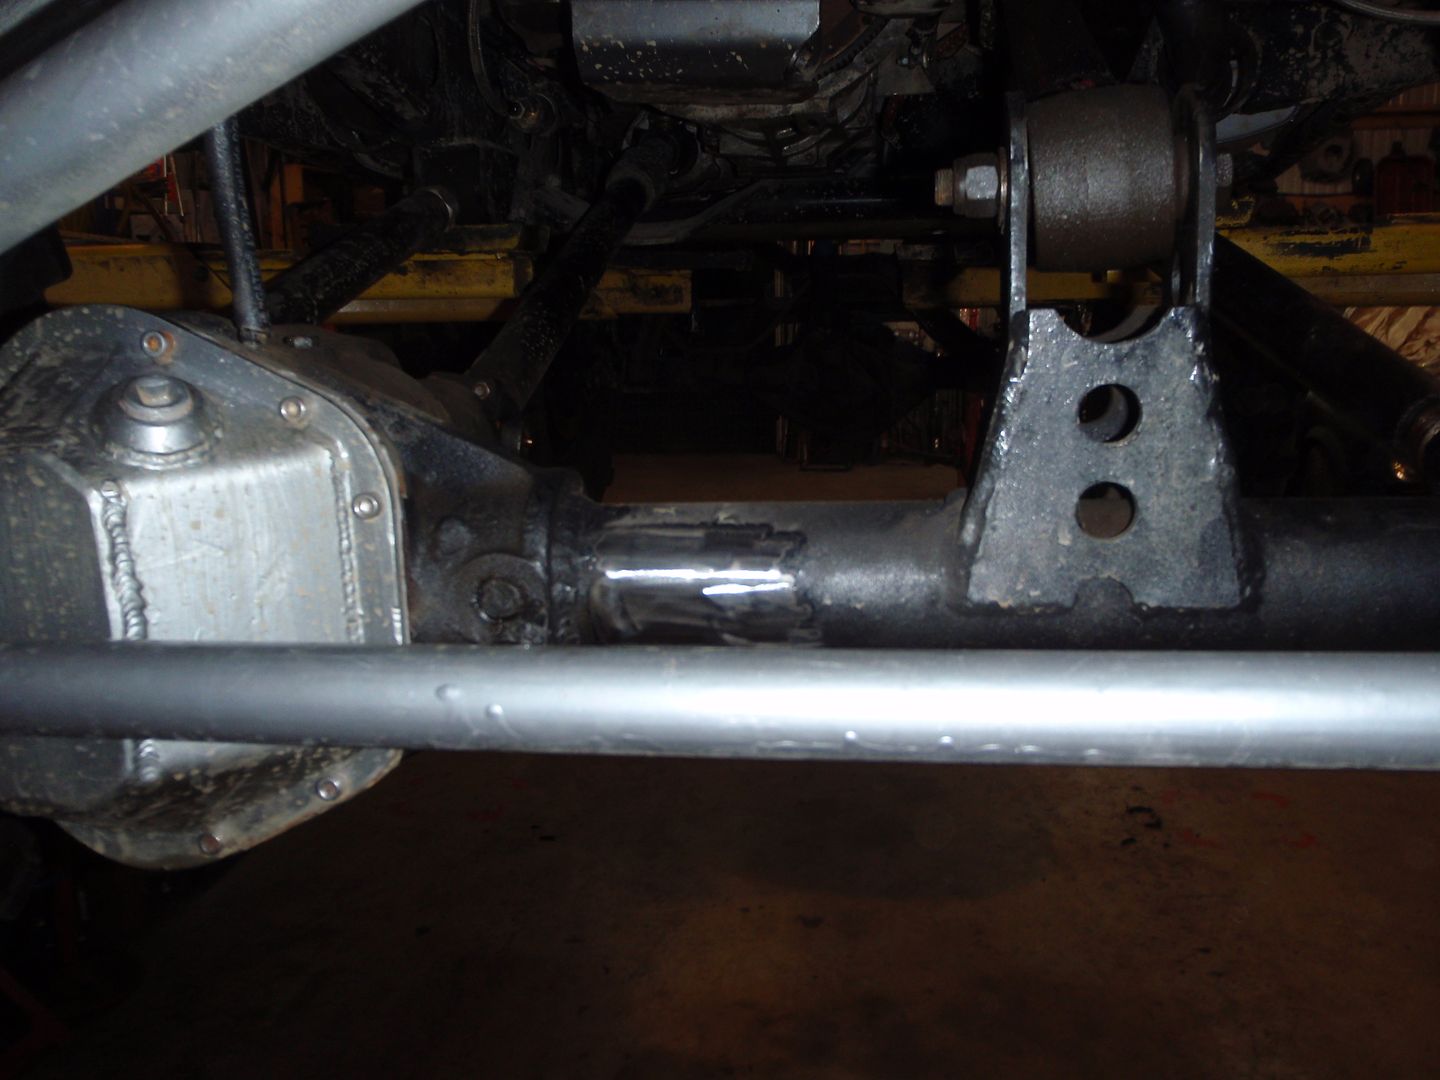
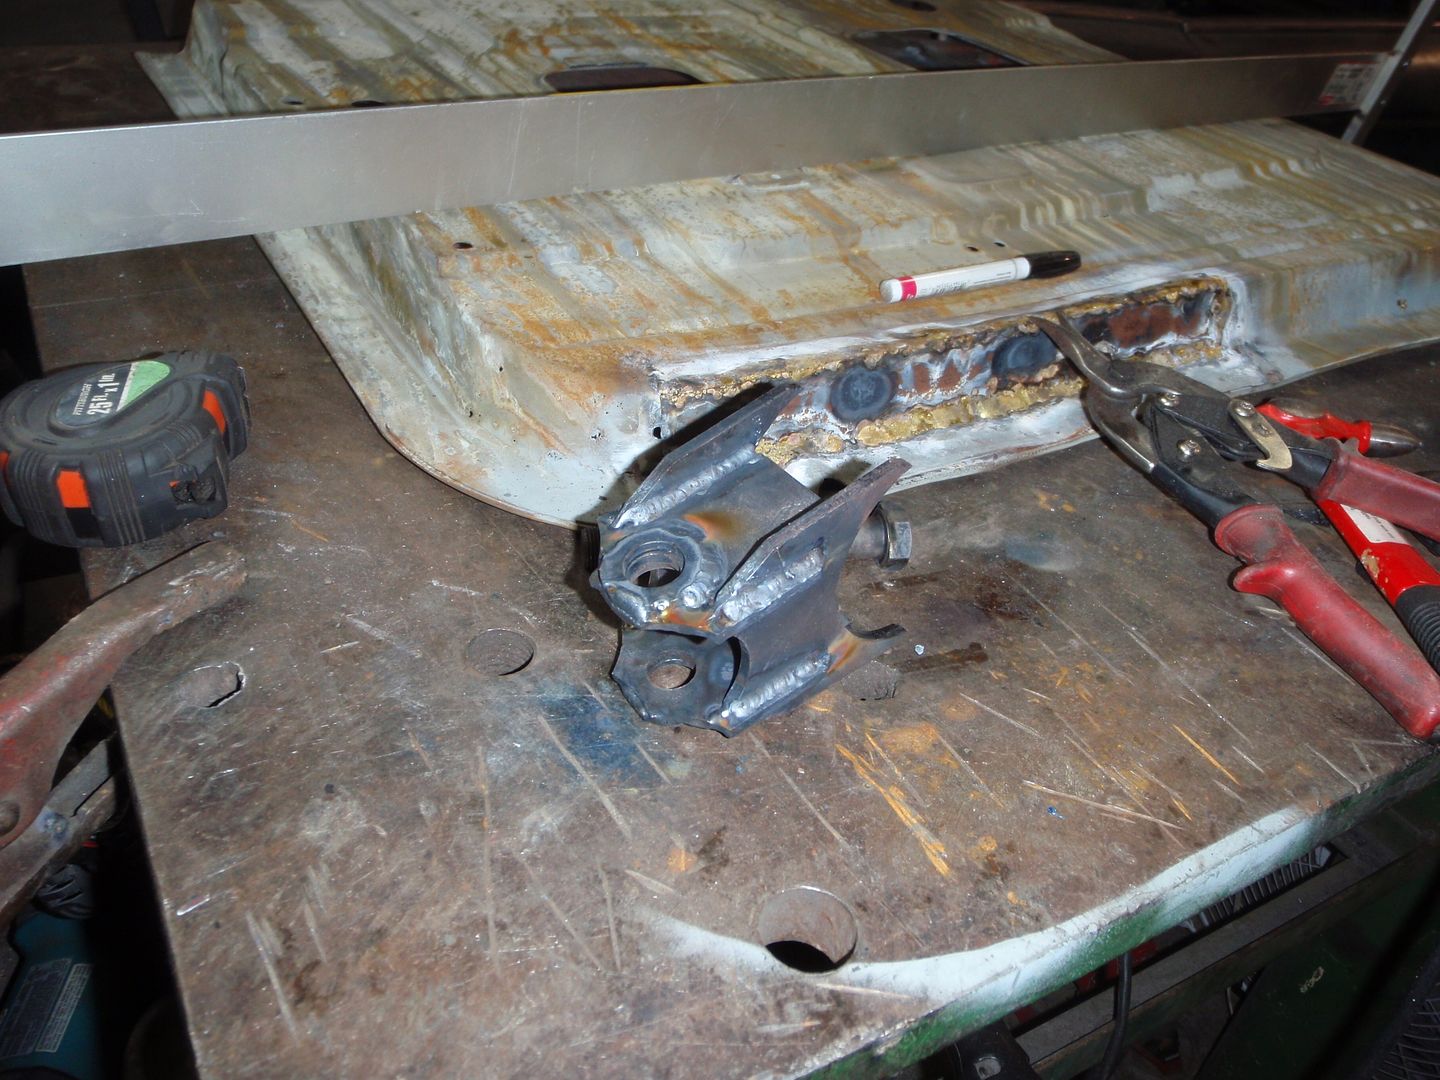
for those who think I can't weld, look away


a teaser while the paint dries


I'm also probably going to relocate my cross-steering arm up onto a high-steer arm then relocated the frame mount of the panhard down so that the bar is parallel with the ground... then it'll handle like a sports car....:)
 

SuperBuickGuy

Well-Known Member
Messages
3,403
Location
Woodinville, WA
zReminder - I was waiting for paint to dry

strangely it turned black after install

also, should I decide I need a dual stabilizer system, this is how it will look

finished, for now


I hate lubing these, but I hate buying new ones even more


hooks installed


monkey reinstalled, I like how they notched the antenna to keep it from coming apart... chinese quality - who knew?


airbox


I also finalized the mount for the HAM radio....
 

SuperBuickGuy

Well-Known Member
Messages
3,403
Location
Woodinville, WA
and it wouldn't start today

symptoms:
1) no tach signal
2) no fuel injector pulse
3) no code
4) no spark

guess - module. Yep, it's new .... but chinese new....

in other news
more parts

it's funny, at least to me, that my FJ40s only come in two colors.... even the parts only come in 2 colors - tan or blue
some trimming may be required


it's missing a couple pieces - 1, the center hoop, and 2, the baskets for the rear hoop.... ah well, for $125 I did pretty well... now for the trollhole top
 

4speedfunk

Well-Known Member
Messages
4,212
Location
Tardville
What caster angle are you running? I've driven a few lifted Jeeps with death wobble....one was downright terrifying. I traced it down to caster angle (I think). The same Jeep had junk track bar bushings, so that may have played a roll in it as well. I put adjustable upper links on it and shortened them about .250" to rotate the knuckles back a tad...seemed to do the trick. I didn't actually measure it but it was probably sitting around 6 degrees.
 

SuperBuickGuy

Well-Known Member
Messages
3,403
Location
Woodinville, WA
5,6, and 7... right now it's at 6. With the stabilizer, the problem has disappeared. With that said, I plan to take the steering off the cross bar and put it on a high-steer bracket, on top of that I'm going to lower the frame mount of the panhard bar along with brace across the frame.... while that probably won't do anything for the wobble, it may actually help because it will give the steering more leverage against the tire. Also, I think part of this is a bias-ply issue given the mechanics of what's happening.
 
Last edited:

SuperBuickGuy

Well-Known Member
Messages
3,403
Location
Woodinville, WA
Soft top ordered will look similar to this one
image-jpg.969350
 

SuperBuickGuy

Well-Known Member
Messages
3,403
Location
Woodinville, WA
well, Sunday was spent tearing a deck off so nothing of consequence happened on the '40..... tonight I made 2 brackets - yeah, it goes slowly


brackets


next up, brackets


​and then a cross bar....
 

SuperBuickGuy

Well-Known Member
Messages
3,403
Location
Woodinville, WA
Much tube was kinked... but first
My current task.... replace the deck


I had a bobcat, but it was just way too heavy so I sold it and rented this.... I will buy one of these - what an amazingly handy tool

and yes, a quad track will happen before I return it.

so what I found was if I did the initial bend with my Eastwood bender, then finished the bend with this, I would eventually call it good enough. I wish I could do tight bends like Toyota did - but not going to happen and honestly, I'm the only one who would ever care


closeish


I split it in half, welded it back together, flattened the arch, rebent the arch, shortened the legs, kinked a bend (not going to fix).... and that was it for tonight


I think it will adequately hold up PVC canvas... next up is the leg clamps and the front windshield channel


SuperBuickGuy

Well-Known Member
Messages
3,403
Location
Woodinville, WA
this was fun
RTI is 1008

1st run


2nd run (avoiding the ramp with the rear tire)


I could have pushed it a bit further..... but 1008 is pretty decent for a vehicle that you can drive on the freeway

what was really cool was the look on the guy's face when I told him I built the suspension and the '40


and yes, to those who think this, I'm bragging.


SuperBuickGuy

Well-Known Member
Messages
3,403
Location
Woodinville, WA
and it works fine with a known, good ignition module... that's the 3rd this one has taken

​and I must Kudo again NuMark Automotive - he's an amazing help (he's the friend I ask when I'm stumped)
 

SuperBuickGuy

Well-Known Member
Messages
3,403
Location
Woodinville, WA
it's remarkable how much time a house will steal from your projects... when we bought the house, the one 'issue' was the deck was about to collapse, I can proudly say that I got another 8 years of use before it almost collapsed :)
before

now


At the Offroad expo I bought 3 25' extensions for my winch line - that means I carry about 200' of line. Probably the next time I use it, I'll need 210' but that's really the way it goes.


hmmm, running a bit lean - I need to get a pressure gauge, I think the fix is going to be simply increase the fuel pressure.... but we'll see, I could get another chip burned that fits better what I'm doing.


I didn't have decent cables, I do now


with the no start issue came finding a boot was a bit burned


as I said before, it was the module, number 3, my friend says that's actually too common now with parts - I hope not - but I will go back to NAPA and see if I can't get them to give me another one (the last one lasted maybe a month).... which is funny since the Chinese one lasted for a year...

time to finalize the place for the fuel and water


And I may add another fuel tank, but my thought is now under the current tank - combine to single exhaust.... we'll see, I could also put it under the driver's side
 

SuperBuickGuy

Well-Known Member
Messages
3,403
Location
Woodinville, WA
a bit more done tonightthe missing hoop is done and I think I'm going to get creative on the front piece by adapting the hardtop plate to hold the convertible top. It means it's bolted on... which would have advantages
 

SuperBuickGuy

Well-Known Member
Messages
3,403
Location
Woodinville, WA
I fixed the ignition problem with all new parts

hope it works

I went with simple in mounting the rearmost frame


but I certainly will make up for that with this

the to-do list:
deskin the 71 doors,
deskin the 76 doors
weld the new bottoms on the 76 doors
cut down the inner 71 door to match the outer
weld flanges on the top of both doors
weld the inners to the outers

I'm mostly certain I'm going to simply buy some 71-fitting doors for winter... these are summer doors... except I have another dastardly plan that requires some custom glass, an extended frame and would be removeable... so we'll see
 

SuperBuickGuy

Well-Known Member
Messages
3,403
Location
Woodinville, WA
Doors... I've been postponing these because they're a boatload of work, but I'm out of excuses and I had a free Sunday

first game is find the spotwelds

drill then split

or cheat

weld-through prime the patch panels

test fit

part 2

not sure why Toyota didn't put large holes in the bottoms of the doors - and these are later doors, so they should have known better


so this much of the skin is being used


edge clean

onto the older doors, need the inner panels

my goodness there were a lot of spot welds

pry

and done

some assembly

it was a wash - either make a die to stamp the detail or do some stuff that Dr. Frankenstein would be proud of

test fit 1

test fit 2 with inner panel

I'm going to make pockets where the mechanicals were


I got a solid start putting the other together.... should have both roughed out tomorrow night
 

SuperBuickGuy

Well-Known Member
Messages
3,403
Location
Woodinville, WA
Door 2

goes a whole lot faster


and who knows where 1 pin is....


so I still don't know what I'm going to do to cap this... I'm really tempted to leave the center open or perhaps a channel to slide some plexiglas into...


inside


SuperBuickGuy

Well-Known Member
Messages
3,403
Location
Woodinville, WA
I swear these doors - had I paid the $500 for some aqualus and divided that by the number of hours labor to make these about 50% of those.... I'd be making $10/hr. Oh well, for those curious the entire plan of this rig was practice for the Buick I've posted a couple times... this really is metalwork light comparatively.

so primer and paint the inside of the doors so they don't rust out again


woohoo, long, flat, thin metal welds


no warps! yay


more long welds and corners


so with a bit of hammer and dolly work it's close


I did say "close"


believe it or not this is really easy to get out when you metal finish... you're already putting heat in the weld with the grinding so you might as well put it to work to shrink it back flat


the trick is to be certain the sides are straight and the center isn't tin-canning


and I don't have grinding disks... forgot to get them today, oh well that's a good stopping point for tonight
 
Top