
-
Welcome to H4O! For a reduced ad experience, please login or register with the forum.
You are using an out of date browser. It may not display this or other websites correctly.
You should upgrade or use an alternative browser.
You should upgrade or use an alternative browser.
Ultimate Adventure 2017
- Thread starter 06 H3
- Start date
4speedfunk
Well-Known Member
- Messages
- 4,212
- Location
- Tardville
Clarify what you're doing with that axle. You pressed new 3" pieces if DOM into the pumpkin?
Also, does this diff use spanners for lash adjustment?
Sent from my iPhone using Tapatalk
Also, does this diff use spanners for lash adjustment?
Sent from my iPhone using Tapatalk
06 H3
a.k.a. "The Jackal"
- Messages
- 9,352
- Location
- Meridian, ID
Call should be soon! I contacted the other guys and nothing on their end. Very impatient!
Thanks score!
Cj,
Yes this diff uses spanners, this is a new school Dana 70 from the rear end of 2006 1 ton van.
I pressed those little 3in pieces into the housing to hold the seal. They do nothing but hold the seal. The reason for this is that the ID of the tube is oddball at 2.66 and finding an off the shelf seal is much easier at 2.5in all this does is reduce the ID to 2.5 for a common seal.
06 H3
a.k.a. "The Jackal"
- Messages
- 9,352
- Location
- Meridian, ID


I owe my buddy big time! He is on summer break from school and had the day off work...I had work but he spent all day on my rig alone. Turning out killer! The whole goal is to make an exo that does not have the weakness an exo sometimes has. The C pillar would be weak if it was exo only so the internal C pillar really strengthens it up. We have some more additions to make as well. After I got home from work he left since he was dead tired and I got to work on the D70 front.

Machined sleeve to allow it to press fit (or BFH fit) then a few plug welds and a big bevel weld.

Burned in the C's...since it's a low pinion, 11 up on pinion angle and 7 back on caster.
I tacked on the upper link mount and then started rebuilding the kingpins. Called it quits around 11pm when the 35 year old race wouldn't hammer out and didn't want to piss off the neighbors. I'm away for work tonight but tomorrow night the fun will continue. For the axle I still have some work to do
-gear setup/locker install
-install axle seals
-rebuild kingpins
-make my own D60/70 brake bracket to work with H3 calipers and weld on ABS sensor mounts.
-finish mounting all link coil shock and track bar brackets
-long side of tube truss
It will be tough to package a link mount, coil bucket, shock mount and track bar mount on 4in of tube. D60/D70 have roughly 4in of tube to work with while the D44 has 8...
Still need to decide what to do with my D44. I love that high pinion 44 it's held up great on 40s even with a chipped pinion. I may hold on it if the 70 doesn't fit well or have issues. If I can talk my little sister who's getting her license soon into a 4x4 maybe it will make its way under her rig one day [emoji322]
- Messages
- 10,447
- Location
- Scottsdale
Wow, looking great.
JPaul
Well-Known Member
- Messages
- 2,401
- Location
- Way up north, UT
That's looking pretty slick! It's definitely a one of a kind H3.
Still rooting for you to get the invite!
Sent from my Nexus 7 using Tapatalk
Still rooting for you to get the invite!
Sent from my Nexus 7 using Tapatalk
rascole
Well-Known Member
- Messages
- 2,587
- Location
- Bellflower, CA
Really nice, can't wait to see it on the cover.
Big2dabank
Well-Known Member
- Messages
- 1,216
- Location
- Central Florida
Kick ass work on the cage!
RamRod
Well-Known Member
- Messages
- 3,914
- Location
- AB, Canada
Looking mean!
Sent from my SM-G935W8 using Tapatalk
Sent from my SM-G935W8 using Tapatalk
06 H3
a.k.a. "The Jackal"
- Messages
- 9,352
- Location
- Meridian, ID
Thanks everyone!! Big process today! Cage was left as is for now but got work done on the axle...got the kingpins rebuilt, got the spindle studs on, knuckles on, spindles on, got all the brackets tacked on except for the track bar bracket. This was HUGE! The pass side only left me with 4in of tube to work vs 8in like the D44. One big concern was having to move the link mount outboard. Doing so would leave the tires contacting the links and causing a much worse turning radius. Doing that wasn't an option, I could do a bent link but it would be more work, more time and I like straight links. This should be pretty trick and I'll get pics when it's done. Waiting on the track bar bracket to arrive. I think this will be a longer track bar setup but that's ok!
Got the Eaton e locker as well. It's a new design...4 pinion and direct engagement. The direct engagement is available only on the D60/D70 from what I understand. No ball and ramp setup like the old school and no locking/unlocking when going forward to reverse...
So I put the bearings and ring gear on...gear install will probably be this weekend.
Hubs are at a local machine shop to get the tone rings on and should be done by Friday.
4speedfunk
Well-Known Member
- Messages
- 4,212
- Location
- Tardville
Okay...got it. You left the stock tubes in place. Chopped the pass side down...and chopped the driver side down, sleeved it, and extended it, and welded on the inner C's. This way you aren't disturbing the original fitment of the tubes into the casting. Nice.
Going to run custom length inner shafts?
Sent from my iPhone using Tapatalk
Going to run custom length inner shafts?
Sent from my iPhone using Tapatalk
06 H3
a.k.a. "The Jackal"
- Messages
- 9,352
- Location
- Meridian, ID
Yep! I've seen this method done many times on pirate. I will also be adding a mini truss on the long side for added rigidity.
I made the tube lengths to accept factory length Chevy D60 shafts. I prefer running factory length shafts if I break one.
The D70 Eaton e locker I picked up allows 35 spline or 40 spline. I'm running 35 for now so I can run factory D60 shafts. If the day ever comes to where I need 40 spline I can swap out the side gears and run 40 spline all the way through like the rock bouncers do...and still have a stronger centersection then the 60.
Once I get my hubs and generic D60 brake brackets I will be using the brake bracket solely for the perfect spindle bore and fit. I will do what I did to your 6 lug 44 when I went to 8 lug. Modify the bracket to accept H3 calipers
4speedfunk
Well-Known Member
- Messages
- 4,212
- Location
- Tardville
Sounds like a plan. I'm currently working on some D44 8-lug caliper brackets (based on your prototype).
GreatDaneHummer
Well-Known Member
- Messages
- 994
- Location
- Chicago
With putting support bars on the inside etc basically killing the original interior did you ever think about just removing the rest of the interior? Drop some more weight and just line x the entire floor or something? At this point it is an all out assault on off road fun so why bother?
High Five H2
Well-Known Member
- Messages
- 1,627
- Location
- West Texas
how am I just reading about this? I'll be keeping up for sure.
Chris if you do turn the back in to storage area only ( that idea is a great one !)), don't forget some type of screen to keep anything that come loose from hitting you in the back of the head . Even if everything is secured , things come loose during unexpected rapid deceleration and loss tire contact with Mother Earth . Looking good and keep up the great work .
06 H3
a.k.a. "The Jackal"
- Messages
- 9,352
- Location
- Meridian, ID
Thanks guys!! Updates are coming later today have gotten a ton done!
- Messages
- 10,447
- Location
- Scottsdale
Chris has already learned about the gravity-defying tricks of bottle jacks, especially as they hit side windows.
cbetts
NERD!!!
- Messages
- 3,182
- Location
- Rancho Palos Verdes, CA
It has been fun watching you grow, Chris. Seems like yesterday you were new to the group and had a base H3 with hardly any mods.
4speedfunk
Well-Known Member
- Messages
- 4,212
- Location
- Tardville
I completely agree. I remember years ago when he bloodied his face working underneath it...back when bolt-on stuff was a major job. Haha. Nowadays he routinely grabs a welder and builds all of his own axles and stuff.
Chris and Squeaky are a shining example of the persistence and experimentation that it takes to build a super rig. Its been an absolute pleasure watching a guy like this grow and learn. And its not without set-backs! He routinely flogs the piss out of his rig...knows he is going to break parts...accepts full responsibility for the breakage...and fixes it better than before! Its an emotional (and financial) roller coaster and many people cannot deal with it. But that is the essence of tinkering.
I am officially an old fart now (50 years) and I take notice to the work ethic of the generation behind me. They live in a high tech word that I sometimes can't relate to. Most of them are completely void of tangible problem solving. If it cannot be done with an app from the couch...then its not possible. Its nice to see someone his age put down the damn cell phone and pick up a tool to actually create something! Hats off!
Last edited:
06 H3
a.k.a. "The Jackal"
- Messages
- 9,352
- Location
- Meridian, ID
Thank you Craig and CJ for the kind words, you guys here have all helped me push myself to where I am at today and without you guys I am not sure where I would be.
A long needed update.
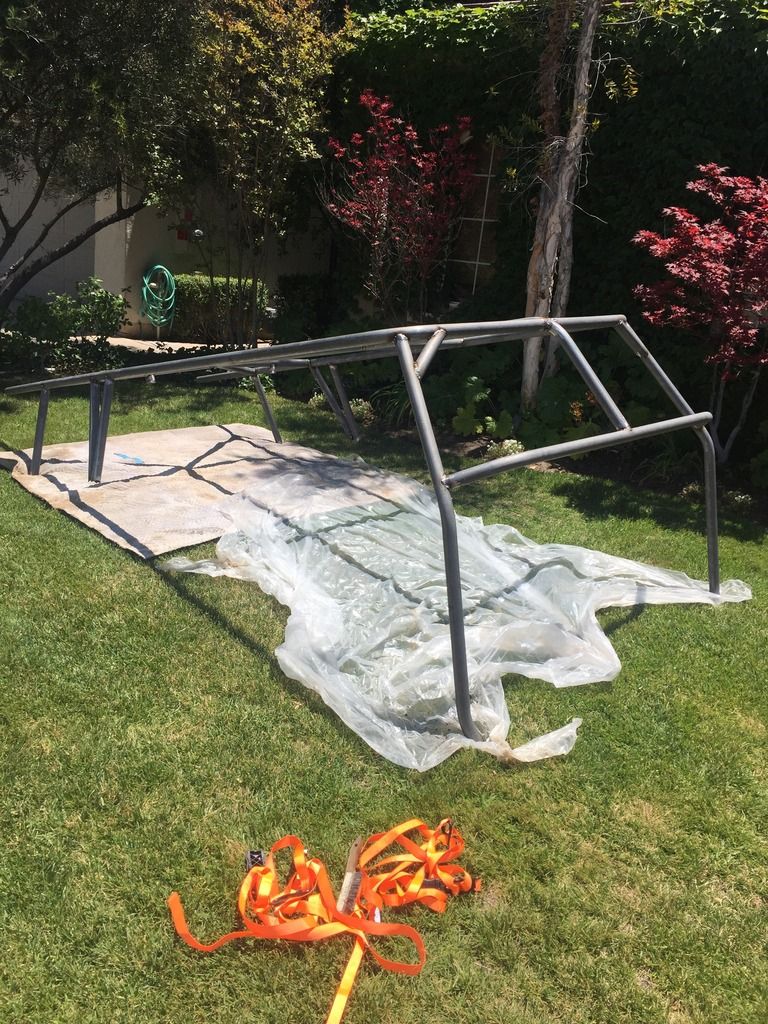
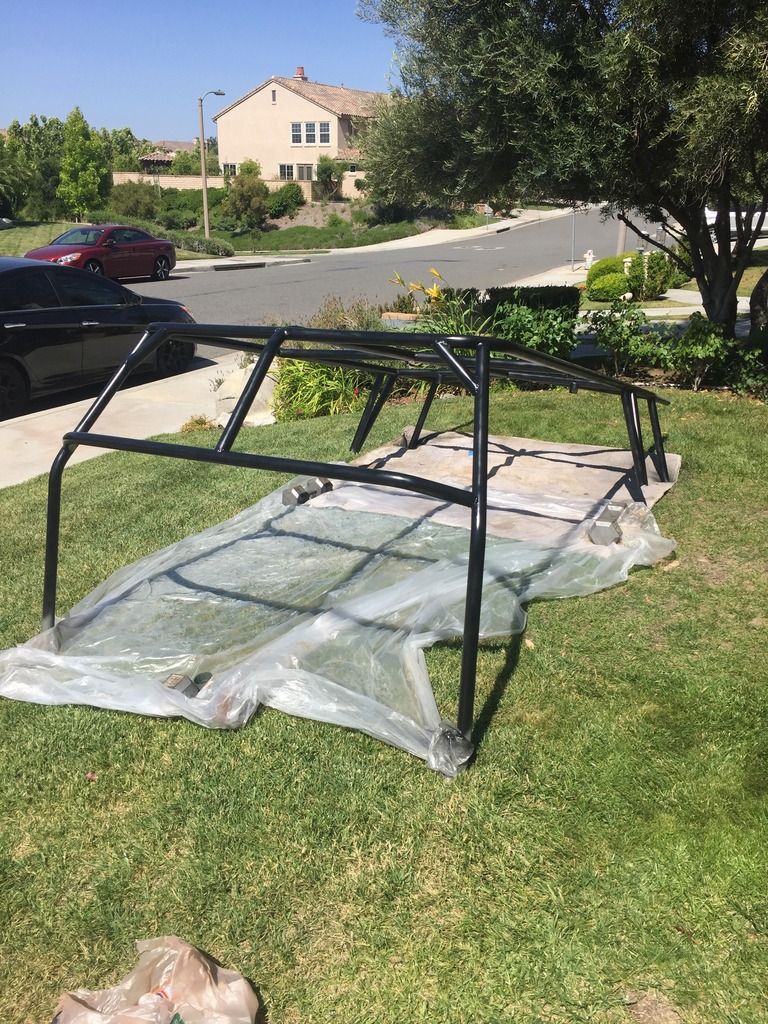
Cage: I pulled the cage to fully weld it and paint it. It's back on and needs to be welded and go to its final resting spot. I will need to do some fender trimming and cowl trimming to make everything fit.
Here's the cage off after welding...primer and paint
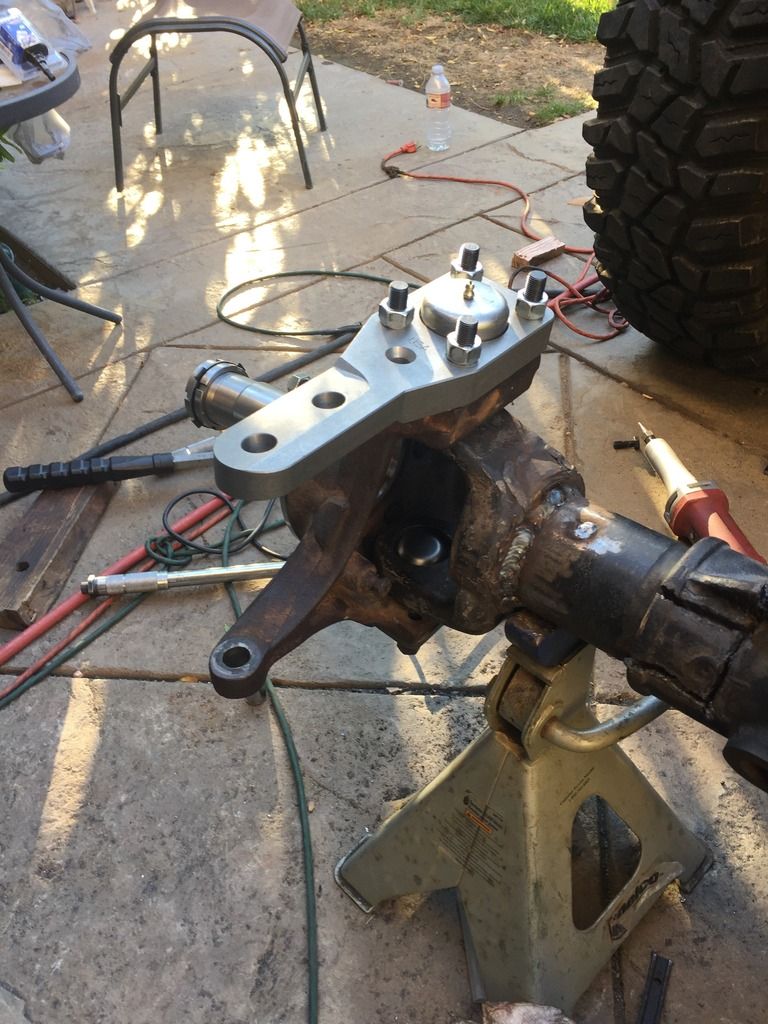
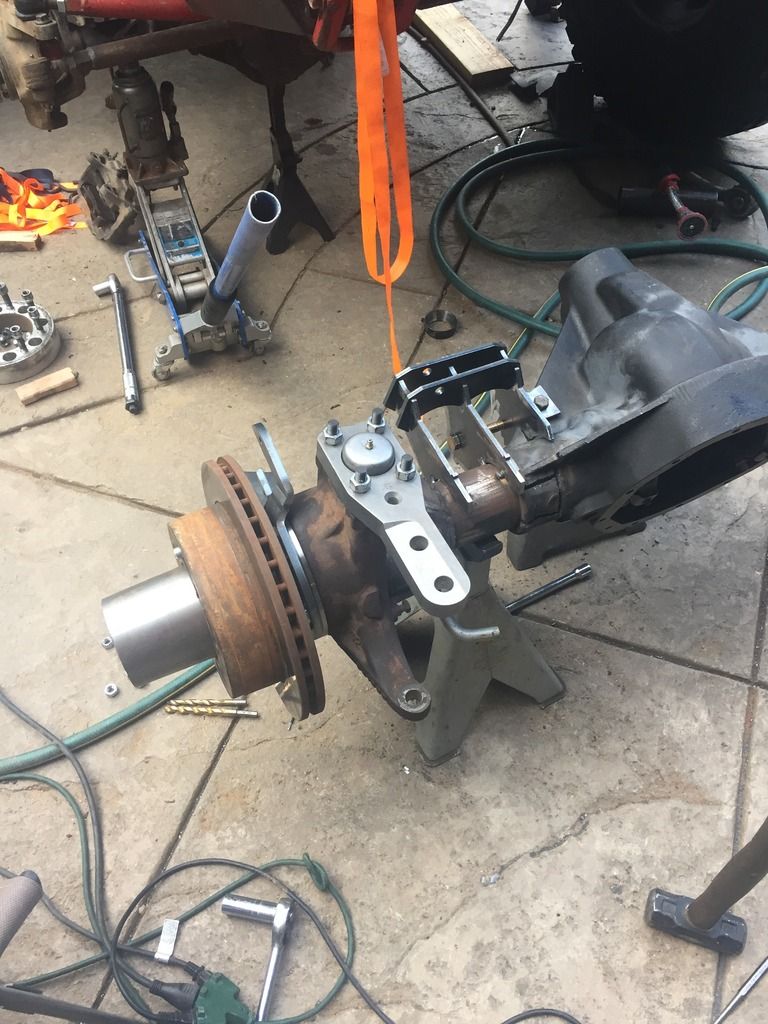
As for the axle I got the kingpins assembled, high steer arm, brackets mocked up, axle seals in, hub rings on, ABS brackets on, brake brackets started and gear install.
Hubs with tone rings on
Kingpins and high steer arm
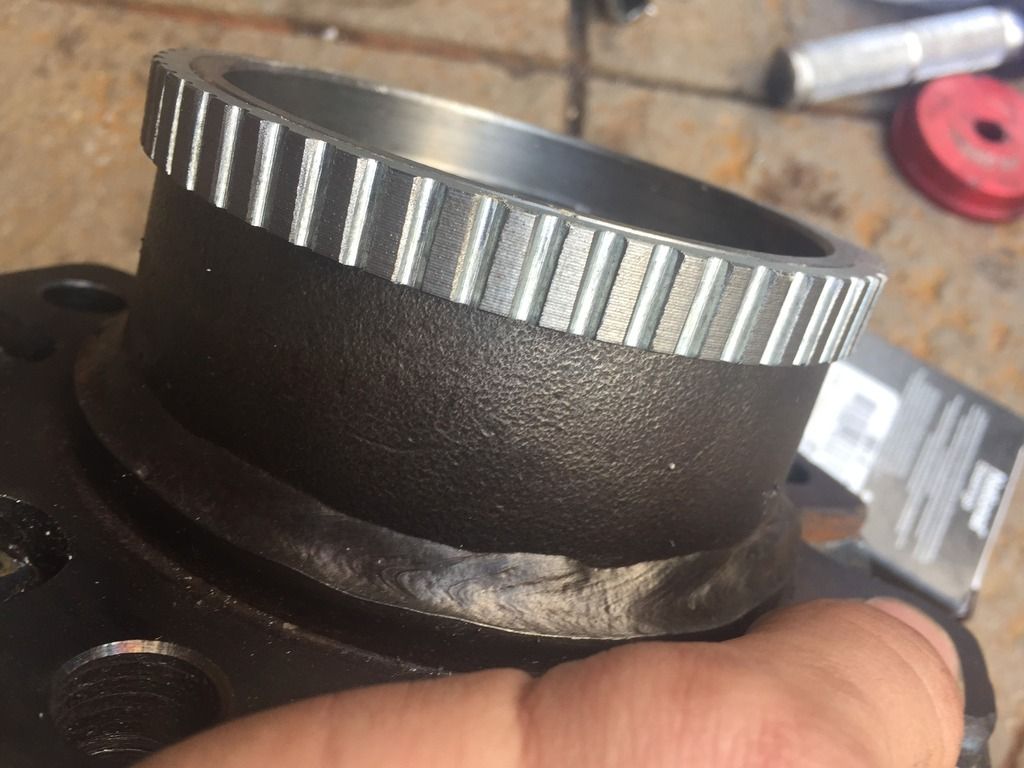
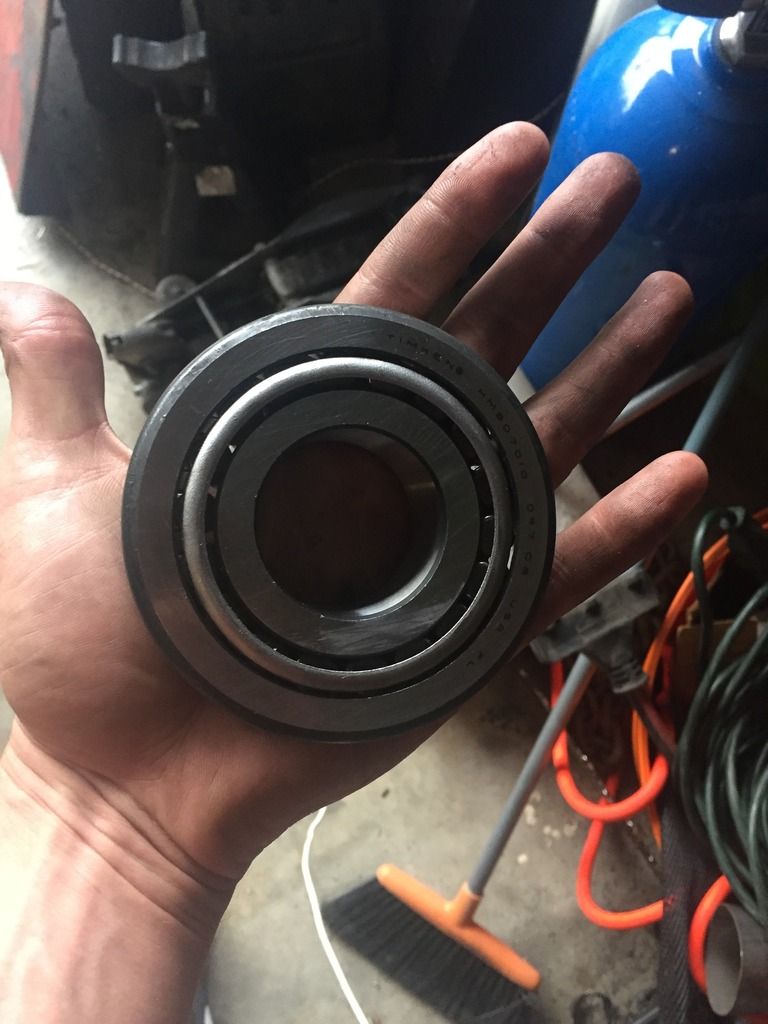
BIG CARRIER BEARINGS
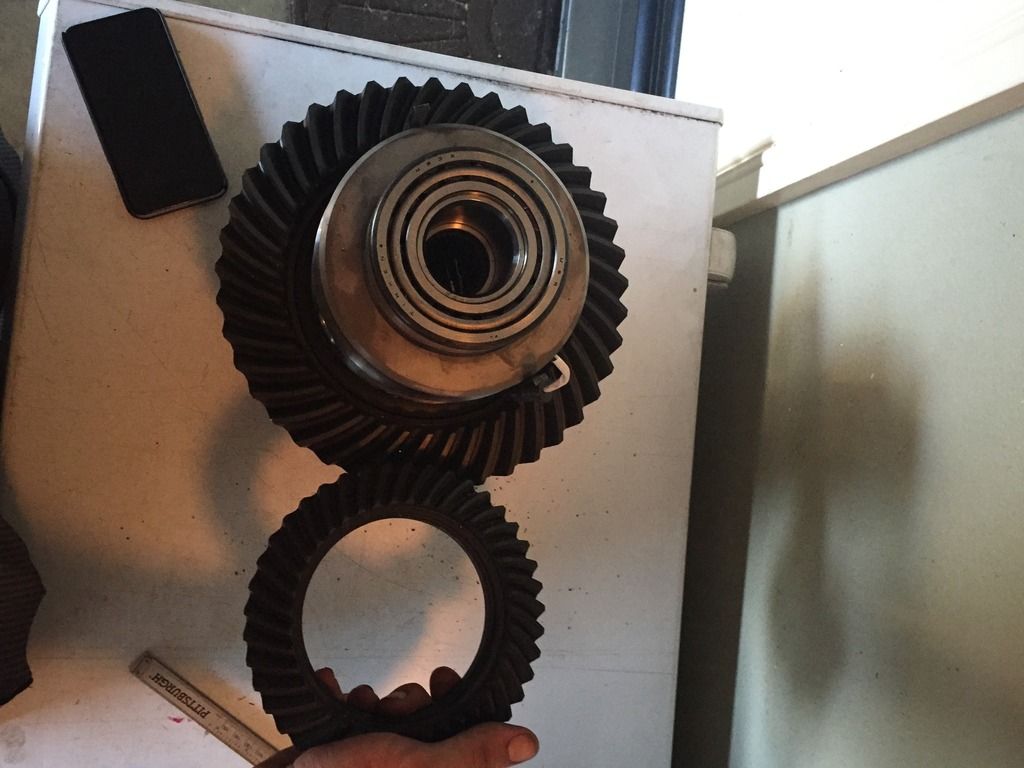
The Dana 30 R&P is similar to the stock H3 front r&p...here it is comparing the D70 to it
Eaton 4 pinion direct acting locker installed, had to drill 2 holes, one for Eaton e locker wire and one for a diff breather. I added gasket maker for additional sealing
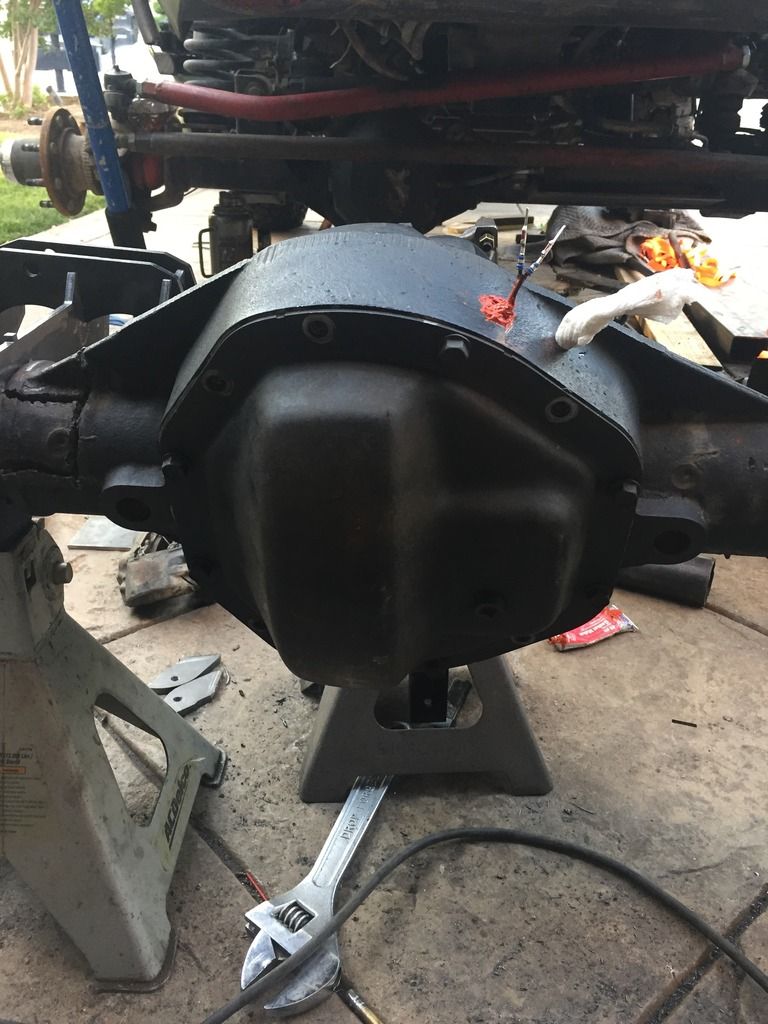
Axle seals are from ruffstuff BA 2.5in od axle seals.
driver side brackets
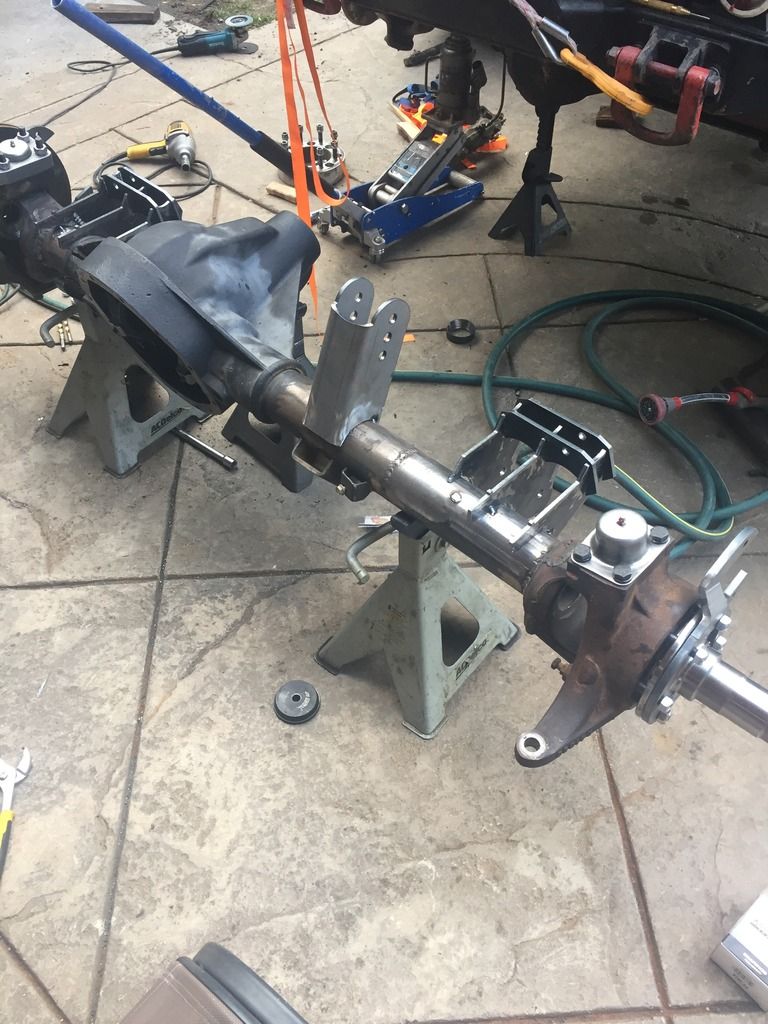
Pass side got tough! Anyone that does a SAS knows there's a lot to fit. The D44 has 8in of tube the D60/70 with stock length shafts has 4in....to fit a coil bucket, link mount, shock mount, and trackbar mount most people lengthen the one side and run a custom shaft...I don't want custom shafts, in case I ever break one I can get a spare easier.
Option 1 cut into cast (started doing that but will weld it back together) weakens housing
Option 2 lengthen tube, no for reasons stated above
Option 3 move link mount outboard, downside is you lose turning radius as the link will rub the tire rather quickly...
Option 4 make it all fit! I chose 4...
So to keep as much cast as possible and keep the link bracket inboard would require welding to cast steel...that's an advantage cast steel is weldable and easier then cast iron. I need to maintain maximum welding surface so I slit into the cast this will allow full welds around the bracket
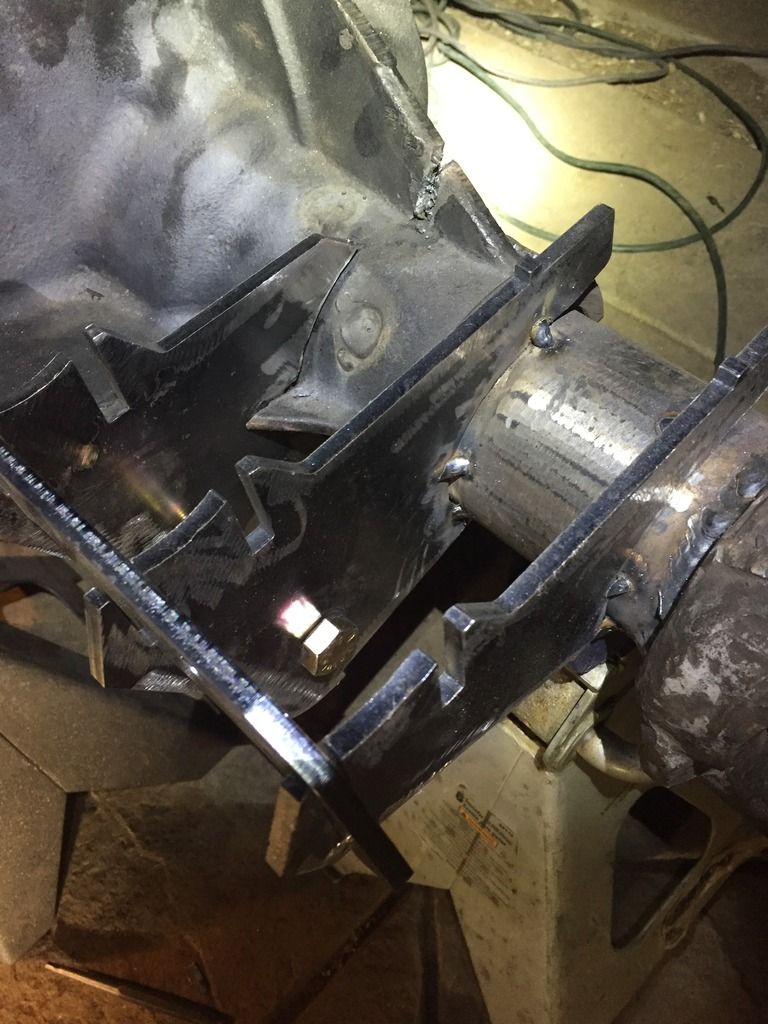
That will allow more welding surface...since I'm going overboard I also drilled into the cast fin made a bracket and bolt setup for a fail safe. I'm confident it's not going anywhere!!
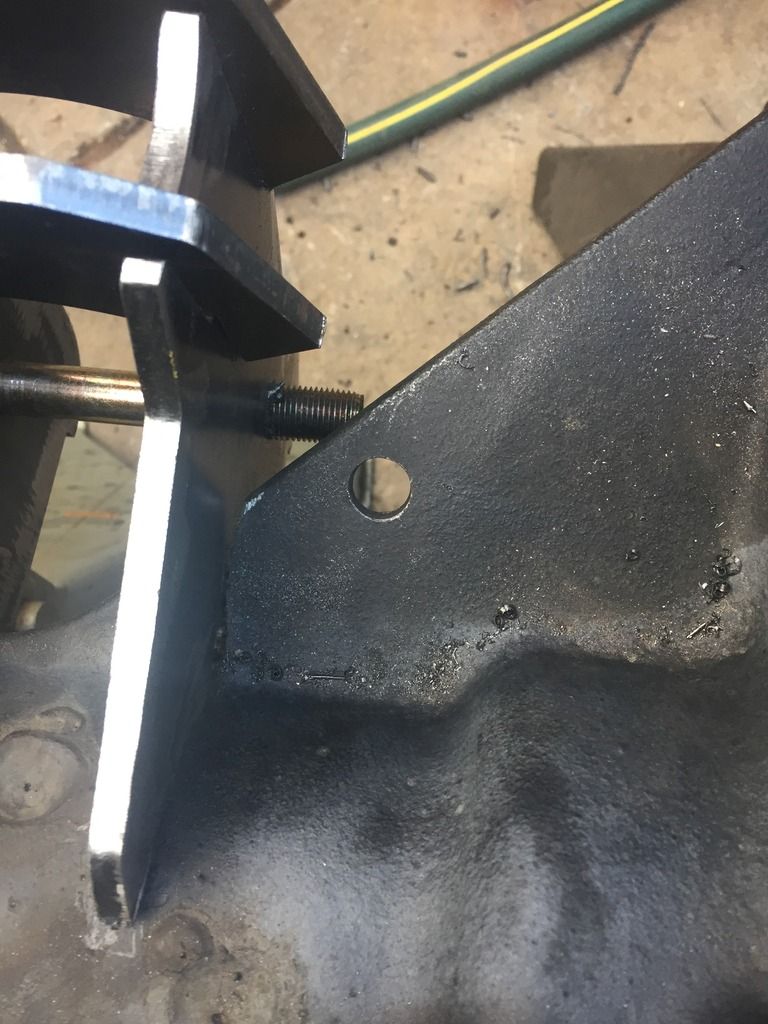
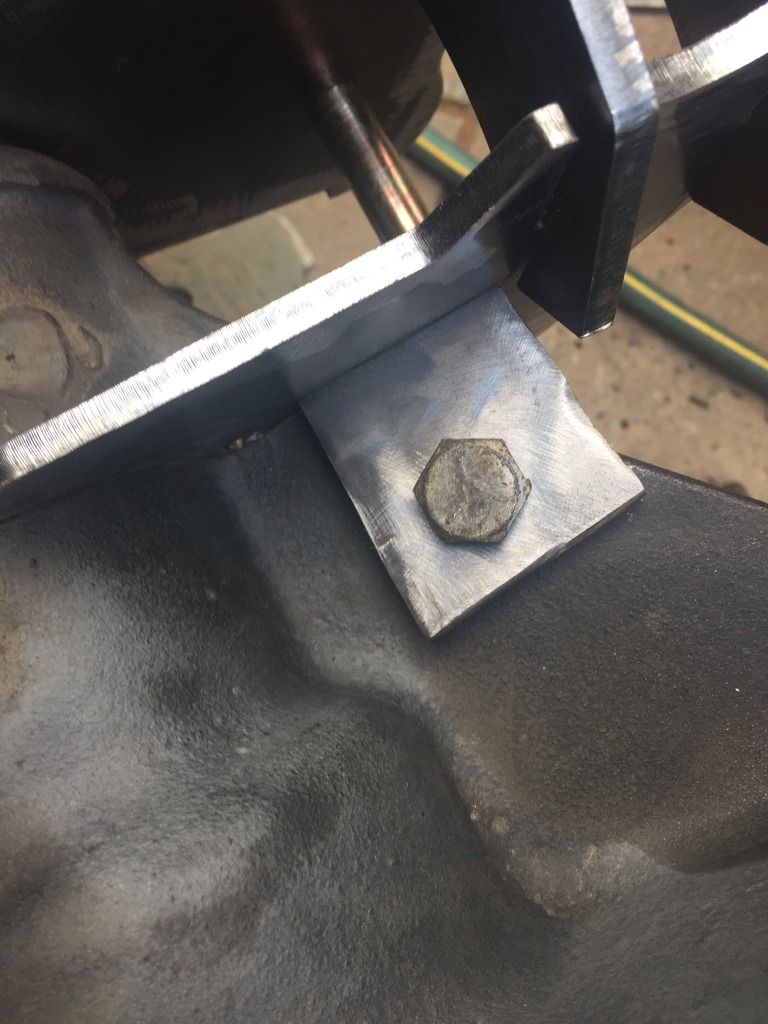
Then that bracket is tied into the other 2 that are on the tube...it should work great. Here I see no compromises and I fit it all! Only thing not pictured is track bar mount as that I will mock up under the truck...
A long needed update.
Cage: I pulled the cage to fully weld it and paint it. It's back on and needs to be welded and go to its final resting spot. I will need to do some fender trimming and cowl trimming to make everything fit.
Here's the cage off after welding...primer and paint


As for the axle I got the kingpins assembled, high steer arm, brackets mocked up, axle seals in, hub rings on, ABS brackets on, brake brackets started and gear install.
Hubs with tone rings on

Kingpins and high steer arm

BIG CARRIER BEARINGS

The Dana 30 R&P is similar to the stock H3 front r&p...here it is comparing the D70 to it

Eaton 4 pinion direct acting locker installed, had to drill 2 holes, one for Eaton e locker wire and one for a diff breather. I added gasket maker for additional sealing

Axle seals are from ruffstuff BA 2.5in od axle seals.
driver side brackets

Pass side got tough! Anyone that does a SAS knows there's a lot to fit. The D44 has 8in of tube the D60/70 with stock length shafts has 4in....to fit a coil bucket, link mount, shock mount, and trackbar mount most people lengthen the one side and run a custom shaft...I don't want custom shafts, in case I ever break one I can get a spare easier.
Option 1 cut into cast (started doing that but will weld it back together) weakens housing
Option 2 lengthen tube, no for reasons stated above
Option 3 move link mount outboard, downside is you lose turning radius as the link will rub the tire rather quickly...
Option 4 make it all fit! I chose 4...

So to keep as much cast as possible and keep the link bracket inboard would require welding to cast steel...that's an advantage cast steel is weldable and easier then cast iron. I need to maintain maximum welding surface so I slit into the cast this will allow full welds around the bracket

That will allow more welding surface...since I'm going overboard I also drilled into the cast fin made a bracket and bolt setup for a fail safe. I'm confident it's not going anywhere!!


Then that bracket is tied into the other 2 that are on the tube...it should work great. Here I see no compromises and I fit it all! Only thing not pictured is track bar mount as that I will mock up under the truck...
06 H3
a.k.a. "The Jackal"
- Messages
- 9,352
- Location
- Meridian, ID
The Eaton e locker is the new 4 pinion design. It also has a design that's new for the D60/D70 it's direct acting...ditching the ball and ramp of the old style like the factory ones. This one won't lock and unlock from forward to back...I've heard good feedback that this one is beef! It also has a 40 spline side gear option in case one day 35 spline isn't good enough...
So what's left?
H3 caliper brackets...I took ruffstuff standard D60 brackets and started modifying them to work with the H3 caliper...
Mock under truck test fit then pull and fully weld the housing...
Finishing welding cage in.
Wire up the locker
additional cooling mods due to potential location where it's stupidly hot...
Panzer07
Well-Known Member
- Messages
- 2,548
- Location
- Ontario, CA
As usual great work mate
Sent from my SM-G930T using Tapatalk
Sent from my SM-G930T using Tapatalk
06 H3
a.k.a. "The Jackal"
- Messages
- 9,352
- Location
- Meridian, ID
Thank you sir